There’s something magical about biting into a perfectly crafted fruit tart – the buttery, flaky pastry giving way to silky cream, followed by the burst of fresh, seasonal fruit. I’ve been making these puff pastry fruit tarts with ricotta cream filling for years, and they never fail to impress both family and guests. What started as an attempt to recreate a dessert I fell in love with at a Parisian patisserie has become one of my signature treats.
These elegant tarts combine the convenience of store-bought puff pastry with the sophistication of homemade ricotta cream filling, creating a dessert that looks like it came straight from a high-end bakery. The beauty lies not just in their stunning appearance, but in their versatility – you can adapt them to showcase whatever fruits are in season, making them a year-round favorite.
Understanding the Components
Puff Pastry : A laminated dough consisting of multiple layers of butter and dough that creates hundreds of flaky layers when baked. The steam from the butter creates the characteristic “puff” that gives this pastry its name and light, airy texture.
Ricotta Cream Filling : A smooth, lightly sweetened cream base made from ricotta cheese, often enhanced with vanilla, lemon zest, or other flavorings. This Italian-inspired filling provides a perfect balance of richness and lightness.
Fruit Topping : Fresh seasonal fruits arranged decoratively on top of the cream filling. Common choices include berries, stone fruits, citrus segments, and tropical fruits, each bringing unique flavors and visual appeal.
Glaze : A protective and glossy coating, typically made from apricot jam or honey, that preserves the fruit’s appearance and adds a subtle sweetness.
Essential Ingredients and Their Roles
The success of these tarts depends heavily on the quality and preparation of each component. I’ve learned through countless batches that understanding why each ingredient matters makes all the difference in the final result.
Pastry Components
| Ingredient | Quantity (6 tarts) | Purpose | Selection Tips |
|---|---|---|---|
| Frozen Puff Pastry | 2 sheets (17.3 oz package) | Creates flaky, buttery base | Choose all-butter varieties for best flavor |
| Egg | 1 large | Egg wash for golden color | Room temperature works best |
| Coarse Sugar | 2 tablespoons | Adds sparkle and crunch | Sanding sugar or turbinado preferred |
Ricotta Cream Filling
| Ingredient | Quantity | Purpose | Quality Indicators |
|---|---|---|---|
| Whole Milk Ricotta | 15 oz container | Creamy base | Should be smooth, not grainy |
| Powdered Sugar | 1/2 cup | Sweetness and smooth texture | Sift to prevent lumps |
| Heavy Cream | 1/4 cup | Richness and lightness | 35% fat content minimum |
| Vanilla Extract | 1 teaspoon | Flavor enhancement | Pure vanilla, not imitation |
| Lemon Zest | 1 lemon | Brightness and aroma | Organic lemons preferred |
| Mascarpone | 4 oz | Luxury and smoothness | Optional but recommended |
Fruit and Finishing
| Component | Quantity | Seasonal Options | Preparation Notes |
|---|---|---|---|
| Mixed Fresh Fruit | 2-3 cups | Spring: strawberries, kiwi | Pat completely dry |
| Summer: berries, peaches | Cut uniformly for best appearance | ||
| Fall: figs, grapes, pears | Some fruits need lemon juice to prevent browning | ||
| Winter: citrus, pomegranate | Consider color contrast | ||
| Apricot Jam | 1/4 cup | Year-round | Strain for smooth glaze |
| Water | 1 tablespoon | For thinning glaze | Use sparingly |
Step-by-Step Preparation Method
Preparing the Pastry Shells
I always start with the pastry since it needs time to chill and bake properly. The key to perfect puff pastry shells is maintaining the right temperature throughout the process.
First, I remove the puff pastry from the freezer and let it thaw at room temperature for about 30 minutes. You want it pliable but still cold – if it becomes too warm, the butter layers will melt and you’ll lose that essential flakiness.
Once thawed, I roll each sheet on a lightly floured surface to smooth out any creases. Using a sharp knife or pizza cutter, I cut each sheet into six equal rectangles, giving me twelve total pieces. For individual tarts, I prefer rectangles measuring approximately 4 by 3 inches, though you can adjust the size based on your preference.
The secret to getting those beautiful raised edges lies in the scoring technique. Using a sharp paring knife, I score a border about half an inch from the edge, cutting only halfway through the pastry. This creates a frame that will puff up higher than the center, forming a natural well for the filling.
Next comes the egg wash – I beat one egg with a tablespoon of water until smooth, then brush it over the entire surface of each pastry rectangle. The egg wash not only gives that gorgeous golden color but also helps the coarse sugar adhere. I sprinkle each tart with a light dusting of coarse sugar for added texture and visual appeal.
Creating the Perfect Ricotta Cream
The ricotta cream is where these tarts truly shine. I’ve experimented with countless variations, and this method consistently produces the smoothest, most flavorful result.
I start by straining the ricotta through a fine-mesh sieve to remove any graininess – this step is crucial for achieving that silky texture. In a medium bowl, I combine the strained ricotta with sifted powdered sugar, whisking until completely smooth.
The addition of mascarpone, while optional, elevates the cream significantly. I fold it in gently, followed by the heavy cream, vanilla extract, and fresh lemon zest. The lemon zest provides a bright note that balances the richness of the dairy.
For the smoothest possible texture, I often pass the entire mixture through the sieve one more time. Some bakers prefer to use a food processor for this step, pulsing just until smooth, but I find hand mixing preserves the delicate texture better.
Baking Techniques for Success
Temperature control is absolutely critical when baking puff pastry. I preheat my oven to 425°F (220°C) and position the rack in the center. The high initial temperature helps create that dramatic puff, while the consistent heat ensures even browning.
Before placing the tarts in the oven, I dock the centers with a fork – this prevents the middle from puffing up too much and creates a better surface for the filling. I make about 8-10 gentle holes in the center rectangle, being careful not to pierce through completely.
The baking process takes about 15-18 minutes, but I watch carefully after 12 minutes. The pastry should be golden brown and the edges noticeably puffed. If some areas are browning faster than others, I rotate the baking sheet halfway through.
Once baked, I immediately transfer the shells to a wire rack. While they’re still warm, I gently press down the centers with the back of a spoon if they’ve puffed up too much. This creates a better depression for the filling.
Fruit Selection and Arrangement Strategies
The fruit selection can make or break these tarts visually and flavor-wise. I’ve learned that the best results come from choosing fruits that are ripe but still firm, as they hold their shape better and won’t release excess moisture.
Seasonal Fruit Combinations
Spring Selection: Fresh strawberries paired with kiwi slices create a beautiful color contrast. I hull the strawberries and slice them lengthwise, while the kiwi gets peeled and cut into rounds. The combination of red and green is particularly striking.
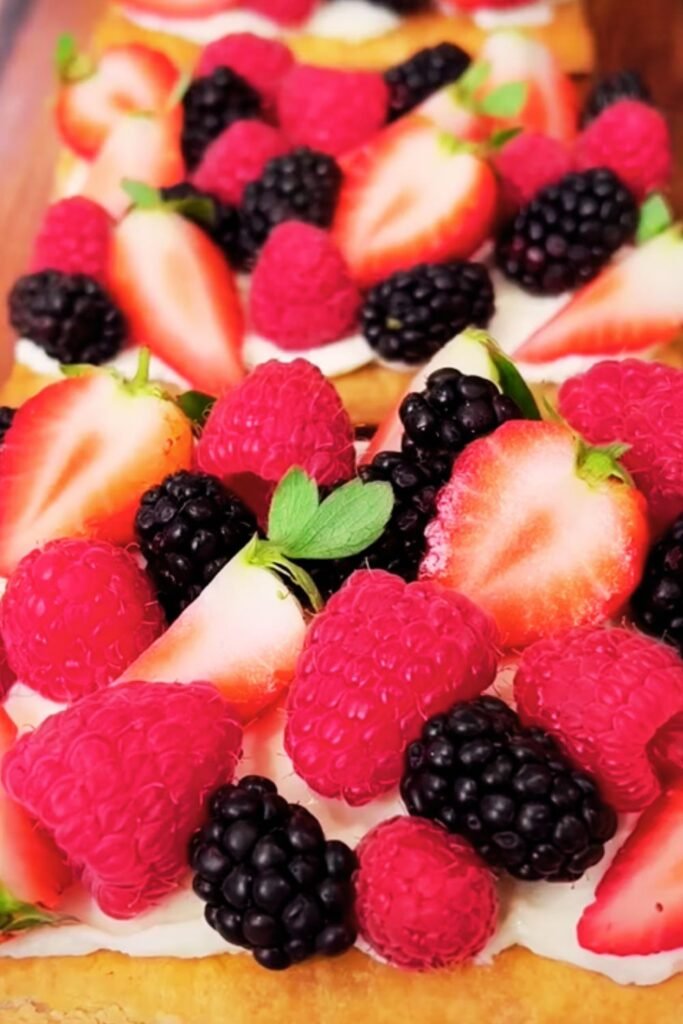
Summer Bounty: This is peak season for these tarts. I love combining mixed berries – blueberries, raspberries, and blackberries – with sliced peaches or nectarines. The variety of colors and textures creates visual interest, while the flavors complement each other beautifully.
Autumn Harvest: Figs cut into quarters, red grapes halved, and thin pear slices make for an elegant fall presentation. I often add a few pomegranate seeds for color and crunch.
Winter Options: Citrus segments work wonderfully in winter. I combine orange and grapefruit segments with a few cranberries and perhaps some sliced persimmons when available.
Arrangement Techniques
| Pattern Type | Description | Best Fruits | Visual Impact |
|---|---|---|---|
| Concentric Circles | Fruits arranged in overlapping circles | Berries, grapes | Classic, elegant |
| Linear Rows | Fruits placed in parallel lines | Sliced fruits, berries | Modern, geometric |
| Random Scatter | Natural, organic placement | Mixed small fruits | Casual, rustic |
| Focal Point | One central fruit surrounded by others | Large strawberry, fig quarters | Dramatic, artistic |
The key to professional-looking arrangement is working with completely dry fruit. I always pat everything dry with paper towels and let cut fruits sit on towels for a few minutes before arranging.
Assembly and Finishing Touches
Once my pastry shells have cooled completely and my ricotta cream is ready, I can begin the final assembly. Timing is important here – I prefer to assemble these tarts no more than 2-3 hours before serving to maintain the pastry’s crispness.
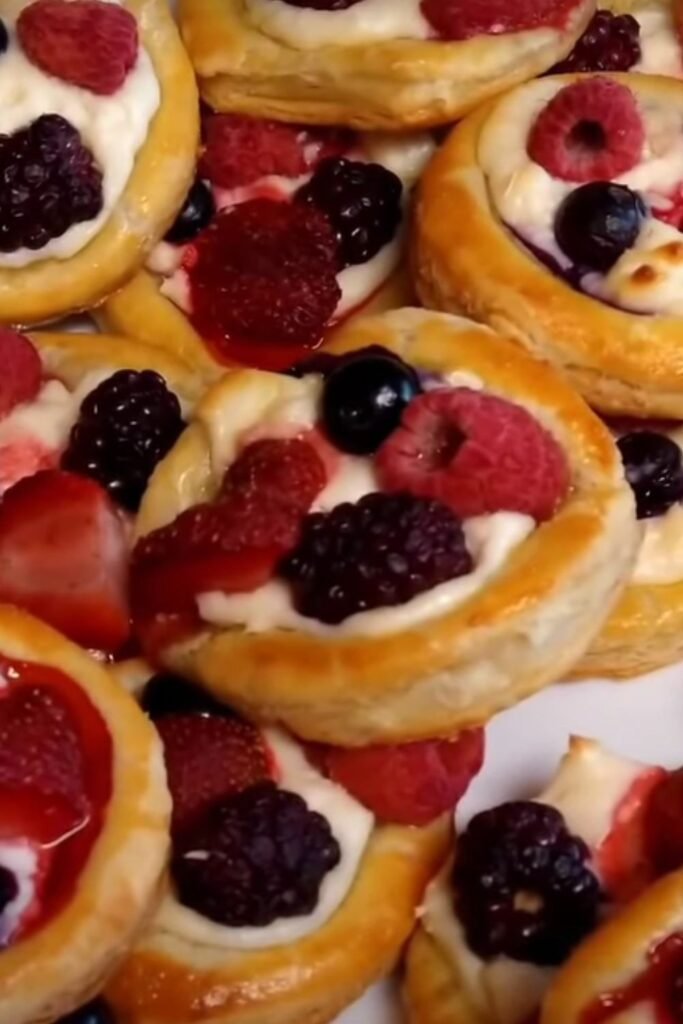
I start by filling each pastry shell with about 2-3 tablespoons of ricotta cream, spreading it evenly with the back of a spoon. The cream should come nearly to the top of the raised edges but not overflow.
Next comes the fruit arrangement. I work systematically, starting with the largest pieces and filling in with smaller fruits. The goal is to create height and visual interest while ensuring every bite includes fruit.
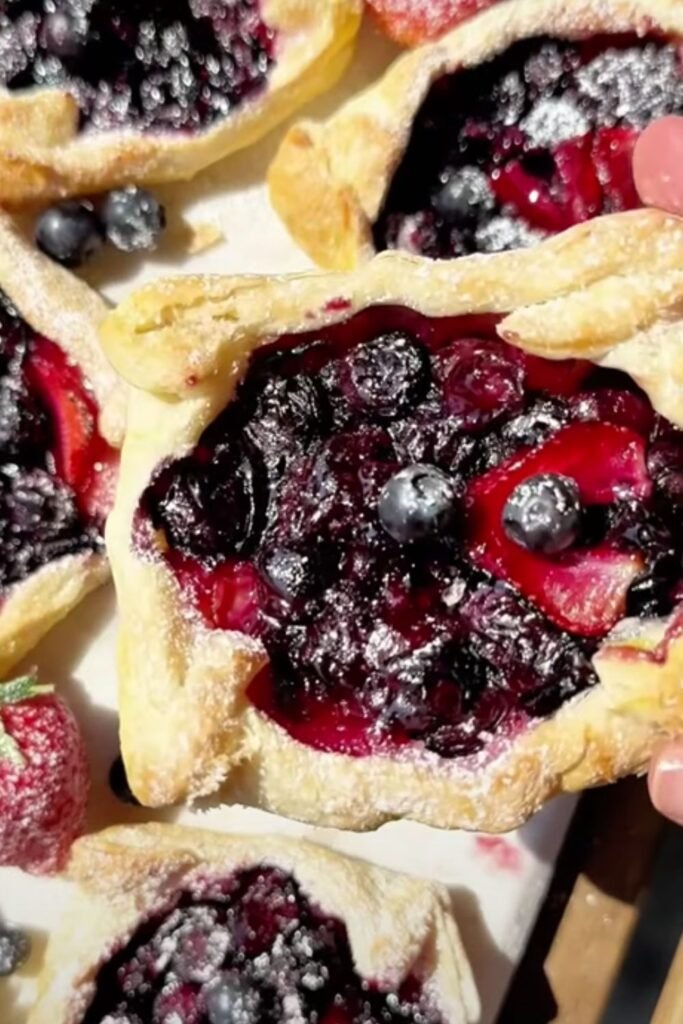
The final glaze is what gives these tarts their professional bakery appearance. I warm apricot jam in the microwave for 30 seconds, then strain it to remove any chunks. If it’s too thick, I thin it with a teaspoon of water. Using a pastry brush, I gently apply the glaze over all the fruit, being careful not to disturb the arrangement.
Nutritional Information and Dietary Considerations
Understanding the nutritional profile of these tarts helps in serving appropriate portions and making necessary modifications for different dietary needs.
Nutritional Breakdown (Per Tart)
| Nutrient | Amount | % Daily Value | Notes |
|---|---|---|---|
| Calories | 285 | 14% | Primarily from pastry and cream |
| Total Fat | 18g | 23% | Mostly from butter in pastry |
| Saturated Fat | 11g | 55% | Consider portion size |
| Cholesterol | 45mg | 15% | From dairy and eggs |
| Sodium | 190mg | 8% | Mainly from pastry |
| Carbohydrates | 28g | 9% | Pastry and fruit sugars |
| Fiber | 2g | 8% | From fruits |
| Protein | 8g | 16% | Ricotta contributes significantly |
| Vitamin C | 25mg | 28% | Varies by fruit selection |
| Calcium | 180mg | 18% | From ricotta and mascarpone |
Dietary Modifications
Gluten-Free Option: Replace puff pastry with gluten-free puff pastry or create individual almond flour crusts. The ricotta filling remains unchanged.
Reduced Sugar: Cut powdered sugar in ricotta cream by half and choose naturally sweet fruits like ripe berries and stone fruits.
Dairy-Free Adaptation: Substitute ricotta with cashew cream or coconut cream, though texture will differ significantly.
Lower Fat Version: Use part-skim ricotta and reduce or eliminate mascarpone, though richness will be compromised.
Storage and Serving Guidelines
Proper storage ensures these tarts maintain their quality and safety. I’ve learned through experience that the storage method can make the difference between a crisp, fresh tart and a soggy disappointment.
Short-Term Storage (Same Day)
These tarts are best served within 4 hours of assembly. I keep them at room temperature, covered loosely with plastic wrap to prevent the fruit from drying out while maintaining pastry crispness.
Refrigerated Storage (Up to 2 Days)
If you must store them longer, refrigerate assembled tarts in a single layer, covered with plastic wrap. Before serving, let them come to room temperature for 20-30 minutes to restore the pastry’s texture.
Component Storage Strategy
For maximum freshness, I often prepare components separately:
- Baked pastry shells: Room temperature in airtight container for 2 days
- Ricotta cream: Refrigerated for up to 3 days
- Prepared fruit: Refrigerated for 1 day maximum
Serving Suggestions
| Occasion | Presentation | Accompaniments | Serving Size |
|---|---|---|---|
| Casual Family Dinner | Individual plates | Fresh mint sprigs | 1 tart per person |
| Dinner Party | Elegant platter | Dusted powdered sugar | 1 tart per person |
| Afternoon Tea | Tiered stand | Hot tea, coffee | 1/2 tart per person |
| Buffet Style | Large serving tray | Small plates, forks | 1 tart per person |
| Holiday Gathering | Decorative board | Seasonal garnishes | 1 tart per person |
Troubleshooting Common Issues
Even experienced bakers encounter challenges with puff pastry tarts. I’ve faced most of these problems myself and developed reliable solutions.
Soggy Bottom Syndrome: This happens when moisture from the filling seeps into the pastry. Prevention includes thoroughly cooling pastry shells before filling and ensuring fruits are completely dry.
Uneven Puffing: Usually caused by inconsistent pastry thickness or oven hot spots. Roll pastry evenly and rotate the baking sheet halfway through baking.
Grainy Ricotta Cream: Always strain ricotta and sift powdered sugar. If graininess persists, briefly process the mixture in a food processor.
Fruit Browning: Some fruits like apples and pears brown quickly. Toss with lemon juice immediately after cutting, or choose naturally stable fruits.
Glaze Issues: Glaze that’s too thick won’t spread evenly; too thin and it won’t provide adequate coverage. The consistency should be like warm honey.
Advanced Variations and Seasonal Adaptations
Once you’ve mastered the basic technique, these tarts become a canvas for creativity. I enjoy experimenting with different flavor combinations and seasonal themes.
Flavor Variations for Ricotta Cream
Citrus Burst: Add orange or lime zest along with lemon, plus a tablespoon of fresh citrus juice.
Vanilla Bean: Replace extract with seeds from half a vanilla bean for intense flavor and visual appeal.
Almond Essence: Add 1/2 teaspoon almond extract and chopped toasted almonds for crunch.
Honey Lavender: Replace some powdered sugar with honey and add a pinch of culinary lavender.
Chocolate Swirl: Fold in 2 tablespoons of cocoa powder and create a marbled effect.
Seasonal Theme Inspirations
Valentine’s Day: Heart-shaped pastries with strawberries and raspberries, finished with rose petal garnish.
Easter: Pastel-colored fruits like yellow mango, purple grapes, and pink strawberries.
Fourth of July: Red strawberries, white cream, and blue berries for patriotic appeal.
Thanksgiving: Warm spiced pears, cranberries, and a cinnamon-infused cream.
Christmas: Pomegranate seeds, green kiwi, and candied cranberries for festive colors.
Questions and Answers
Q. Can I make the pastry shells ahead of time? Absolutely! I often bake the shells a day ahead and store them in an airtight container at room temperature. They actually hold up quite well and save time on the day of serving.
Q. What’s the best way to prevent the pastry from getting soggy? The key is moisture control. Make sure your pastry shells are completely cool before adding filling, pat all fruits dry, and don’t assemble too far in advance. I also sometimes brush the inside of cooled shells with a thin layer of melted white chocolate as a moisture barrier.
Q. Can I use frozen fruit for these tarts? While fresh fruit is ideal, you can use frozen fruit that’s been thawed and thoroughly drained. However, the texture won’t be as firm, and you’ll need to be extra careful about moisture. I’d recommend this only for berries and avoid it for soft fruits like peaches.
Q. How do I know when the puff pastry is properly baked? The pastry should be golden brown all over, with noticeably puffed edges. The center should sound hollow when tapped lightly, and there shouldn’t be any raw, doughy appearance. If in doubt, bake an extra 2-3 minutes rather than underbaking.
Q. What can I substitute for ricotta if I can’t find good quality ricotta? Cottage cheese that’s been strained and processed until smooth works, though the flavor will be different. Cream cheese mixed with a little sour cream is another option, but you’ll need to adjust the sweetness since cream cheese is tangier.
Q. Why does my glaze look cloudy instead of clear? This usually happens when the jam hasn’t been strained properly or if it’s been overheated. Make sure to strain out all the fruit pieces and warm the jam gently. If it’s still cloudy, try using a different brand of jam or make a simple sugar syrup instead.
Q. Can I make mini versions of these tarts? Definitely! Cut the pastry into smaller squares and reduce the baking time by 3-5 minutes. Mini tarts are perfect for parties and portion control. You’ll get about 12-15 mini tarts from one recipe.
Q. How do I transport these tarts without damaging them? Transport them in a single layer in a covered container. If you’re going far, consider transporting components separately and assembling at your destination. The pastry shells travel well, and the cream can be piped on just before serving.
Q. What’s the best fruit combination for beginners? I recommend starting with strawberries and blueberries – they’re colorful, hold their shape well, don’t brown, and are widely available. This combination is forgiving and always looks beautiful.
Q. Can I make these tarts completely dairy-free? While the traditional ricotta cream can’t be replicated exactly, you can make a delicious dairy-free version using coconut cream that’s been chilled and whipped, sweetened with powdered sugar and flavored with vanilla. The texture will be different but still delicious.
These puff pastry fruit tarts with ricotta cream filling have become one of my most requested desserts, and I understand why. They strike the perfect balance between elegance and approachability, offering endless possibilities for customization while maintaining consistent, impressive results. Whether you’re planning a special celebration or simply want to elevate an ordinary meal, these tarts deliver both visual impact and delicious flavor that will leave everyone asking for the recipe.