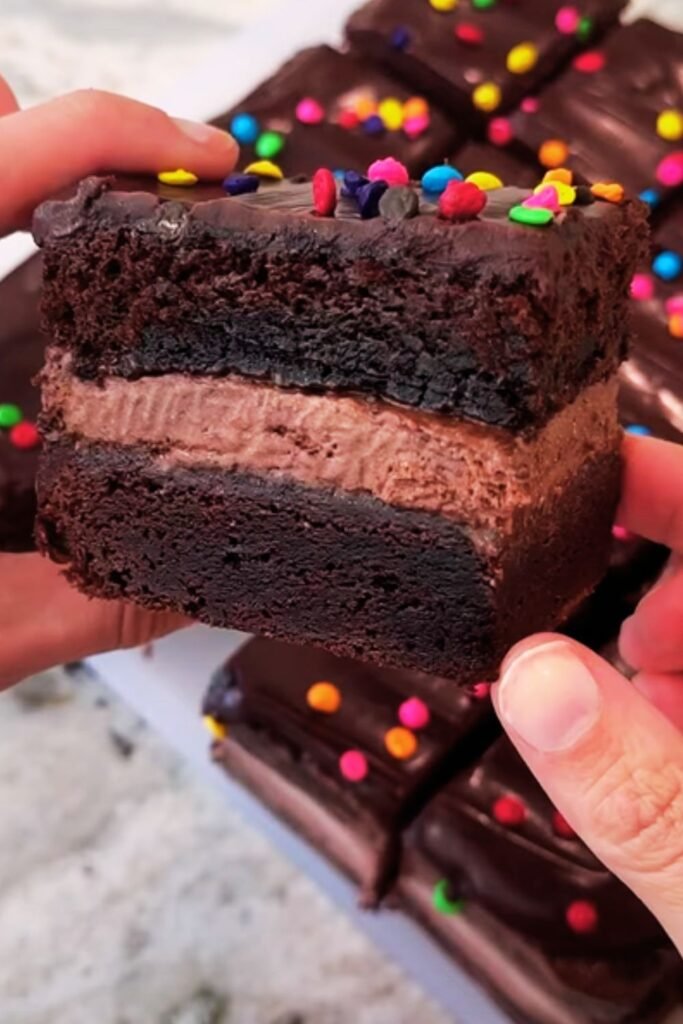
There’s something magical about biting into a perfectly crafted ice cream sandwich. The contrast between the soft, creamy filling and the tender cookie exterior creates a symphony of textures that never fails to bring a smile to my face. After years of experimenting in my kitchen, I’ve discovered that homemade ice cream sandwiches aren’t just superior to store-bought versions—they’re surprisingly simple to make and endlessly customizable.
I remember the first time I attempted to make my own ice cream sandwiches. It was a sweltering summer afternoon, and I was craving something more exciting than the basic vanilla rectangles from the freezer section. What started as a simple experiment with chocolate chip cookies and strawberry ice cream has evolved into a passion for creating unique flavor combinations that surprise and delight everyone who tries them.
Today, I’m sharing seven of my most beloved ice cream sandwich recipes that have become staples in my dessert repertoire. These aren’t your ordinary combinations—each recipe tells a story and brings its own personality to the table. From nostalgic childhood flavors to sophisticated adult indulgences, there’s something here for every palate and occasion.
Understanding Ice Cream Sandwich Fundamentals
Before diving into the recipes, let me share some essential knowledge I’ve gathered through countless batches of trial and error. The perfect ice cream sandwich requires balance in several key areas:
Temperature Management : The ice cream should be soft enough to spread easily but firm enough to hold its shape. I typically remove it from the freezer 10-15 minutes before assembly.
Cookie Texture : Cookies need to be tender enough to bite through without the filling squirting out, yet sturdy enough to maintain structural integrity.
Size Proportion : The cookie-to-ice cream ratio significantly impacts the eating experience. I aim for cookies that are roughly 3-4 inches in diameter with about ½ inch of ice cream filling.
Flavor Harmony : The cookie and ice cream flavors should complement rather than compete with each other.
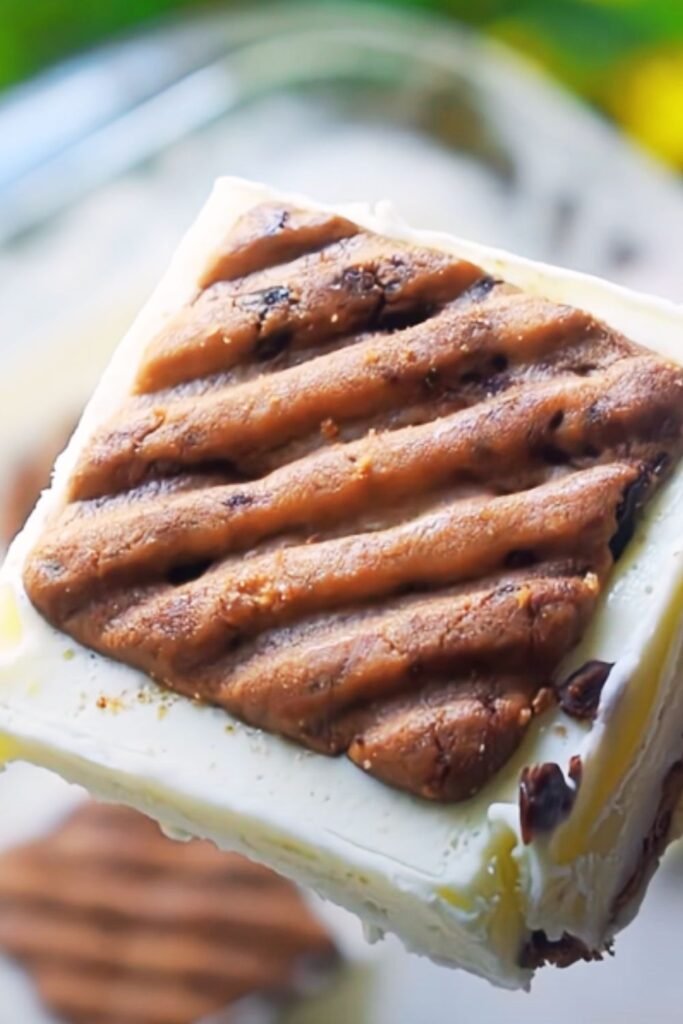
Recipe 1: Classic Chocolate Chip Cookie with Vanilla Bean Ice Cream
This combination holds a special place in my heart because it reminds me of summer evenings on my grandmother’s porch. The key to making this classic shine lies in the quality of your vanilla ice cream and the texture of your cookies.
Ingredients
For the Cookies:
- 2¼ cups all-purpose flour
- 1 teaspoon baking soda
- 1 teaspoon salt
- 1 cup butter, softened
- ¾ cup granulated sugar
- ¾ cup packed brown sugar
- 2 large eggs
- 2 teaspoons vanilla extract
- 2 cups semi-sweet chocolate chips
For Assembly:
- 1 quart high-quality vanilla bean ice cream
Instructions
- Prepare the dough: I begin by creaming the butter with both sugars until the mixture becomes light and fluffy, which usually takes about 3-4 minutes with an electric mixer.
- Add wet ingredients: Beat in eggs one at a time, followed by vanilla extract, ensuring each addition is fully incorporated.
- Combine dry ingredients: In a separate bowl, whisk together flour, baking soda, and salt. Gradually blend this into the butter mixture.
- Fold in chocolate chips: Gently stir in the chocolate chips until evenly distributed.
- Shape and bake: Drop rounded tablespoons of dough onto ungreased baking sheets, spacing them about 2 inches apart. Bake at 375°F for 9-11 minutes until golden brown.
- Cool completely: This step is crucial—warm cookies will melt the ice cream instantly.
- Assemble: Place a generous scoop of softened vanilla ice cream between two cookies, gently pressing to create an even layer.
Pro Tips for Success
The secret to perfect chocolate chip cookies for sandwiches lies in slightly underbaking them. I remove mine from the oven when the edges are set but the centers still look slightly soft. This ensures they remain tender even when frozen.
Recipe 2: Double Chocolate Brownie with Mint Chocolate Chip
This recipe was born from a happy accident when I had leftover brownie batter and a craving for something refreshing. The rich, fudgy brownie paired with cool mint creates an experience that’s both indulgent and refreshing.
Ingredients
For the Brownie Cookies:
- ½ cup unsalted butter
- 4 oz dark chocolate, chopped
- ¾ cup granulated sugar
- 2 large eggs
- 1 teaspoon vanilla extract
- ⅓ cup all-purpose flour
- ¼ cup cocoa powder
- ¼ teaspoon salt
- ½ cup mini chocolate chips
For Assembly:
- 1 quart mint chocolate chip ice cream
Instructions
- Melt chocolate and butter: I use a double boiler method, stirring constantly until smooth and glossy.
- Mix in sugar: Remove from heat and whisk in sugar until well combined.
- Add eggs and vanilla: Beat in eggs one at a time, then vanilla extract.
- Combine dry ingredients: Sift together flour, cocoa powder, and salt, then fold into the chocolate mixture.
- Add mini chips: Stir in mini chocolate chips for extra texture.
- Bake: Drop spoonfuls onto parchment-lined baking sheets and bake at 350°F for 10-12 minutes.
- Assembly: Once completely cool, sandwich mint chocolate chip ice cream between pairs of brownie cookies.
| Component | Texture Goal | Key Technique |
|---|---|---|
| Brownie Cookie | Fudgy but stable | Slight underbaking |
| Ice cream layer | Smooth, even spread | 15-minute tempering |
| Final product | Balanced bite-through | Proper proportions |
Recipe 3: Snickerdoodle with Cinnamon Ice Cream
The warm spices in both the cookie and ice cream create a harmonious flavor profile that reminds me of autumn afternoons. This combination requires a bit more patience, as I make my own cinnamon ice cream, but the results are absolutely worth the effort.
Ingredients
For Snickerdoodle Cookies:
- 2¾ cups all-purpose flour
- 2 teaspoons cream of tartar
- 1 teaspoon baking soda
- ½ teaspoon salt
- 1 cup butter, softened
- 1½ cups granulated sugar
- 2 large eggs
- 1 teaspoon vanilla extract
For Cinnamon Sugar Coating:
- ¼ cup granulated sugar
- 2 teaspoons ground cinnamon
For Cinnamon Ice Cream:
- 2 cups heavy cream
- 1 cup whole milk
- ¾ cup sugar
- 6 large egg yolks
- 2 teaspoons ground cinnamon
- 1 teaspoon vanilla extract
Instructions
For the Ice Cream:
- Heat the base: I warm the cream, milk, and half the sugar in a saucepan until it just begins to simmer.
- Prepare custard: Whisk egg yolks with remaining sugar and cinnamon until pale and thick.
- Temper the eggs: Gradually add the hot cream mixture to the yolks, whisking constantly.
- Cook the custard: Return to the saucepan and cook, stirring constantly, until it coats the back of a spoon (170°F).
- Chill and churn: Strain, add vanilla, chill completely, then churn in an ice cream maker according to manufacturer’s instructions.
For the Cookies:
- Make dough: Cream butter and sugar, add eggs and vanilla, then mix in dry ingredients.
- Shape and coat: Roll dough into balls, then roll in cinnamon-sugar mixture.
- Bake: Flatten slightly and bake at 375°F for 8-10 minutes until edges are set.

Recipe 4: Peanut Butter Cookie with Chocolate Peanut Butter Ice Cream
This recipe satisfies every peanut butter lover’s dream. The combination of nutty, salty cookies with rich, creamy ice cream creates layers of flavor that build with each bite. I’ve found that using natural peanut butter in both components adds depth that commercial versions simply can’t match.
Ingredients
For Peanut Butter Cookies:
- 2 cups all-purpose flour
- 1 teaspoon baking soda
- ½ teaspoon salt
- 1 cup natural peanut butter
- ½ cup butter, softened
- ¾ cup brown sugar
- ½ cup granulated sugar
- 2 large eggs
- 1 teaspoon vanilla extract
For Chocolate Peanut Butter Ice Cream:
- 2 cups heavy cream
- 1 cup whole milk
- ¾ cup sugar
- 6 large egg yolks
- ½ cup natural peanut butter
- 3 oz dark chocolate, melted
- 1 teaspoon vanilla extract
Instructions
The beauty of this recipe lies in the texture contrast. I bake the cookies until they’re just set—they’ll continue cooking slightly on the hot pan, resulting in a tender interior that won’t crack when you bite into the frozen sandwich.
For the ice cream, I incorporate the peanut butter while the custard base is still slightly warm, which helps it blend smoothly. The melted chocolate gets swirled in during the final minutes of churning, creating beautiful ribbons throughout.
Recipe 5: Oatmeal Raisin with Rum Raisin Ice Cream
This sophisticated combination transports me to cozy evenings by the fireplace. The chewy texture of oatmeal cookies paired with the complex flavors of rum raisin ice cream creates an adult-oriented treat that’s perfect for dinner parties or quiet moments of indulgence.
Ingredients
For Oatmeal Raisin Cookies:
- 1½ cups old-fashioned oats
- 1 cup all-purpose flour
- ½ teaspoon baking soda
- ½ teaspoon salt
- 1 teaspoon cinnamon
- ½ cup butter, softened
- ¾ cup brown sugar
- 1 large egg
- 1 teaspoon vanilla extract
- ¾ cup raisins
For Rum Raisin Ice Cream:
- ½ cup raisins
- ¼ cup dark rum
- 2 cups heavy cream
- 1 cup whole milk
- ¾ cup sugar
- 6 large egg yolks
- 1 teaspoon vanilla extract
Instructions
I start by soaking the raisins in rum for at least 2 hours, though overnight is even better. This allows them to plump up and absorb the rum’s flavor completely.
The oatmeal cookies require careful attention to prevent over-baking. I look for edges that are just beginning to brown while the centers remain soft. These cookies will firm up as they cool but maintain their characteristic chewiness.
| Recipe Component | Prep Time | Cook/Freeze Time | Difficulty Level |
|---|---|---|---|
| Oatmeal Cookies | 15 minutes | 12 minutes | Easy |
| Rum Raisin Base | 20 minutes | 30 minutes | Moderate |
| Ice Cream Churning | 5 minutes | 25 minutes | Easy |
| Assembly | 10 minutes | 2 hours freeze | Easy |
Recipe 6: Sugar Cookie with Strawberry Cheesecake Ice Cream
This recipe represents the perfect marriage of simplicity and elegance. The delicate flavor of sugar cookies doesn’t compete with the rich, tangy strawberry cheesecake ice cream, instead providing a neutral canvas that allows the ice cream’s complexity to shine.
Ingredients
For Sugar Cookies:
- 2¾ cups all-purpose flour
- 1 teaspoon baking soda
- 1 teaspoon baking powder
- 1 cup butter, softened
- 1½ cups granulated sugar
- 1 large egg
- 1 teaspoon vanilla extract
For Strawberry Cheesecake Ice Cream:
- 2 cups heavy cream
- 1 cup whole milk
- ¾ cup sugar
- 6 large egg yolks
- 8 oz cream cheese, softened
- 1 cup fresh strawberries, pureed
- 1 teaspoon vanilla extract
- ¼ cup graham cracker crumbs
Instructions
The key to perfect sugar cookies lies in not overworking the dough and maintaining consistent thickness when rolling. I use a light touch and roll between parchment sheets to achieve even cookies that bake uniformly.
For the ice cream, I blend the cream cheese with a portion of the warm custard base to ensure smoothness, then strain the mixture to eliminate any lumps. The strawberry puree gets folded in during the final churning minutes, along with graham cracker crumbs for that authentic cheesecake experience.
Recipe 7: Coconut Macaroon with Tropical Mango Ice Cream
This tropical-inspired combination brings sunshine to any day. The chewy coconut texture paired with bright, refreshing mango creates a flavor profile that’s both exotic and comforting. I developed this recipe after a memorable vacation to the Caribbean, wanting to capture those carefree island vibes in dessert form.
Ingredients
For Coconut Macaroons:
- 3 cups sweetened shredded coconut
- 3 large egg whites
- ½ cup granulated sugar
- ¼ teaspoon salt
- 1 teaspoon vanilla extract
- 2 tablespoons all-purpose flour
For Mango Ice Cream:
- 2 cups ripe mango, pureed
- 1½ cups heavy cream
- ½ cup whole milk
- ¾ cup sugar
- 4 large egg yolks
- 1 teaspoon vanilla extract
- 1 tablespoon lime juice
Instructions
Coconut macaroons require a gentle hand and careful timing. I whip the egg whites to soft peaks before folding in the coconut and other ingredients. The key is baking them until they’re golden but still tender inside.
The mango ice cream showcases the fruit’s natural sweetness enhanced by a touch of lime juice that brightens the overall flavor. I strain the mango puree to ensure a silky smooth texture that complements the chewy macaroon exterior.
Advanced Techniques and Tips
Through my years of ice cream sandwich making, I’ve developed several techniques that elevate the final product from good to extraordinary.
Flavor Balancing I always taste each component separately before assembly. The cookie should be slightly less sweet than you’d prefer on its own, as the ice cream will add additional sweetness. Similarly, the ice cream should have enough flavor intensity to hold its own against the cookie.
Texture Optimization The ideal ice cream consistency for assembly is similar to soft-serve. If your ice cream is too hard, let it sit at room temperature for 10-15 minutes. If it’s too soft, place it back in the freezer for 20-30 minutes.
Storage Solutions I wrap each assembled sandwich individually in plastic wrap, then store them in an airtight container. This prevents freezer burn and maintains optimal texture for up to two weeks.
Serving and Presentation Ideas
The way you present ice cream sandwiches can transform them from casual treats to elegant desserts. Here are some of my favorite presentation techniques:
I often roll the edges of assembled sandwiches in chopped nuts, mini chocolate chips, or cookie crumbs for added texture and visual appeal. For special occasions, I’ll drizzle melted chocolate over the entire sandwich and let it set in the freezer.
When serving at parties, I arrange them on a chilled platter garnished with fresh berries or mint leaves. The contrast of colors creates an appealing display that guests find irresistible.
For individual servings, I sometimes cut larger sandwiches into smaller portions using a sharp knife warmed under hot water. This creates neat, professional-looking portions perfect for dinner parties or elegant gatherings.
Storage and Make-Ahead Tips
One of the greatest advantages of homemade ice cream sandwiches is their make-ahead convenience. I often prepare large batches during weekend afternoons, creating a freezer stash that lasts for weeks.
The cookies can be baked up to a week in advance and stored in airtight containers at room temperature. Ice cream bases can be prepared and churned 2-3 days before assembly, though I find they’re best used within 24 hours of churning for optimal texture.
When assembling, I work quickly but methodically, completing 4-6 sandwiches before returning them to the freezer. This prevents the ice cream from becoming too soft and maintains the structural integrity of each sandwich.
| Storage Method | Duration | Quality Retention | Best Use |
|---|---|---|---|
| Plastic wrap only | 3-5 days | Good | Quick consumption |
| Airtight container | 1-2 weeks | Excellent | Regular treats |
| Vacuum sealed | 3-4 weeks | Superior | Long-term storage |
| Freezer bags | 1 week | Fair | Emergency backup |
Troubleshooting Common Issues
Even experienced bakers encounter challenges when making ice cream sandwiches. Here are solutions to the most common problems I’ve encountered:
Cookies too hard: This usually results from overbaking or using too much flour. I recommend checking cookies 1-2 minutes before the minimum baking time and ensuring accurate flour measurements.
Ice cream too soft: If your ice cream won’t hold its shape, it likely needs more freezing time or your freezer temperature isn’t cold enough. I aim for 0°F (-18°C) for optimal storage.
Sandwiches falling apart: This typically happens when the cookie-to-ice cream ratio is off or the ice cream is too soft during assembly. I maintain a 2:1 ratio of cookie width to ice cream thickness.
Uneven ice cream distribution: Using an ice cream scoop warmed in hot water helps create uniform portions that spread evenly when pressed between cookies.
Nutritional Considerations and Modifications
While ice cream sandwiches are undeniably indulgent treats, there are ways to make them slightly healthier without sacrificing enjoyment. I’ve experimented with various modifications over the years:
For reduced sugar options, I substitute up to half the sugar in cookie recipes with sugar alternatives like erythritol or stevia. The texture changes slightly, but the flavor remains satisfying.
Whole wheat pastry flour can replace up to 25% of all-purpose flour in most cookie recipes, adding fiber and nutrients while maintaining acceptable texture.
For dairy-free versions, I use coconut cream-based ice creams and vegan butter in cookies. The results are surprisingly close to traditional versions, especially in the tropical mango combination.
Frequently Asked Questions
Q: How long do homemade ice cream sandwiches last in the freezer? A: When properly wrapped and stored, homemade ice cream sandwiches maintain their best quality for 1-2 weeks. They’re safe to eat for up to a month, though the texture may begin to deteriorate after two weeks.
Q: Can I use store-bought ice cream instead of making my own? A: Absolutely! Store-bought ice cream works perfectly well for these recipes. I recommend choosing high-quality brands with dense textures that won’t become too soft too quickly during assembly.
Q: Why do my cookies get soggy after freezing? A: Soggy cookies usually result from assembling the sandwiches while the cookies are still warm or from excess moisture in the ice cream. Always ensure cookies are completely cool and use ice cream that’s not overly soft or watery.
Q: Can I make mini ice cream sandwiches? A: Yes! Mini versions are perfect for parties. I use a small cookie scoop to make uniform smaller cookies and adjust the baking time accordingly, usually reducing it by 2-3 minutes.
Q: What’s the best way to cut ice cream sandwiches for serving? A: Use a sharp knife warmed under hot running water, wiping it clean between cuts. This prevents the ice cream from sticking to the blade and creates clean, professional-looking portions.
Q: How do I prevent the ice cream from melting too quickly during assembly? A: Work in small batches, keeping the ice cream in the freezer between assemblies. I also chill my cookie sheets in the freezer before placing assembled sandwiches on them.
Q: Can I add mix-ins to the ice cream? A: Certainly! Add mix-ins like chocolate chips, nuts, or fruit pieces during the last few minutes of churning. Keep portions reasonable—about ½ cup per quart of ice cream—to maintain proper texture.
Q: What tools do I need for making ice cream sandwiches? A: Essential tools include an ice cream maker, cookie sheets, mixing bowls, measuring cups, and plastic wrap for storage. A cookie scoop helps create uniform cookies, and an ice cream scoop ensures even portions.
Creating homemade ice cream sandwiches has become one of my favorite ways to bring joy to both everyday moments and special occasions. Each recipe I’ve shared represents hours of experimentation and refinement, resulting in combinations that never fail to delight. The beauty of these treats lies not just in their delicious flavors, but in their ability to be customized to any preference or dietary need.
Whether you’re seeking a nostalgic trip down memory lane with classic chocolate chip and vanilla, or wanting to impress guests with sophisticated rum raisin combinations, these recipes provide the foundation for countless creative possibilities. The techniques I’ve shared will serve you well beyond these specific recipes, empowering you to create your own unique flavor combinations.
Remember that the best ice cream sandwiches come from quality ingredients, careful attention to technique, and most importantly, the love you put into making them. Each bite should tell a story, create a memory, and bring a moment of pure happiness to whoever experiences it. I encourage you to start with these tried-and-true recipes, then let your creativity guide you toward new and exciting flavor adventures.