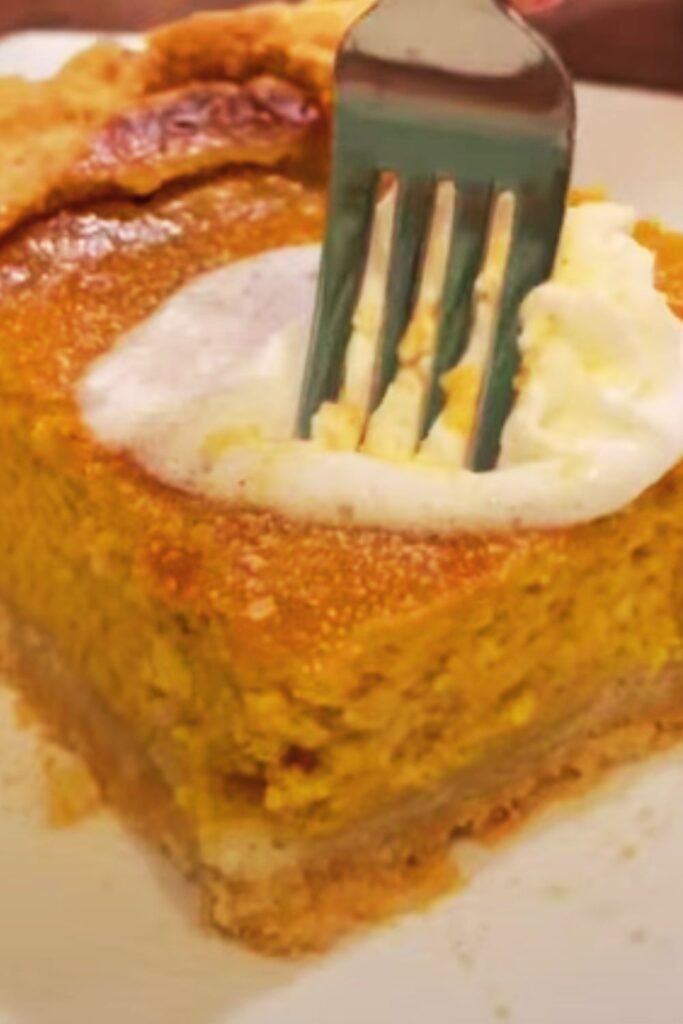
I’ve been making pumpkin cheesecake bars for over a decade, and let me tell you, there’s nothing quite like the moment when that first batch comes out of the oven. The aroma fills every corner of my kitchen, and suddenly, everyone in the house gravitates toward that magical scent. These bars combine the best of both worlds – the creamy richness of cheesecake with the warm, spiced comfort of pumpkin pie.
What makes these bars so special isn’t just their incredible taste, but their versatility. I’ve served them at Thanksgiving dinners, potluck parties, and casual weekend gatherings. They’re easier to make than a traditional cheesecake, yet they deliver that same luxurious texture and flavor that makes people ask for the recipe every single time.
Understanding the Perfect Pumpkin Cheesecake Bar
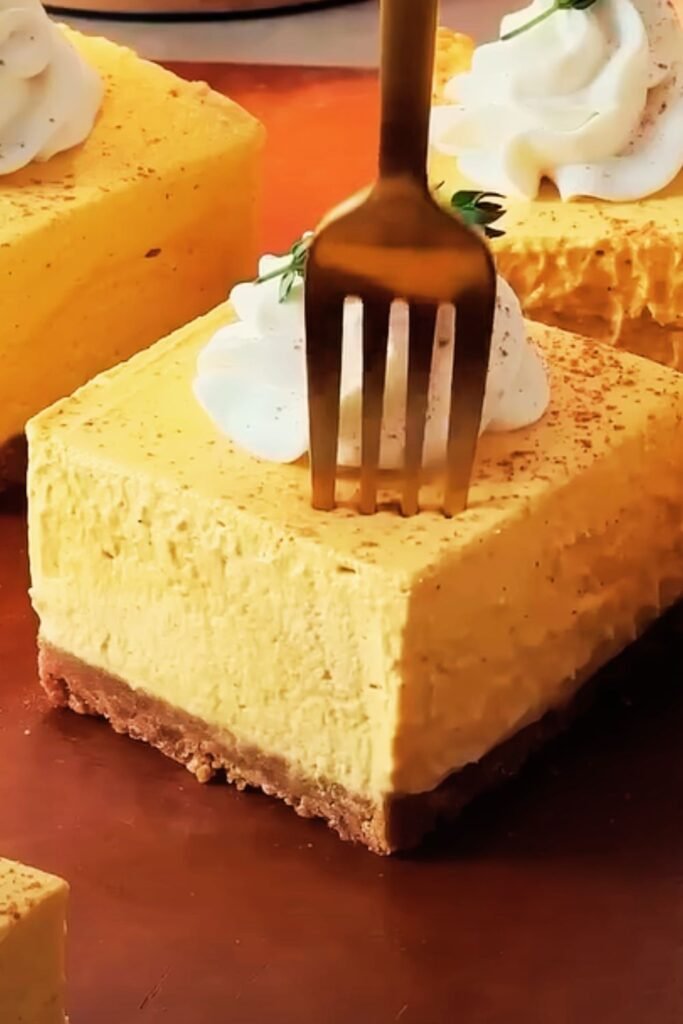
Graham Cracker Crust: The foundation layer made from crushed graham crackers, butter, and sugar that provides a sweet, crunchy base for the creamy filling.
Cream Cheese Layer: The rich, tangy middle layer that gives these bars their cheesecake character, made primarily from cream cheese, eggs, and sugar.
Pumpkin Swirl: The spiced pumpkin mixture that’s swirled into the cream cheese layer, creating beautiful marbled patterns and adding seasonal flavor.
Tempering: The process of gradually adjusting ingredient temperatures to prevent curdling and ensure smooth mixing.
Water Bath Method: An optional technique where the baking pan sits in a larger pan filled with hot water to create gentle, even heat distribution.
Essential Ingredients Breakdown
The beauty of pumpkin cheesecake bars lies in their straightforward ingredient list. I’ve found that using high-quality ingredients makes a noticeable difference in the final product. Here’s what you’ll need:
For the Crust:
- 2 cups graham cracker crumbs (about 16 crackers)
- 1/2 cup unsalted butter, melted
- 1/4 cup granulated sugar
- 1/4 teaspoon salt
For the Cheesecake Layer:
- 24 oz cream cheese, softened to room temperature
- 3/4 cup granulated sugar
- 3 large eggs, room temperature
- 1 teaspoon vanilla extract
- 1/4 cup sour cream
For the Pumpkin Layer:
- 1 cup pumpkin puree (not pumpkin pie filling)
- 1/2 cup packed brown sugar
- 2 large eggs
- 1 teaspoon ground cinnamon
- 1/2 teaspoon ground nutmeg
- 1/4 teaspoon ground ginger
- 1/4 teaspoon ground cloves
- 1/8 teaspoon salt
The key to success lies in having all your ingredients at room temperature. I cannot stress this enough – cold cream cheese will create lumps no matter how much you mix it. I usually take my ingredients out about 2-3 hours before I plan to start baking.
Nutritional Information and Serving Details
| Nutrient | Per Bar (1/16 of recipe) | Daily Value % |
|---|---|---|
| Calories | 285 | 14% |
| Total Fat | 18g | 23% |
| Saturated Fat | 11g | 55% |
| Cholesterol | 95mg | 32% |
| Sodium | 220mg | 10% |
| Total Carbohydrates | 28g | 10% |
| Dietary Fiber | 1g | 4% |
| Total Sugars | 25g | – |
| Protein | 5g | 10% |
| Vitamin A | 4,200 IU | 84% |
| Calcium | 85mg | 8% |
| Iron | 1.2mg | 7% |
Step-by-Step Preparation Guide
Preparing Your Kitchen
Before I even touch an ingredient, I make sure my kitchen is set up for success. I preheat my oven to 325°F and line a 9×13-inch baking pan with parchment paper, leaving some overhang for easy removal later. This step has saved me countless times from bars that stick to the pan.
Creating the Perfect Crust
The crust is the foundation of great pumpkin cheesecake bars. I combine the graham cracker crumbs, melted butter, sugar, and salt in a bowl, mixing until it resembles wet sand. The mixture should hold together when pressed but not be overly wet.
I press this mixture firmly into the bottom of my prepared pan, using the bottom of a measuring cup to ensure even distribution. The crust needs to be compact enough to support the layers above it. I bake it for 10 minutes, then set it aside to cool while I prepare the fillings.

Mastering the Cheesecake Layer
This is where technique becomes crucial. I beat the softened cream cheese until it’s completely smooth and fluffy – this usually takes about 3-4 minutes with an electric mixer. Then I gradually add the sugar, beating until well combined.
Next, I add the eggs one at a time, mixing just until incorporated after each addition. Overmixing at this stage can incorporate too much air, leading to cracks later. Finally, I blend in the vanilla extract and sour cream until the mixture is smooth and creamy.
Crafting the Pumpkin Swirl
In a separate bowl, I whisk together the pumpkin puree, brown sugar, eggs, and all the spices until smooth. The mixture should be well-blended but not overworked. I taste it at this point to ensure the spice balance is right – you should be able to detect each spice without any one overpowering the others.
Assembly and Baking Technique
I pour the cheesecake mixture over the cooled crust, spreading it evenly. Then I dollop the pumpkin mixture on top in spoonfuls, distributing it evenly across the surface. Using a knife, I create swirls by dragging it through both layers in a figure-eight pattern.
The baking process requires patience. I bake the bars for 45-50 minutes, until the center is almost set but still slightly jiggly. The edges should be lightly golden, and a toothpick inserted in the center should come out with just a few moist crumbs.
Baking Variables and Troubleshooting
| Issue | Cause | Solution |
|---|---|---|
| Cracked surface | Overbaking or temperature too high | Reduce oven temp by 25°F, check doneness earlier |
| Soggy crust | Underbaked crust or wet ingredients | Pre-bake crust 10-12 minutes, ensure proper ratios |
| Lumpy texture | Cold ingredients or overmixing | Room temperature ingredients, mix just until combined |
| Uneven swirls | Thick batter or insufficient swirling | Thin pumpkin layer slightly, use gentle figure-8 motions |
| Sunken center | Underbaking or rapid cooling | Bake until center barely jiggles, cool gradually |
| Bars too soft | Insufficient chilling time | Chill minimum 4 hours, preferably overnight |
Cooling and Storage Guidelines
The cooling process is just as important as the baking. I let the bars cool completely in the pan at room temperature, which takes about 2 hours. Then I refrigerate them for at least 4 hours, though overnight is even better. This chilling time allows the flavors to meld and the texture to set properly.
For storage, I cover the bars tightly with plastic wrap or aluminum foil. They’ll keep in the refrigerator for up to 5 days, though in my experience, they rarely last that long. I’ve also frozen them successfully for up to 3 months – just wrap individual bars in plastic wrap and store in a freezer bag.
Variations and Customization Options
Over the years, I’ve experimented with countless variations of these bars. Here are some of my favorites:
Spice Variations
- Maple Spice: Replace brown sugar with maple syrup and add a pinch of cardamom
- Chai Spiced: Add ground black pepper, cardamom, and increase the ginger
- Apple Pie Spice: Include allspice and reduce the cloves slightly
Crust Alternatives
- Gingersnap Crust: Use gingersnap cookies instead of graham crackers
- Pecan Crust: Add 1/2 cup chopped pecans to the graham cracker mixture
- Chocolate Crust: Use chocolate graham crackers or add 2 tablespoons cocoa powder
Topping Ideas
- Whipped Cream: Light and airy complement to the rich bars
- Caramel Drizzle: Adds sweetness and visual appeal
- Candied Pecans: Provides textural contrast and nutty flavor
- Cinnamon Sugar: Simple dusting for extra spice
Serving Suggestions and Presentation
I love serving these bars at different occasions throughout the fall season. For casual gatherings, I cut them into generous squares and serve them on simple plates. For more formal events, I cut smaller, more elegant rectangles and dust them with powdered sugar or drizzle with caramel sauce.
The bars pair beautifully with hot beverages – I particularly enjoy them with freshly brewed coffee, spiced chai tea, or hot apple cider. For a special presentation, I sometimes serve them alongside a scoop of vanilla ice cream or a dollop of freshly whipped cream.
Seasonal Ingredient Sourcing
| Ingredient | Best Season | Storage Tips | Quality Indicators |
|---|---|---|---|
| Pumpkin Puree | Fall (Sept-Nov) | Pantry: 2 years sealed, refrigerate after opening | Deep orange color, smooth texture |
| Fresh Pumpkin | Fall (Oct-Nov) | Cool, dry place for 2-3 months | Firm stem, no soft spots, heavy for size |
| Cream Cheese | Year-round | Refrigerate, use within 2 weeks | Smooth texture, no separation |
| Eggs | Year-round | Refrigerate, use within 3-5 weeks | Clear whites, firm yolks |
| Spices | Year-round | Cool, dark place for 2-3 years | Strong aroma, vibrant color |
| Graham Crackers | Year-round | Pantry, sealed container | Crisp texture, not stale |
Professional Tips for Perfect Results
After years of making these bars, I’ve learned several tricks that consistently produce bakery-quality results:
Temperature Control: I use an oven thermometer to ensure my oven is accurate. Many home ovens run hot or cold, and this can significantly impact baking time and texture.
Quality Pumpkin: I always use pure pumpkin puree, never pumpkin pie filling. The difference in flavor and texture is remarkable. If you’re using fresh pumpkin, roast it yourself and strain out excess moisture.
Swirling Technique: Less is more when creating swirls. I make deliberate, gentle motions rather than aggressive mixing. This preserves the distinct layers while creating beautiful patterns.
Doneness Test: The bars are done when the center is almost set but still has a slight jiggle. They’ll continue cooking from residual heat as they cool.
Advanced Techniques for Experienced Bakers
For those who want to take their pumpkin cheesecake bars to the next level, I’ve developed a few advanced techniques:
Layered Approach
Instead of swirling, I sometimes create distinct layers. I pour half the cheesecake mixture, then all the pumpkin mixture, then top with the remaining cheesecake mixture. This creates clean, professional-looking layers when cut.
Flavor Infusions
I occasionally infuse the cream cheese layer with complementary flavors. A tablespoon of bourbon or rum extract adds sophistication, while a teaspoon of espresso powder creates depth without overwhelming the pumpkin flavor.
Texture Enhancements
For added texture, I sometimes fold chopped toasted pecans or walnuts into the pumpkin layer, or create a streusel topping using flour, butter, brown sugar, and cinnamon.
Nutritional Considerations and Dietary Modifications
While these bars are undeniably indulgent, I’ve successfully adapted the recipe for various dietary needs:
Reduced Sugar Version
I’ve cut the sugar by one-third and added a sugar substitute like erythritol. The texture remains creamy, though slightly less sweet.
Gluten-Free Option
Using gluten-free graham crackers or crushing gluten-free cookies creates an equally delicious crust for those with gluten sensitivities.
Lighter Version
Substituting part of the cream cheese with Greek yogurt reduces calories and fat while maintaining much of the tangy flavor and creamy texture.
Troubleshooting Common Issues
Even experienced bakers encounter problems occasionally. Here are solutions to the most common issues I’ve faced:
Cracked Surface: This usually results from overbaking or temperature fluctuations. I prevent this by baking at a lower temperature and avoiding opening the oven door frequently.
Soggy Bottom: Ensure your crust is properly pre-baked and completely cooled before adding the filling. Also, check that your oven rack is positioned correctly – too low can cause uneven baking.
Separation: This occurs when ingredients are too cold or when the mixture is overbeaten. Always use room temperature ingredients and mix just until combined.
The Science Behind Perfect Pumpkin Cheesecake Bars
Understanding the science helps create consistently excellent results. The cream cheese provides richness and tang, while the eggs act as a binding agent and create structure. The pumpkin adds moisture and flavor, but too much can make the bars soggy.
The spices not only provide flavor but also have preservative qualities that help extend shelf life. Cinnamon contains natural antimicrobial compounds, while nutmeg and cloves add complexity to the flavor profile.
The graham cracker crust serves as more than just a base – it absorbs excess moisture and provides textural contrast to the creamy filling. The butter in the crust creates a moisture barrier that prevents the bottom from becoming soggy.
Seasonal Menu Planning
I incorporate these bars into my fall menu planning in various ways:
Thanksgiving: I make them two days ahead, allowing flavors to develop fully Halloween Parties: I cut them into fun shapes using cookie cutters Potluck Dinners: They transport well and serve a crowd easily Weekend Gatherings: Perfect make-ahead dessert that improves with time
Q&A Section
Q: Can I use fresh pumpkin instead of canned pumpkin puree? A: Absolutely! I often use fresh pumpkin, especially when I have sugar pumpkins available. Roast the pumpkin halves cut-side down at 400°F for 45 minutes, then scoop out the flesh and puree it. Make sure to drain excess moisture by placing the puree in a fine-mesh strainer for 30 minutes before using.
Q: Why do my bars always crack on top? A: Cracking usually happens from overbaking or sudden temperature changes. I bake mine at 325°F and test for doneness by gently shaking the pan – the center should jiggle slightly. Also, let them cool gradually at room temperature before refrigerating.
Q: Can I make these bars ahead of time? A: These bars are actually better when made ahead! I prepare them up to 3 days in advance. The flavors meld beautifully, and the texture becomes even more creamy. Store them covered in the refrigerator and bring to room temperature about 30 minutes before serving.
Q: My bars turned out too soft. What went wrong? A: Soft bars usually result from underbaking or insufficient chilling time. Make sure to bake until the center is almost set but still slightly jiggly, then chill for at least 4 hours. The bars will firm up considerably as they cool.
Q: Can I freeze these bars? A: Yes! I wrap individual bars in plastic wrap and freeze them for up to 3 months. They thaw beautifully in the refrigerator overnight. I sometimes make a double batch and freeze half for unexpected guests.
Q: What’s the best way to cut clean squares? A: I use a sharp knife dipped in warm water and wiped clean between cuts. This prevents the filling from sticking to the blade and creates clean, professional-looking edges. The parchment paper overhang also helps – I lift the entire block out of the pan before cutting.
Q: Can I substitute the sour cream? A: You can substitute Greek yogurt for sour cream in equal amounts. It provides similar tanginess and moisture. I’ve also used heavy cream with a tablespoon of lemon juice as a substitute, though the flavor is slightly different.
Q: How do I know when the bars are properly done? A: The bars are done when the edges are set and lightly golden, but the center still has a slight jiggle when you gently shake the pan. A toothpick inserted in the center should come out with just a few moist crumbs. Remember, they’ll continue cooking from residual heat as they cool.
Q: Why did my crust become soggy? A: A soggy crust usually results from not pre-baking it long enough or adding the filling while the crust is still warm. I always bake my crust for 10-12 minutes until it’s lightly golden and let it cool completely before adding the filling.
Q: Can I make individual portions instead of bars? A: Absolutely! I sometimes make these in muffin tins lined with paper liners. Press the crust mixture into each cup, then divide the filling among them. Bake for 18-22 minutes at 325°F. They make elegant individual servings for dinner parties.
These pumpkin cheesecake bars have become my signature fall dessert, and I hope they bring as much joy to your kitchen as they have to mine. The combination of creamy cheesecake, spiced pumpkin, and crunchy graham cracker crust creates a dessert that’s both comforting and sophisticated. Whether you’re hosting a holiday gathering or simply want to fill your home with the warm aromas of fall, these bars deliver every single time.