I still remember the first time I tasted authentic chocolate pots de crème at a quaint bistro in Paris. The silky texture, the rich chocolate flavor that melted on my tongue, and the elegant presentation in those tiny ceramic pots left me mesmerized. What struck me most was how something so sophisticated could feel so comforting at the same time. That experience ignited my passion for recreating this classic French dessert in my own kitchen.
After years of perfecting my technique and testing countless variations, I’m excited to share my foolproof recipe that brings the magic of French patisserie into your home. This isn’t just another dessert recipe – it’s your gateway to mastering one of the most beloved classics in French cuisine.
Understanding Chocolate Pots de Crème
Before diving into the recipe, let me explain what makes pots de crème so special. The name literally translates to “pots of cream” in French, though the dessert is actually a rich custard rather than whipped cream. Think of it as the sophisticated cousin of chocolate pudding – smoother, richer, and infinitely more elegant.
Pots de Crème: A traditional French dessert consisting of a rich, silky custard made with eggs, cream, and chocolate, traditionally served in small ceramic pots or ramekins.
Custard Base: The foundation of the dessert, created by carefully combining heated cream with egg yolks to achieve the signature smooth texture without curdling.
Tempering: The crucial technique of gradually warming egg yolks with hot cream to prevent scrambling and ensure a smooth custard.
Bain-marie: A water bath cooking method that provides gentle, even heat to prevent the custard from overcooking or developing a grainy texture.
What sets authentic pots de crème apart from regular chocolate pudding is the cooking method and ingredient ratios. While pudding is typically cooked on the stovetop with cornstarch as a thickener, pots de crème rely on eggs and gentle oven cooking for their luxurious texture.
Essential Ingredients and Their Roles
The beauty of pots de crème lies in its simplicity – just a handful of premium ingredients come together to create something truly extraordinary. Each component plays a crucial role in achieving the perfect result.
Primary Ingredients
| Ingredient | Quantity | Purpose | Quality Tips |
|---|---|---|---|
| Heavy cream | 2 cups | Creates rich, silky base | Use 35% fat content minimum |
| Dark chocolate | 6 oz | Primary flavor and body | Choose 60-70% cacao for best results |
| Egg yolks | 6 large | Thickening agent and richness | Use room temperature, fresh eggs |
| Granulated sugar | 1/3 cup | Sweetness and texture | Superfine sugar dissolves better |
| Vanilla extract | 1 tsp | Flavor enhancement | Pure vanilla, not imitation |
| Salt | 1/4 tsp | Flavor enhancement | Fine sea salt preferred |
Optional Flavor Variations
| Variation | Addition | Effect |
|---|---|---|
| Espresso | 1 tbsp instant coffee | Deepens chocolate flavor |
| Orange | 1 tbsp orange zest | Adds citrus brightness |
| Mint | 1/2 tsp peppermint extract | Creates refreshing contrast |
| Rum | 2 tbsp dark rum | Adds warmth and complexity |
| Cinnamon | 1/2 tsp ground cinnamon | Provides warm spice notes |
Equipment You’ll Need
Success with pots de crème depends not just on technique but also on having the right tools. Here’s what I recommend from my years of making this dessert:
Essential Equipment:
- Six 4-ounce ramekins or small ceramic pots
- Heavy-bottomed saucepan
- Fine-mesh strainer
- Large mixing bowl
- Whisk
- Rubber spatula
- Roasting pan (for water bath)
- Kitchen thermometer
Helpful but Optional:
- Immersion blender (for ultra-smooth texture)
- Kitchen scale (for precision)
- Double boiler (alternative to direct heat)
The ramekins are particularly important – ceramic conducts heat evenly and retains temperature well, which is crucial for the gentle cooking process. If you don’t have traditional pots de crème vessels, small ceramic ramekins work perfectly.
Step-by-Step Recipe Instructions
Now comes the exciting part – creating these magnificent desserts. I’ve broken down the process into clear, manageable steps that even beginners can follow successfully.
Phase 1: Preparing the Chocolate Base
Start by preheating your oven to 325°F (163°C). This moderate temperature ensures gentle cooking without curdling the custard.
Chop your dark chocolate into small, uniform pieces. I prefer using a sharp knife rather than a food processor because it gives me better control over the size. Place the chopped chocolate in a large mixing bowl and set aside.
In your heavy-bottomed saucepan, combine the heavy cream with half of the sugar (about 2-3 tablespoons). Heat this mixture over medium-low heat, stirring occasionally with a wooden spoon. You’re looking for tiny bubbles around the edges – this indicates the cream is hot enough without boiling.
Phase 2: Creating the Custard Base
While the cream heats, whisk the egg yolks with the remaining sugar in a separate bowl. I like to whisk vigorously for about 2 minutes until the mixture becomes pale and slightly thickened. This step is crucial because it helps prevent lumps in the final custard.
Here’s where technique becomes critical. When the cream reaches the right temperature, you’ll need to temper the egg yolks. Remove the cream from heat and slowly pour about 1/4 cup into the egg yolk mixture, whisking constantly. Continue adding the hot cream gradually, whisking continuously until all the cream is incorporated.
This tempering process prevents the eggs from scrambling when they meet the hot cream. Take your time here – rushing this step can ruin the entire batch.
Phase 3: Combining with Chocolate
Pour the tempered custard mixture over the chopped chocolate in your mixing bowl. Let it sit for about 2 minutes to allow the chocolate to soften, then whisk gently until the chocolate completely melts and the mixture becomes smooth and glossy.
Add the vanilla extract and salt, whisking until fully incorporated. The mixture should have a beautiful, rich chocolate color and smooth consistency.
Phase 4: Straining and Portioning
This next step separates good pots de crème from exceptional ones. Pour the entire mixture through a fine-mesh strainer into a clean bowl. This removes any bits of cooked egg or unmelted chocolate that might create texture issues.
Using a ladle or large spoon, carefully divide the mixture among your six ramekins. Fill each about 3/4 full – they’ll puff slightly during cooking, and you want to leave room for any toppings later.
Phase 5: The Water Bath Method
Place your filled ramekins in a roasting pan and carefully pour hot water into the pan until it reaches halfway up the sides of the ramekins. This bain-marie method ensures even, gentle cooking.
Cover the entire pan tightly with aluminum foil. This prevents a skin from forming on the surface of the custards during cooking.
Phase 6: Baking and Cooling
Bake for 35-40 minutes, or until the centers are just set but still slightly jiggly when gently shaken. The custards will continue cooking from residual heat, so it’s better to slightly undercook than overcook them.
Remove the ramekins from the water bath and let them cool at room temperature for 30 minutes. Then refrigerate for at least 4 hours, though overnight is even better.
Nutritional Information and Serving Details
Understanding the nutritional profile of your homemade pots de crème helps you enjoy them as part of a balanced diet. Here’s a comprehensive breakdown:
Nutritional Analysis per Serving
| Nutrient | Amount | % Daily Value |
|---|---|---|
| Calories | 285 | 14% |
| Total Fat | 24g | 31% |
| Saturated Fat | 15g | 75% |
| Cholesterol | 155mg | 52% |
| Sodium | 125mg | 5% |
| Total Carbohydrates | 18g | 6% |
| Dietary Fiber | 3g | 11% |
| Sugars | 14g | – |
| Protein | 6g | 12% |
| Calcium | 95mg | 9% |
| Iron | 2.8mg | 16% |
Portion Considerations
Each serving provides a rich, satisfying dessert experience. The high fat content from cream and chocolate creates natural satiety, meaning a small portion feels very satisfying. I recommend serving these as the finale to a lighter meal, as they’re quite indulgent.
Troubleshooting Common Issues
Even experienced bakers encounter challenges with pots de crème. Here are solutions to the most common problems I’ve encountered:
Problem: Grainy or Curdled Texture
Cause: Usually results from overheating the custard or inadequate tempering Solution: Always use a thermometer and keep temperatures below 180°F. If curdling occurs, immediately strain the mixture and blend with an immersion blender
Problem: Custard Won’t Set
Cause: Insufficient cooking time or temperature too low Solution: Return to oven for 5-10 minutes, checking every 5 minutes until just set
Problem: Skin Forms on Surface
Cause: Inadequate covering during baking or cooling Solution: Press plastic wrap directly onto the surface while cooling to prevent skin formation
Problem: Chocolate Doesn’t Melt Smoothly
Cause: Cream not hot enough or chocolate pieces too large Solution: Ensure cream is steaming hot and chop chocolate very finely
Storage and Make-Ahead Tips
One of the best aspects of pots de crème is their make-ahead friendly nature. They actually improve with time, allowing flavors to meld and develop.
Refrigerator Storage: Properly covered pots de crème will keep for up to 5 days in the refrigerator. Cover each ramekin tightly with plastic wrap, pressing it directly onto the surface to prevent skin formation.
Freezer Storage: While not ideal, you can freeze pots de crème for up to 1 month. Thaw slowly in the refrigerator overnight before serving. The texture may be slightly different but still delicious.
Advance Preparation: These desserts are perfect for entertaining because they must be made ahead. I often prepare them 1-2 days before serving to allow the flavors to fully develop.
Creative Variations and Flavor Combinations
After mastering the basic recipe, you’ll want to explore variations. Here are some of my favorite adaptations:
Seasonal Variations
Spring: Add fresh strawberry purée and a touch of rosewater for an elegant floral note Summer: Incorporate fresh mint and a hint of lime zest for a refreshing twist Fall: Include pumpkin spice blend and a swirl of caramel for autumn comfort Winter: Add peppermint extract and crushed candy canes for holiday flair
International Inspirations
Mexican: Include cinnamon, cayenne pepper, and a touch of vanilla for a spicy kick Italian: Add espresso and a splash of amaretto for sophisticated depth French: Classic preparation with a garnish of candied violets or gold leaf American: Incorporate peanut butter and a pretzel crumb topping for familiar comfort
Serving Suggestions and Presentation
The presentation of pots de crème is almost as important as the taste. These desserts deserve to be showcased properly.
Classic Presentation
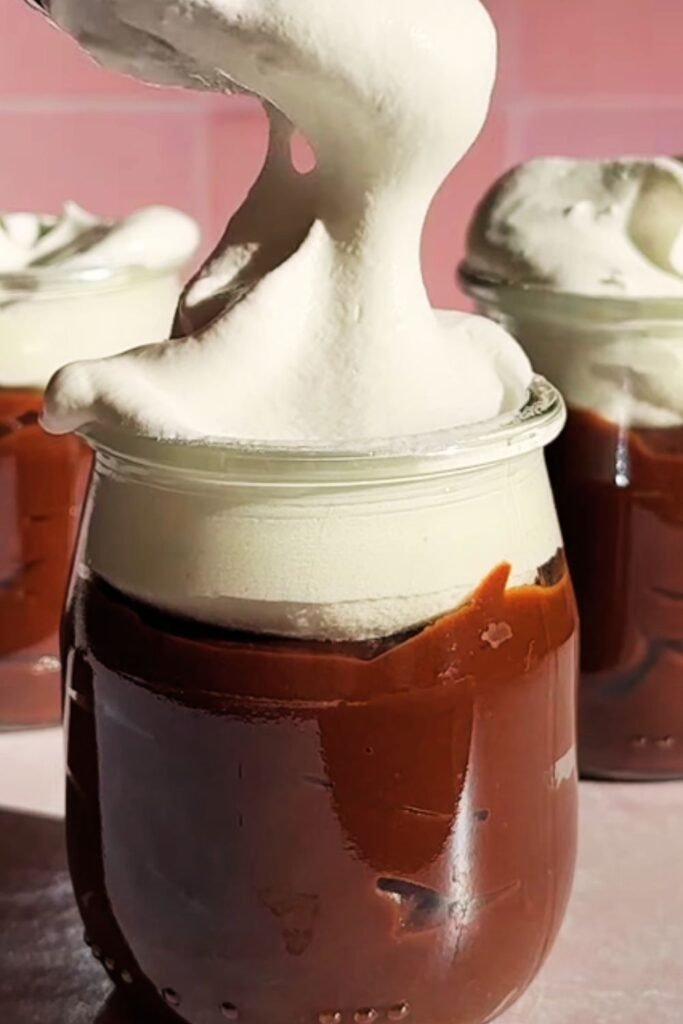
Serve directly in the ramekins with small spoons – demitasse spoons are traditional but regular teaspoons work fine. The contrast between the dark chocolate and white ceramic creates an elegant visual appeal.
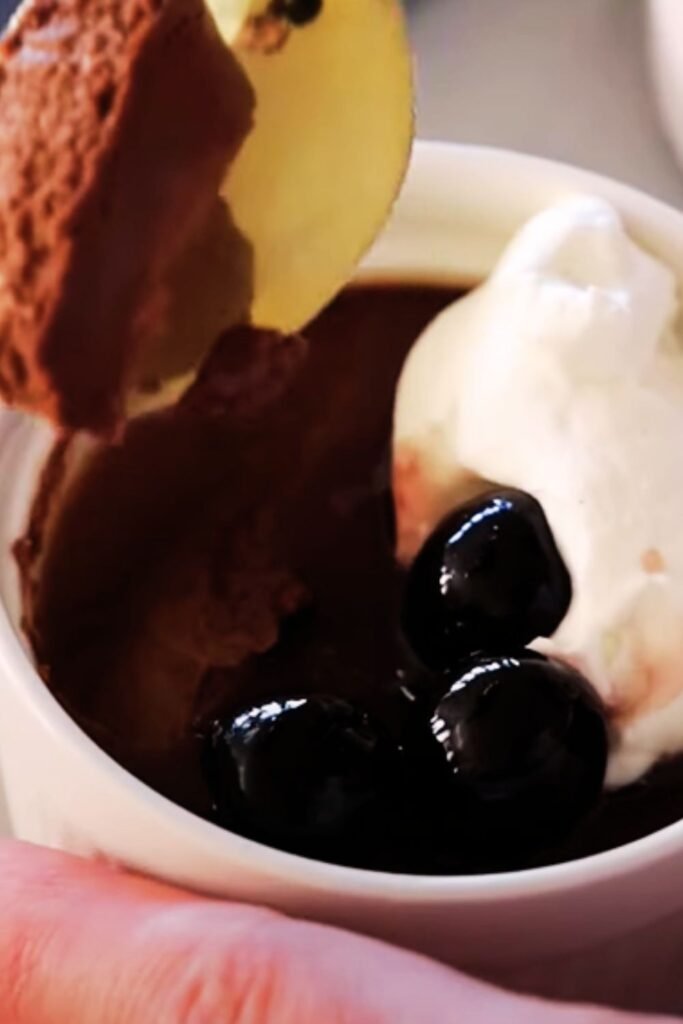
Elevated Garnishes
Whipped Cream: Lightly sweetened cream piped or dolloped on top Fresh Berries: Raspberries or strawberries add color and tartness Chocolate Shavings: Dark chocolate curls create textural interest Candied Citrus: Thin slices of candied orange or lemon provide brightness Toasted Nuts: Chopped hazelnuts or almonds add crunch Caramel Drizzle: A light drizzle of salted caramel creates beautiful contrast
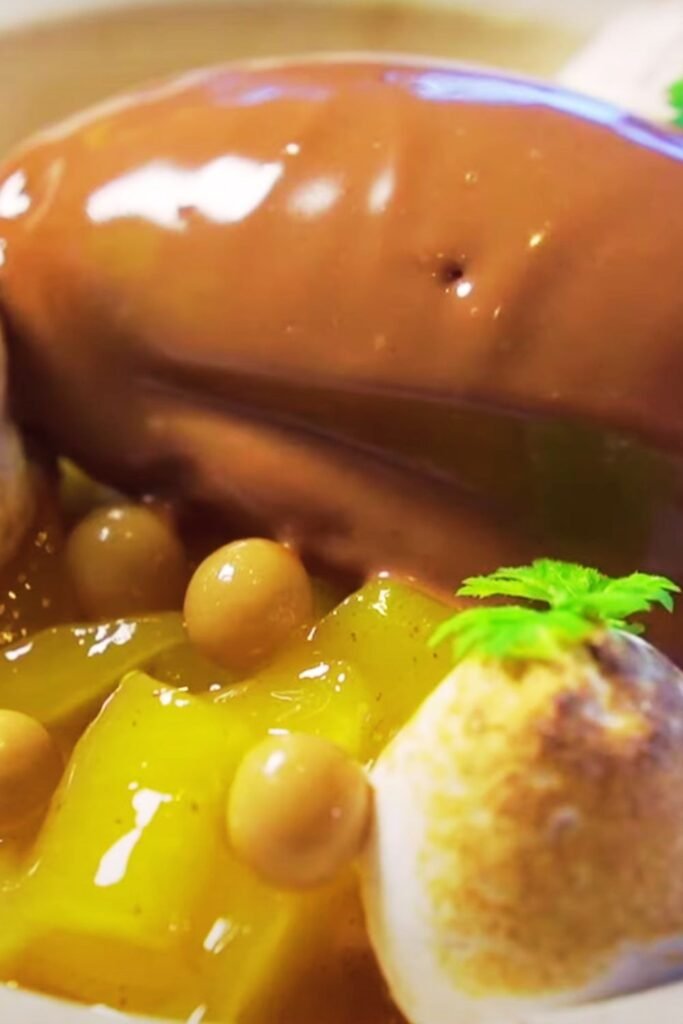
Accompaniments
Crisp Cookies: Delicate tuile cookies or shortbread provide textural contrast Fresh Fruit: Seasonal berries or poached pears complement the rich chocolate Coffee: Espresso or strong coffee balances the sweetness perfectly Tea: Earl Grey or chamomile tea creates a sophisticated pairing
The Science Behind Perfect Pots de Crème
Understanding the science helps you achieve consistent results every time. The key is controlling temperature and timing throughout the process.
Protein Coagulation: Egg proteins begin setting around 160°F but can curdle if heated too quickly or to temperatures above 180°F. The gentle water bath method prevents this.
Starch Gelatinization: Unlike puddings that rely on cornstarch, pots de crème depend entirely on egg proteins for thickening, creating a more delicate texture.
Chocolate Behavior: Chocolate melts optimally between 104-113°F. The hot cream mixture provides the perfect temperature for smooth melting without seizing.
Maillard Reaction: The gentle cooking process allows subtle flavor development without the browning that would occur at higher temperatures.
Frequently Asked Questions
Q: Can I use milk chocolate instead of dark chocolate? A: While possible, milk chocolate will create a much sweeter, less sophisticated flavor. If you prefer milder chocolate, try using 50% dark chocolate instead.
Q: What if I don’t have a thermometer? A: Watch for visual cues: the cream should steam and show tiny bubbles around the edges but never boil. The custard is done when it barely jiggles in the center.
Q: Can I make these dairy-free? A: Yes, substitute coconut cream for heavy cream and use dairy-free chocolate. The texture will be slightly different but still delicious.
Q: Why do my pots de crème have a skin on top? A: This happens when the surface is exposed to air during cooling. Press plastic wrap directly onto the surface immediately after baking to prevent this.
Q: Can I double the recipe? A: Absolutely! This recipe scales well. Just ensure you have enough ramekins and a large enough roasting pan for the water bath.
Q: How do I know when they’re perfectly set? A: The centers should jiggle slightly when gently shaken but not be liquid. They’ll continue setting as they cool.
Q: Can I use egg whites instead of just yolks? A: Egg yolks are essential for the rich texture and binding properties. Using whites would create a completely different dessert.
Q: What’s the difference between pots de crème and chocolate mousse? A: Pots de crème is a baked custard, while mousse is typically unbaked and incorporates whipped cream or egg whites for lightness.
Q: Can I add alcohol to the recipe? A: Yes, 1-2 tablespoons of rum, brandy, or liqueur can enhance the flavor. Add it with the vanilla extract.
Q: Why is my custard lumpy? A: This usually happens from inadequate tempering or overheating. Always strain the mixture and consider using an immersion blender for smoothness.
Creating perfect chocolate pots de crème requires patience, attention to detail, and respect for the traditional techniques that have made this dessert a French classic for centuries. The reward for your careful work is a dessert that’s simultaneously elegant and comforting, sophisticated yet approachable.
Each time I make these desserts, I’m reminded of that first magical taste in Paris. Now, with this detailed guide, you can create that same magic in your own kitchen. The key is understanding that pots de crème isn’t just about following a recipe – it’s about embracing the art of French patisserie and the joy of creating something truly special for the people you care about.
Remember, even experienced bakers sometimes face challenges with custards. Don’t be discouraged if your first attempt isn’t perfect. With practice, you’ll develop an intuitive sense for the proper temperatures, textures, and timing that create flawless results every time.
The beauty of mastering pots de crème extends far beyond this single dessert. The techniques you learn – tempering eggs, creating custards, working with chocolate – will serve you well in countless other culinary adventures. You’re not just making a dessert; you’re developing fundamental skills that will enhance your overall cooking abilities.
So gather your ingredients, prepare your equipment, and embark on this delicious journey. Your kitchen is about to be filled with the irresistible aroma of rich chocolate and cream, and soon you’ll be serving a dessert that would make any French chef proud. Bon appétit!