There’s something deeply satisfying about simmering a pot of bone broth on my stovetop, watching steam rise from the surface while knowing I’m creating liquid gold for my family’s health. I’ve been making bone broth for over a decade, and I can confidently say it’s one of the most rewarding kitchen skills I’ve ever mastered. Whether you’re dealing with a cold, supporting your gut health, or simply craving something warm and nourishing, homemade bone broth delivers in ways that store-bought versions simply can’t match.
The art of making bone broth isn’t just about nutrition—though the benefits are incredible. It’s about transforming what many consider scraps into something extraordinary. When I first started making bone broth, I was amazed at how simple ingredients could create such complex, rich flavors. The process teaches patience, fills your home with the most comforting aroma, and provides you with a versatile base for countless meals.
I remember my grandmother always had a pot of something simmering on her stove, and now I understand why. Bone broth isn’t just food; it’s medicine, comfort, and tradition all rolled into one steaming bowl. Today, I’m sharing everything I’ve learned about creating the perfect bone broth, whether you prefer beef or chicken, along with the tips and tricks that have taken my broth from good to absolutely incredible.
What Makes Bone Broth Special?
Bone Broth: A nutrient-dense liquid made by slowly simmering animal bones and connective tissues for extended periods, typically 12-24 hours, which extracts minerals, collagen, and other beneficial compounds.
Collagen: A protein found in bones, skin, and connective tissues that breaks down into gelatin during the long cooking process, giving properly made bone broth its characteristic gel-like consistency when cooled.
Mineral Extraction: The process by which acid (typically apple cider vinegar) helps leach calcium, magnesium, phosphorus, and other minerals from the bones into the broth.
The magic of bone broth lies in its simplicity and the transformation that occurs during those long hours of simmering. Unlike regular stock, which might cook for 3-4 hours, bone broth requires patience. I’ve found that the difference between good and exceptional bone broth often comes down to time and technique.
When I make bone broth, I’m not just cooking—I’m extracting every possible nutrient from those bones. The collagen breaks down into gelatin, creating that satisfying jiggle when the broth cools. The minerals become bioavailable, meaning my body can actually use them. This isn’t something you can rush, and that’s part of what makes it so special.
Health Benefits That Keep Me Coming Back
The health benefits of bone broth are what initially drew me to making it regularly, but the taste is what keeps me hooked. Here’s what I’ve experienced and what research supports:
My digestive system has never been happier since I started incorporating bone broth into my routine. The gelatin helps heal and seal the gut lining, which I’ve noticed particularly when I’m recovering from illness or stress. The amino acids, especially glycine and proline, support liver detoxification and improve sleep quality—something I definitely notice when I have a warm mug before bed.
The mineral content is impressive too. When I send my homemade broth for testing, it consistently shows high levels of calcium, magnesium, and phosphorus. These aren’t synthetic additions; they’re naturally extracted from the bones through the slow cooking process. My hair, skin, and nails have improved noticeably since making bone broth a weekly ritual.
For joint health, the glucosamine and chondroitin naturally present in the cartilage and connective tissues provide building blocks for maintaining healthy joints. As someone who’s active, I’ve found this particularly beneficial for recovery and overall joint comfort.
Choosing Your Bones: The Foundation of Great Broth
The quality of your bones directly impacts the quality of your broth. I’ve learned this lesson through trial and error, and I want to save you from the disappointment of bland, thin broth.
For beef bone broth, I always use a combination of marrow bones and knuckle bones. The marrow bones provide richness and flavor, while the knuckle bones are packed with collagen. I look for bones from grass-fed cattle when possible, as they tend to have higher nutrient density and better flavor profiles.
My go-to combination includes:
- 2-3 pounds of marrow bones (femur bones cut into sections)
- 1-2 pounds of knuckle bones or joint bones
- 1 pound of meaty bones (oxtail, short ribs, or neck bones)
For chicken bone broth, I prefer using a whole chicken carcass or a combination of backs, necks, and feet. The feet are particularly valuable—they’re loaded with collagen and create the most gelatinous broth. Don’t let the appearance put you off; they’re essential for the best results.
When sourcing bones, I recommend building a relationship with your local butcher. They often have bones available that aren’t displayed, and they can save specific cuts for you. Many will cut marrow bones to your preferred size, which is incredibly helpful.
Essential Equipment and Ingredients
Slow Cooker Method: Using a programmable slow cooker or crockpot to maintain consistent low heat for extended periods, ideal for hands-off cooking.
Pressure Cooker Approach: Utilizing an Instant Pot or similar device to reduce cooking time while still extracting nutrients, typically requiring 2-3 hours under pressure.
Roasting: The process of browning bones in the oven before simmering to develop deeper, more complex flavors through the Maillard reaction.
My kitchen setup for bone broth has evolved over the years, and I’ve found certain tools make the process significantly easier and more successful.
For cooking vessels, I prefer my large stainless steel stockpot for stovetop cooking, though my slow cooker gets regular use for overnight batches. The key is having something large enough to hold all your bones with plenty of water coverage—at least 8-quart capacity for a standard batch.
A fine-mesh strainer is essential for the final straining process. I actually use two: a coarse strainer first, then a fine one lined with cheesecloth for crystal-clear broth. This double-straining method has dramatically improved the appearance and mouthfeel of my finished broth.
For ingredients, I keep it simple but strategic:
- Raw apple cider vinegar (the acid is crucial for mineral extraction)
- Fresh vegetables for aromatics (onions, carrots, celery)
- Fresh herbs (parsley, thyme, bay leaves)
- Whole peppercorns
- Sea salt (added at the end)
The vegetables don’t need to be perfect—I often use scraps and trimmings I’ve saved in the freezer. This makes bone broth an excellent way to minimize food waste while maximizing nutrition.
My Foolproof Beef Bone Broth Recipe

After years of refinement, this is my go-to method that produces consistently excellent results. The key is in the preparation and patience.
Ingredients:
- 4-5 pounds mixed beef bones (marrow, knuckle, and meaty bones)
- 2 tablespoons raw apple cider vinegar
- 1 large onion, quartered
- 2 large carrots, roughly chopped
- 3 celery stalks, roughly chopped
- 1 small bunch fresh parsley
- 2 bay leaves
- 6-8 peppercorns
- Sea salt to taste
Method:
I start by roasting the bones, which is a step I never skip anymore. Preheat your oven to 425°F and arrange the bones on a rimmed baking sheet. Roast for 30-45 minutes until they’re deeply browned. This step develops incredible depth of flavor that you simply can’t achieve without roasting.
Transfer the roasted bones to your stockpot and add the apple cider vinegar immediately. Let this sit for 30 minutes—this waiting period allows the acid to begin working on the bones before heat is applied. I use this time to prepare my vegetables.
Add enough filtered water to cover the bones by about 2 inches. Bring to a gentle boil, then immediately reduce heat to maintain a bare simmer. This initial heating will cause impurities to rise to the surface—skim these off with a ladle for the clearest broth.
After the first hour of simmering, add your vegetables and herbs. From this point, I maintain a very gentle simmer for 18-24 hours. The surface should barely bubble—vigorous boiling will make your broth cloudy and can break down the bones too aggressively.
I check on the broth periodically, adding water as needed to maintain the level and skimming any foam that rises. The house smells incredible during this process, and I’ve learned that good broth takes time—there’s no rushing this step.
Perfect Chicken Bone Broth Recipe
Chicken bone broth cooks faster than beef and has a lighter, more versatile flavor profile. I make this version when I want something that works well as a base for soups or when I need broth more quickly.
Ingredients:
- 1 whole chicken carcass plus 2 pounds chicken backs/necks
- 4-6 chicken feet (if available)
- 2 tablespoons raw apple cider vinegar
- 1 onion, quartered
- 2 carrots, chopped
- 2 celery stalks, chopped
- Fresh herbs (thyme, parsley, bay leaf)
- Peppercorns
Method:
Unlike beef bones, I don’t always roast chicken bones, though it does add flavor if you have time. Place all bones in your stockpot with the vinegar and let sit for 30 minutes.
Cover with cold filtered water by 2 inches and bring to a gentle simmer. Chicken bones release impurities quickly, so be prepared to skim frequently in the first hour.
Add vegetables and herbs after the first hour of simmering. Chicken bone broth is ready in 12-18 hours—much faster than beef. I know it’s done when the bones crumble easily when pressed and the broth has a rich, golden color.
Nutritional Comparison: Beef vs. Chicken Bone Broth
| Nutrient (per 8 oz serving) | Beef Bone Broth | Chicken Bone Broth |
|---|---|---|
| Calories | 45-50 | 35-40 |
| Protein | 9-10g | 6-8g |
| Collagen | 12-15g | 8-10g |
| Calcium | 25-30mg | 15-20mg |
| Magnesium | 8-12mg | 6-8mg |
| Phosphorus | 35-40mg | 25-30mg |
| Glycine | 2.5-3g | 1.8-2.2g |
| Proline | 1.5-2g | 1-1.3g |
| Cooking Time | 18-24 hours | 12-18 hours |
| Gelatin Content | High | Medium-High |
This comparison shows why I choose different broths for different purposes. Beef bone broth is my go-to for maximum nutrition and when I want something more substantial. Chicken bone broth is perfect for everyday use and when I need something lighter.
Cooking Methods Comparison
| Method | Time Required | Hands-On Effort | Final Quality | Best For |
|---|---|---|---|---|
| Stovetop | 18-24 hours | Medium | Excellent | Maximum control |
| Slow Cooker | 18-24 hours | Very Low | Very Good | Convenience |
| Pressure Cooker | 3-4 hours | Low | Good | Quick results |
| Oven | 18-24 hours | Low | Excellent | Even heat |
I’ve used all these methods extensively, and each has its place. The stovetop gives me the most control, but my slow cooker is invaluable for overnight cooking. The pressure cooker works when I need broth quickly, though the results aren’t quite as rich.
Storage and Preservation Methods
Proper storage has been crucial in making bone broth a practical part of my routine. I’ve developed systems that ensure I always have broth available without it taking over my freezer space.
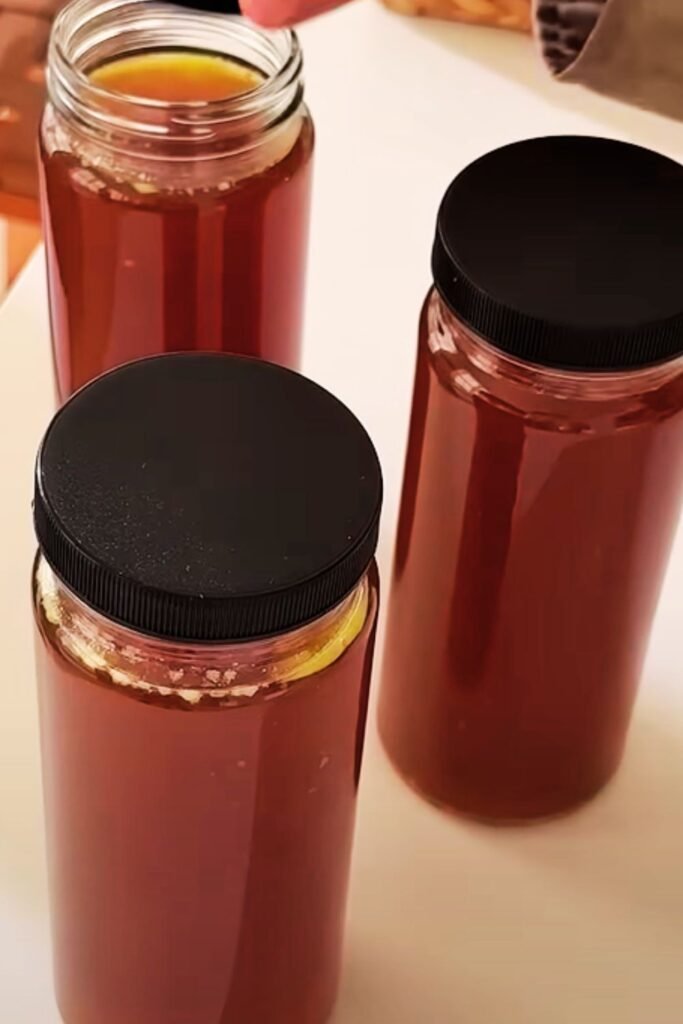
Refrigerator Storage: Fresh bone broth keeps in the refrigerator for 5-7 days. I store it in glass containers because plastic can absorb the strong flavors. When properly made, the broth should gel completely when chilled—this is your sign that you extracted good amounts of collagen.
Freezer Storage: For long-term storage, I freeze broth in multiple portion sizes. Ice cube trays work perfectly for small amounts I might add to sauces or use for cooking grains. Mason jars are ideal for meal-sized portions, though I leave headspace for expansion.
I’ve found that broth maintains its quality for 6-8 months in the freezer, though it’s safe much longer. I label everything with dates and contents—trust me, frozen broths can look surprisingly similar!
Pressure Canning: For shelf-stable storage, I pressure can my bone broth. This requires a pressure canner (not a pressure cooker) and following tested recipes for safety. Home-canned broth keeps for 1-2 years and is incredibly convenient for emergency meals or when freezer space is limited.
Troubleshooting Common Issues
Over the years, I’ve encountered virtually every bone broth problem imaginable. Here are the solutions to the most common issues:
Cloudy Broth: This usually results from boiling too vigorously. The violent bubbling emulsifies fat and proteins, creating cloudiness. Always maintain a gentle simmer. If your broth is already cloudy, you can clarify it using egg whites, but prevention is easier.
Lack of Gelification: If your cooled broth doesn’t gel, you likely didn’t extract enough collagen. This can happen with insufficient cooking time, too much water, or bones without enough connective tissue. Add more knuckle bones or cartilage-rich bones next time.
Weak Flavor: Under-seasoned or bland broth often results from not roasting bones, insufficient cooking time, or too much dilution. Roasting develops flavor, and proper reduction concentrates it. You can always simmer finished broth uncovered to concentrate flavors.
Greasy Broth: Excess fat is easy to fix. Chill the broth completely—the fat will solidify on top and lift off easily. Some fat is good for flavor and nutrition, but too much makes the broth unpalatable.
Creative Uses Beyond Sipping
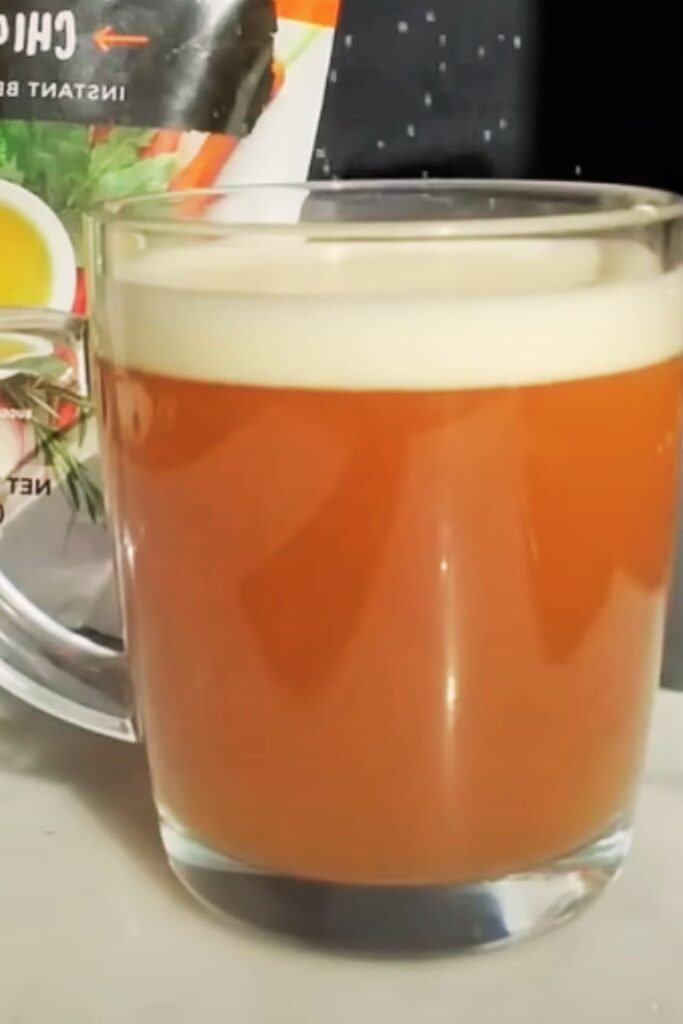
While I love sipping warm bone broth from a mug, its versatility in cooking has made it indispensable in my kitchen. Here’s how I use it:
Cooking Grains: I replace water with bone broth when cooking rice, quinoa, or other grains. This simple substitution dramatically increases the nutrition and flavor of side dishes. The minerals and amino acids absorb into the grains, creating more satisfying meals.
Sauce Base: Bone broth makes an excellent base for gravies and pan sauces. I reduce it by half to concentrate flavors, then finish with herbs or cream. The natural gelatin gives sauces body without flour or other thickeners.
Soup Foundation: This seems obvious, but the difference between soup made with homemade bone broth versus store-bought stock is remarkable. My soups have depth and richness that’s impossible to achieve any other way.
Braising Liquid: When braising meats or vegetables, I use bone broth instead of wine or water. The collagen adds richness to the braising liquid, which reduces into an incredible sauce.
Seasonal Variations and Flavor Profiles
| Season | Added Ingredients | Flavor Profile | Best Uses |
|---|---|---|---|
| Spring | Fresh herbs, leeks, peas | Light, fresh, green | Light soups, risottos |
| Summer | Tomatoes, basil, zucchini | Bright, vegetable-forward | Gazpacho base, light meals |
| Fall | Root vegetables, sage, thyme | Earthy, warming | Stews, braises |
| Winter | Warming spices, ginger, turmeric | Spicy, immune-boosting | Healing drinks, hearty soups |
I’ve learned to adapt my bone broth to the seasons, both for variety and to take advantage of peak produce. Spring broths with fresh herbs feel completely different from winter versions with warming spices.
Cost Analysis: Homemade vs. Store-Bought
| Item | Homemade Cost | Store-Bought Cost | Savings |
|---|---|---|---|
| Beef Bone Broth (32oz) | $3.50-4.00 | $8.00-12.00 | 60-70% |
| Chicken Bone Broth (32oz) | $2.50-3.00 | $6.00-10.00 | 65-75% |
| Annual Consumption (1qt/week) | $150-200 | $400-600 | $250-400 |
These numbers convinced me to make bone broth regularly. The savings are substantial, especially considering the superior quality of homemade versions. Plus, I control every ingredient that goes into my family’s food.
Questions and Answers
Q: How long should I cook bone broth for optimal nutrition?
For beef bone broth, I simmer for 18-24 hours to fully extract minerals and break down collagen. Chicken bone broth needs 12-18 hours. Longer cooking doesn’t hurt—I’ve gone up to 48 hours for beef with excellent results.
Q: Why doesn’t my bone broth gel when cooled?
The gel comes from collagen converting to gelatin. If your broth doesn’t gel, you need bones with more connective tissue (knuckle bones, joints, feet), longer cooking time, or less water dilution. The vinegar also helps extract collagen, so don’t skip it.
Q: Can I reuse bones for a second batch of broth?
I sometimes make a second, lighter batch from the same bones, though the nutrition and flavor will be significantly reduced. I cook the second batch for 12-24 hours and use it for cooking grains or as a base for vegetable soups.
Q: Is it safe to leave bone broth simmering overnight?
Yes, maintaining a gentle simmer overnight is safe and often necessary for proper extraction. I use my slow cooker for overnight cooking or keep my stovetop on the lowest possible setting. Just ensure you’re maintaining a simmer, not a rolling boil.
Q: What’s the difference between bone broth and regular stock?
Bone broth cooks much longer (12-24+ hours vs 3-6 hours for stock) and focuses specifically on extracting nutrients from bones. Stock often includes more vegetables and is designed primarily for flavor rather than nutrition.
Q: Can I add salt during the cooking process?
I always wait until the end to add salt. Adding it early can draw moisture from the bones and vegetables, potentially affecting the extraction process. I taste and season the finished broth just before storing.
Q: How do I know when my bone broth is done?
The bones should crumble easily when pressed with a fork, and the broth should have a rich color and aroma. When cooled, properly made bone broth will gel firmly due to the extracted collagen.
Q: Can I make bone broth in an Instant Pot?
Yes, though the results differ slightly from traditional methods. Use the manual/pressure cook setting for 120 minutes for beef bones, 90 minutes for chicken. Natural pressure release is important. The broth won’t be quite as rich as traditional methods, but it’s still nutritious and flavorful.
Q: What should I do with the vegetables after cooking?
I discard the vegetables after straining. They’ve given up most of their nutrients and flavor to the broth and aren’t pleasant to eat after such long cooking. The bones can be composted along with the vegetables.
Q: Why do some recipes call for roasting bones first?
Roasting develops deeper, more complex flavors through browning reactions. It’s not necessary for nutrition, but it significantly improves taste. I always roast beef bones and sometimes chicken bones when I want extra flavor depth.
Making bone broth has become more than just a cooking technique for me—it’s a practice that connects me to traditional foodways while providing incredible nutrition for my family. The patience required teaches mindfulness, and the results are so much more satisfying than anything I can buy. Whether you start with beef or chicken, the journey of creating your own liquid gold is incredibly rewarding. Take your time, trust the process, and prepare to be amazed by what simple bones and time can create.