When I first attempted to cook pork chops, I ended up with what could only be described as edible shoe leather. The meat was tough, dry, and frankly, disappointing. That experience taught me that achieving perfectly tender, juicy pork chops requires understanding the science behind the cooking process and implementing specific techniques that transform ordinary cuts into extraordinary meals.
After years of experimenting in my kitchen and learning from both successes and failures, I’ve discovered the secrets to creating pork chops so tender they practically dissolve on your tongue. The journey to mastering this dish involves selecting the right cut, proper preparation, precise cooking techniques, and understanding how different factors affect the final result.
The transformation from tough meat to melt-in-your-mouth perfection doesn’t happen by accident. It requires patience, attention to detail, and knowledge of how proteins break down under specific conditions. Through this comprehensive guide, I’ll share everything I’ve learned about creating pork chops that will have your family asking for seconds and thirds.
Understanding Pork Chop Cuts and Selection
The foundation of exceptional pork chops begins with understanding different cuts and their characteristics. Not all pork chops are created equal, and selecting the right cut significantly impacts your final result.
Bone-In vs. Boneless Considerations
Bone-in pork chops offer superior flavor and moisture retention compared to their boneless counterparts. The bone acts as a natural heat conductor, ensuring even cooking while adding depth to the overall taste profile. During my cooking experiments, I consistently found that bone-in chops retained more moisture and developed better flavor complexity.
Boneless chops, while convenient, require more careful attention to prevent overcooking. They cook faster but can become dry more easily. However, they’re excellent for certain preparation methods like stuffing or when uniform cooking is essential.
Thickness Matters
Thickness plays a crucial role in achieving that melt-in-your-mouth texture. Thin chops cook quickly but often become tough and dry before the connective tissues have time to break down properly. Thick chops, typically 1.5 to 2 inches, provide the perfect canvas for low-and-slow cooking methods that transform tough fibers into tender, succulent meat.
| Cut Type | Thickness | Best Cooking Method | Cooking Time | Tenderness Rating |
|---|---|---|---|---|
| Rib Chop | 1.5-2 inches | Sear then oven | 25-30 minutes | Excellent |
| Center Cut | 1-1.5 inches | Pan searing | 15-20 minutes | Very Good |
| Shoulder Chop | 1.5-2 inches | Braising | 45-60 minutes | Outstanding |
| Sirloin Chop | 1-1.25 inches | Grilling | 12-18 minutes | Good |
Quality Indicators
When selecting pork chops, I look for specific visual and tactile cues that indicate quality. The meat should display a pinkish-red color with fine marbling throughout. Avoid chops with excessive liquid in the packaging, as this often indicates the meat has been frozen and thawed, which can affect texture.
Fresh pork should feel firm to the touch and have a subtle, clean aroma. Any strong or off-putting odors suggest the meat is past its prime. The fat should appear white or slightly cream-colored, never yellow or gray.
The Science of Tenderness
Understanding the science behind meat tenderness revolutionized my approach to cooking pork chops. Tenderness results from the breakdown of proteins and connective tissues within the meat structure.
Collagen Transformation
Pork contains collagen, a tough protein that connects muscle fibers. When exposed to moist heat over extended periods, collagen transforms into gelatin, creating that signature melt-in-your-mouth texture. This transformation occurs most effectively at temperatures between 160°F and 180°F over extended cooking periods.
The process requires both time and proper temperature control. Rushing this transformation by increasing heat typically results in tough, dry meat because the muscle proteins contract and expel moisture before collagen has time to break down.
Moisture Retention Techniques
Maintaining moisture throughout the cooking process requires understanding how proteins react to heat. Muscle fibers begin contracting around 140°F, squeezing out natural juices. However, if we can keep the internal temperature low while providing sufficient time for collagen breakdown, we achieve optimal results.
Brining, marinating, and proper seasoning create moisture barriers that help retain natural juices during cooking. Salt, in particular, helps proteins retain water through a process called protein denaturation.
Essential Preparation Techniques
Proper preparation sets the foundation for exceptional results. My preparation routine has evolved through countless cooking sessions, and each step serves a specific purpose in achieving that perfect texture.
Brining Process
Brining transforms pork chops by allowing salt and moisture to penetrate deep into the meat fibers. I create my standard brine using:
- 4 cups warm water
- 1/4 cup kosher salt
- 2 tablespoons brown sugar
- 1 bay leaf
- 1 teaspoon black peppercorns
The salt concentration creates an osmotic environment that initially draws moisture from the meat, then reverses the process, carrying salt and flavor compounds deep into the tissue. This process typically requires 4-8 hours for optimal results.
Marinating Strategies
While brining focuses on moisture retention, marinating introduces flavor compounds and can help break down surface proteins through enzymatic action. Acidic marinades containing ingredients like vinegar, citrus juice, or wine can begin the tenderizing process before cooking begins.
My go-to marinade combines:
- 1/2 cup olive oil
- 1/4 cup apple cider vinegar
- 2 cloves minced garlic
- 1 tablespoon fresh herbs
- 1 teaspoon Dijon mustard
The oil provides fat-soluble flavor transport, while the acid begins protein breakdown. Marinating time should not exceed 24 hours, as extended exposure to acid can create a mushy texture.
Scoring and Mechanical Tenderizing
For particularly thick chops, I sometimes employ mechanical tenderizing techniques. Light scoring of the surface fat prevents the chop from curling during cooking while creating channels for seasoning penetration.
Using a meat mallet to gently pound thicker sections ensures even cooking thickness. This technique requires a light touch – we’re not trying to flatten the meat completely, just create uniformity.
Cooking Methods for Maximum Tenderness
Different cooking methods produce varying results, and understanding when to use each technique has dramatically improved my success rate with pork chops.
Reverse Searing Technique
Reverse searing has become my preferred method for thick pork chops. This technique involves slowly cooking the chops in a low oven until they reach the desired internal temperature, then finishing with a high-heat sear for color and crust development.
The process begins by seasoning the chops and placing them on a wire rack over a baking sheet. I set my oven to 275°F and cook until the internal temperature reaches 135°F. This typically takes 25-35 minutes depending on thickness.
After removing from the oven, I heat a cast-iron skillet over high heat and sear each side for 1-2 minutes to develop a beautiful crust. This method ensures even cooking throughout while maintaining maximum moisture retention.
Braising Method
Braising produces the most tender results but requires patience and proper technique. I begin by searing the seasoned chops in a heavy-bottomed Dutch oven to develop flavor through the Maillard reaction.
After searing, I remove the chops and build a flavorful braising liquid using:
- 2 cups chicken or vegetable broth
- 1 cup diced onions
- 2 carrots, sliced
- 2 celery stalks, chopped
- Fresh herbs (thyme, rosemary, sage)
The chops return to the pot, which goes into a 325°F oven for 45-60 minutes. The combination of moist heat and extended cooking time breaks down connective tissues completely.
Sous Vide Precision
Sous vide cooking offers the ultimate control over texture and doneness. By cooking in a precisely controlled water bath, I can achieve perfect results every time.
I season the chops and seal them in vacuum bags with a small amount of fat (butter or oil) and aromatics. The water bath temperature depends on desired texture:
| Temperature | Time | Texture Result |
|---|---|---|
| 140°F | 2-3 hours | Firm, traditional |
| 145°F | 2-3 hours | Tender, juicy |
| 150°F | 3-4 hours | Very tender |
| 155°F | 4-6 hours | Fall-apart tender |
After sous vide cooking, I finish with a quick sear in a hot pan to develop surface color and texture.
Seasoning and Flavor Enhancement
Proper seasoning enhances natural pork flavors while contributing to the overall eating experience. My approach to seasoning has evolved from simple salt and pepper to complex flavor profiles that complement the meat’s natural characteristics.
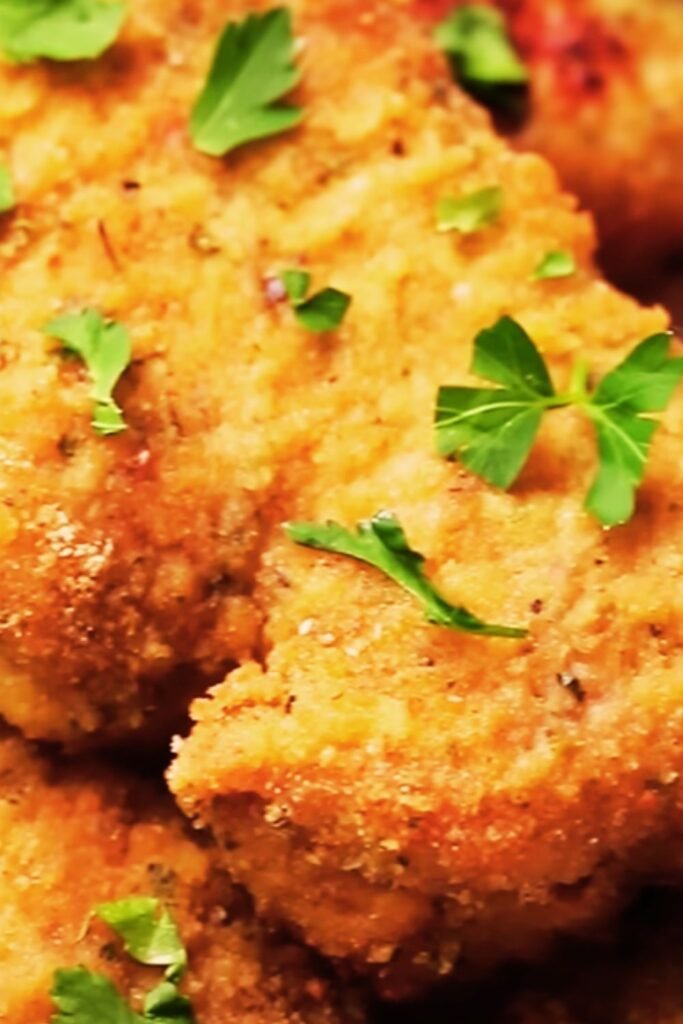
Dry Rub Combinations
Dry rubs create flavorful crusts while helping retain moisture during cooking. My signature blend includes:
- 2 tablespoons brown sugar
- 1 tablespoon paprika
- 1 teaspoon garlic powder
- 1 teaspoon onion powder
- 1 teaspoon dried thyme
- 1/2 teaspoon black pepper
- 1/2 teaspoon salt
- 1/4 teaspoon cayenne pepper
The sugar caramelizes during cooking, creating depth and complexity. The spices penetrate the surface, building layers of flavor that complement rather than overwhelm the pork.
Fresh Herb Applications
Fresh herbs bring brightness and aromatic complexity to pork chops. I prefer hardy herbs like rosemary, thyme, and sage, which withstand cooking temperatures while releasing essential oils that infuse the meat.
For delicate herbs like parsley, chives, or cilantro, I add them after cooking or use them in finishing sauces to preserve their bright flavors.
Fat and Oil Selection
The choice of cooking fat significantly impacts flavor development. I use different fats depending on the cooking method and desired flavor profile:
High-Heat Cooking: Avocado oil, grapeseed oil, or clarified butter for their high smoke points
Medium-Heat Cooking: Regular butter, olive oil, or coconut oil for flavor enhancement
Finishing: Compound butters, herb oils, or flavored salts for final flavor layers
Temperature Control and Timing
Achieving perfect results requires precise temperature control and understanding how timing affects texture development. My approach to temperature management has evolved through experience and understanding of food science principles.
Internal Temperature Guidelines
Pork safety guidelines have changed over the years, and modern pork can be safely consumed at lower temperatures than previously recommended. The USDA now recommends cooking pork to an internal temperature of 145°F followed by a 3-minute rest period.
However, for maximum tenderness in thick chops, I often cook to slightly higher temperatures:
| Doneness Level | Internal Temperature | Rest Time | Texture Description |
|---|---|---|---|
| Medium-Rare | 145°F | 5-10 minutes | Slightly pink, very juicy |
| Medium | 150°F | 5-10 minutes | Pale pink, tender |
| Medium-Well | 155°F | 3-5 minutes | Light pink, firm but moist |
| Well-Done | 160°F+ | 3-5 minutes | No pink, can be dry |
Resting Importance
Resting allows juices to redistribute throughout the meat after cooking. During cooking, heat drives moisture toward the center of the chop. Resting time allows these juices to flow back toward the surface, ensuring every bite is moist and flavorful.
I typically rest thick chops for 5-10 minutes under loose foil. This time also allows carryover cooking to bring the internal temperature up an additional 5-10 degrees.
Carryover Cooking Calculations
Understanding carryover cooking prevents overcooking. Thick chops continue cooking after removal from heat, with internal temperature rising 5-15 degrees depending on cooking method and thickness.
When using high-heat methods like grilling or pan-searing, I remove chops when they’re 5-10 degrees below target temperature. For low-heat methods like braising or slow roasting, carryover is minimal.
Troubleshooting Common Problems
Through my cooking journey, I’ve encountered and solved numerous problems that can prevent achieving perfect pork chops. Understanding these issues helps avoid disappointment and ensures consistent results.
Dryness Issues
Dry pork chops result from several factors, with overcooking being the most common cause. However, other factors contribute to dryness:
Insufficient Fat Content: Lean chops dry out more quickly than well-marbled cuts. Adding fat through barding, stuffing, or sauce helps compensate.
Rapid Temperature Changes: Moving from high heat to low heat too quickly can shock proteins, causing them to contract and expel moisture.
Inadequate Resting: Cutting into chops immediately after cooking allows juices to escape onto the cutting board rather than staying in the meat.
Toughness Problems
Tough pork chops usually indicate insufficient cooking time for collagen breakdown or incorrect temperature management. The solution involves understanding the difference between muscle protein coagulation and connective tissue breakdown.
Muscle proteins begin contracting around 140°F, but connective tissue breakdown requires sustained temperatures between 160-180°F over extended periods. This seeming contradiction requires careful cooking method selection.
Uneven Cooking
Uneven cooking stems from several sources:
Thickness Variations: Pounding or butterflying thick sections creates uniformity
Temperature Inconsistencies: Using an oven thermometer ensures accurate temperature control
Overcrowding: Proper spacing allows even heat circulation
Cold Spots: Rotating pans and moving chops ensures even exposure to heat
Serving Suggestions and Accompaniments
The perfect pork chop deserves equally impressive accompaniments that complement rather than compete with the star of the show. My approach to side dishes focuses on balancing flavors, textures, and nutritional components.
Classic Pairings
Traditional accompaniments work well because they’ve been tested through generations of cooking. Apple-based sides naturally complement pork’s sweet undertones, while acidic elements cut through richness.
Apple Preparations: Sautéed apples with onions, apple chutney, or baked apple slices seasoned with cinnamon and thyme
Starch Options: Mashed sweet potatoes, roasted fingerling potatoes, or wild rice pilaf provide satisfying bases that absorb flavors
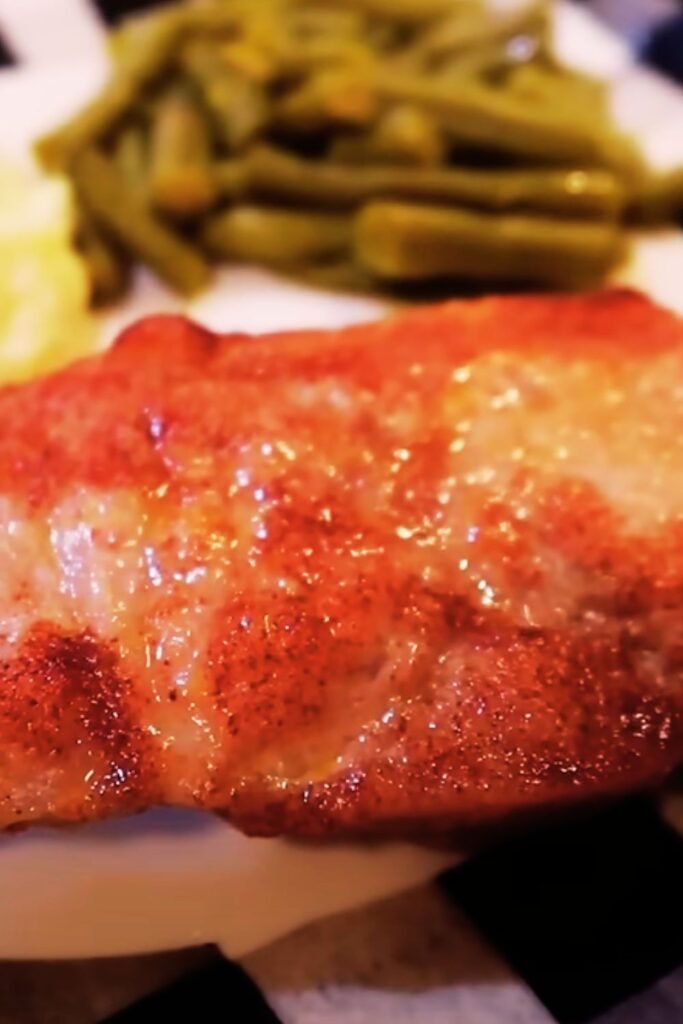
Vegetable Selections: Roasted Brussels sprouts, braised red cabbage, or sautéed green beans add color and nutritional balance
Modern Flavor Combinations
Contemporary approaches to pork chop accompaniments explore international flavor profiles and unexpected combinations that create memorable dining experiences.
Asian-Inspired: Steamed jasmine rice with stir-fried vegetables and a ginger-soy glaze
Mediterranean Style: Roasted vegetables with herbs, quinoa, and a lemon-herb sauce
Southwestern Approach: Black bean and corn salad with cilantro-lime dressing and roasted poblano peppers
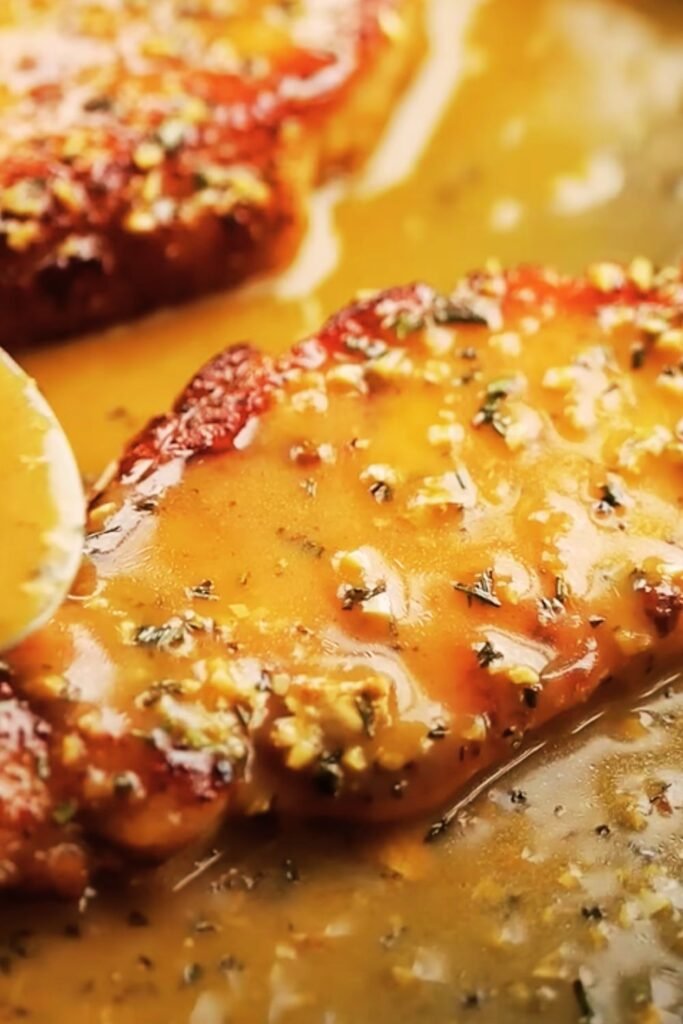
Sauce Considerations
Sauces can enhance or mask the natural flavors of perfectly cooked pork chops. My preference leans toward lighter preparations that add moisture and complementary flavors without overwhelming the meat.
Pan Gravies: Using cooking drippings creates sauces that naturally complement the pork
Fruit-Based Sauces: Cherry, cranberry, or peach sauces provide sweetness and acidity
Herb Sauces: Chimichurri, pesto, or herb butter add freshness and aromatic complexity
| Sauce Type | Flavor Profile | Best Pairing | Preparation Time |
|---|---|---|---|
| Pan Gravy | Rich, meaty | All cooking methods | 10-15 minutes |
| Fruit Compote | Sweet-tart | Grilled or roasted | 20-30 minutes |
| Herb Sauce | Fresh, aromatic | Simple preparations | 5-10 minutes |
| Cream Sauce | Rich, smooth | Braised chops | 15-20 minutes |
Storage and Reheating
Proper storage and reheating techniques preserve the quality of leftover pork chops, maintaining as much of the original texture and flavor as possible.
Refrigeration Guidelines
Cooked pork chops should be refrigerated within two hours of cooking and consumed within 3-4 days for optimal quality and safety. I store them in airtight containers or wrapped tightly in plastic wrap to prevent moisture loss and flavor absorption from other foods.
For meal prep purposes, I often cook extra chops specifically for later use, slightly undercooking them to account for reheating.
Freezing Considerations
Properly wrapped cooked pork chops can be frozen for up to three months. I wrap individual chops in plastic wrap, then place them in freezer bags with as much air removed as possible.
Freezing affects texture somewhat, making previously tender chops slightly less succulent. However, proper reheating techniques can minimize these effects.
Reheating Methods
Reheating requires gentle heat to avoid further cooking the meat. My preferred methods maintain moisture while bringing the chops back to serving temperature.
Oven Method: Wrap chops in foil with a small amount of liquid (broth, apple juice, or water) and heat at 325°F until warmed through
Stovetop Method: Add chops to a covered pan with a small amount of liquid over low heat, turning once
Microwave Method: Place chops on a microwave-safe plate, cover with damp paper towel, and heat in 30-second intervals
Advanced Techniques
Once you’ve mastered basic pork chop preparation, advanced techniques can elevate your cooking to restaurant quality levels. These methods require more time and attention but produce exceptional results.
Compound Seasoning
Creating complex flavor profiles through layered seasoning applications builds depth that simple salt and pepper cannot achieve. I apply different seasonings at various stages of the cooking process.
Initial Seasoning: Salt applied 40 minutes before cooking draws out moisture, then gets reabsorbed along with flavor compounds
Pre-Cooking Rub: Spice blends applied just before cooking create surface flavors and appealing color
Finishing Seasonings: Fresh herbs, flavored salts, or aromatic oils added after cooking provide bright top notes
Temperature Layering
Professional kitchens often use multiple temperature zones during cooking to achieve optimal results. This technique involves starting at one temperature and finishing at another, each serving a specific purpose.
Low-Start Method: Beginning at 225°F breaks down connective tissues, then finishing at 450°F creates surface caramelization
High-Start Method: Searing at high temperature develops flavor, then finishing low ensures even doneness
Moisture Management
Advanced moisture management goes beyond simple brining to create ideal texture throughout the cooking process. This involves understanding how different moisture sources interact with heat and proteins.
Steam Injection: Adding small amounts of liquid during covered cooking creates a moist environment that prevents surface drying
Fat Basting: Continuously spooning rendered fat or added fats over the surface maintains moisture and builds flavor
Humidity Control: Using covered pans, foil tenting, or water pans in ovens creates controlled humid environments
Nutritional Considerations
Understanding the nutritional aspects of pork chops helps make informed decisions about preparation methods and portion sizes while maintaining the focus on flavor and texture.
Protein Quality
Pork provides high-quality complete proteins containing all essential amino acids. A typical 6-ounce serving contains approximately 35-40 grams of protein, making it an excellent choice for muscle maintenance and growth.
The cooking methods I recommend preserve protein quality while enhancing digestibility through proper heat application.
Fat Content Variables
Different cuts contain varying amounts of fat, which affects both flavor and nutritional profiles. Understanding these differences helps in menu planning and cooking method selection.
| Cut Type | Total Fat (per 6 oz) | Saturated Fat | Calories | Protein |
|---|---|---|---|---|
| Rib Chop | 12-15g | 4-5g | 280-320 | 35-38g |
| Center Cut | 8-12g | 3-4g | 240-280 | 38-40g |
| Sirloin | 10-14g | 3-5g | 260-300 | 36-39g |
| Shoulder | 15-18g | 5-6g | 320-360 | 32-35g |
Mineral Content
Pork chops provide essential minerals including iron, zinc, phosphorus, and selenium. Proper cooking techniques preserve these nutrients while making them more bioavailable.
The minerals in pork support immune function, bone health, and energy metabolism, making properly prepared pork chops a nutritious choice for regular meals.
Q&A Section
Q: How thick should pork chops be for the best melt-in-your-mouth results? I recommend 1.5 to 2-inch thick chops for optimal results. This thickness allows enough time for connective tissues to break down while maintaining moisture throughout the cooking process. Thinner chops cook too quickly and often become tough before proper tenderization occurs.
Q: Can I achieve tender results with lean pork chops? Yes, but it requires more careful attention to cooking method and timing. Lean chops benefit from brining, marinating, or cooking in moist environments. I often use braising or sous vide methods for lean cuts to ensure maximum tenderness.
Q: What’s the biggest mistake people make when cooking pork chops? The most common mistake is cooking at too high a temperature for too short a time. This approach cooks the outside while leaving tough connective tissues intact inside. Low and slow cooking methods produce much better results.
Q: How do I know when my pork chops are done without overcooking them? I always use an instant-read thermometer inserted into the thickest part of the chop. Target 145°F for medium doneness with a 5-minute rest. The meat should feel firm but still give slightly when pressed.
Q: Can I prepare pork chops ahead of time for entertaining? Absolutely! I often use the reverse searing method, cooking chops to about 130°F earlier in the day, then finishing with a quick sear when guests arrive. This approach ensures perfect timing and temperature control.
Q: What’s the best way to prevent pork chops from curling during cooking? Light scoring of the fat edge prevents curling. Make shallow cuts about 1/4 inch deep every inch along the fat edge. This technique allows the fat to render properly without causing the chop to curl.
Q: Why do my pork chops sometimes turn out dry even when I don’t overcook them? Dryness often results from inadequate fat content in the cut or insufficient moisture retention during cooking. Try brining lean chops or adding fat through barding or compound butter applications during cooking.
Q: Is it necessary to bring pork chops to room temperature before cooking? While not absolutely necessary, bringing chops to room temperature (about 30 minutes out of refrigeration) promotes more even cooking. Cold chops straight from the refrigerator can result in overcooked exteriors and undercooked centers.
Q: What’s the difference between marinating and brining for pork chops? Brining primarily focuses on moisture retention through salt solutions, while marinating adds flavors through acids, oils, and aromatics. Both techniques can be used together for maximum flavor and tenderness.
Q: Can I use these techniques with bone-in and boneless chops equally? Most techniques work for both, but timing adjustments are necessary. Bone-in chops typically require 5-10 minutes longer cooking time, and the bone helps retain moisture naturally. Boneless chops cook faster but may need additional moisture management.
Q: How do I reheat leftover pork chops without making them tough? Gentle reheating is key. I prefer wrapping chops in foil with a small amount of liquid and warming in a 325°F oven. Avoid high heat or microwave reheating without covering, as these methods can make the meat tough and dry.
Q: What should I do if my pork chops are cooking too quickly on the outside? Reduce heat immediately and consider finishing in a lower-temperature oven. You can also create a foil tent over the chops to slow surface browning while allowing interior cooking to continue.