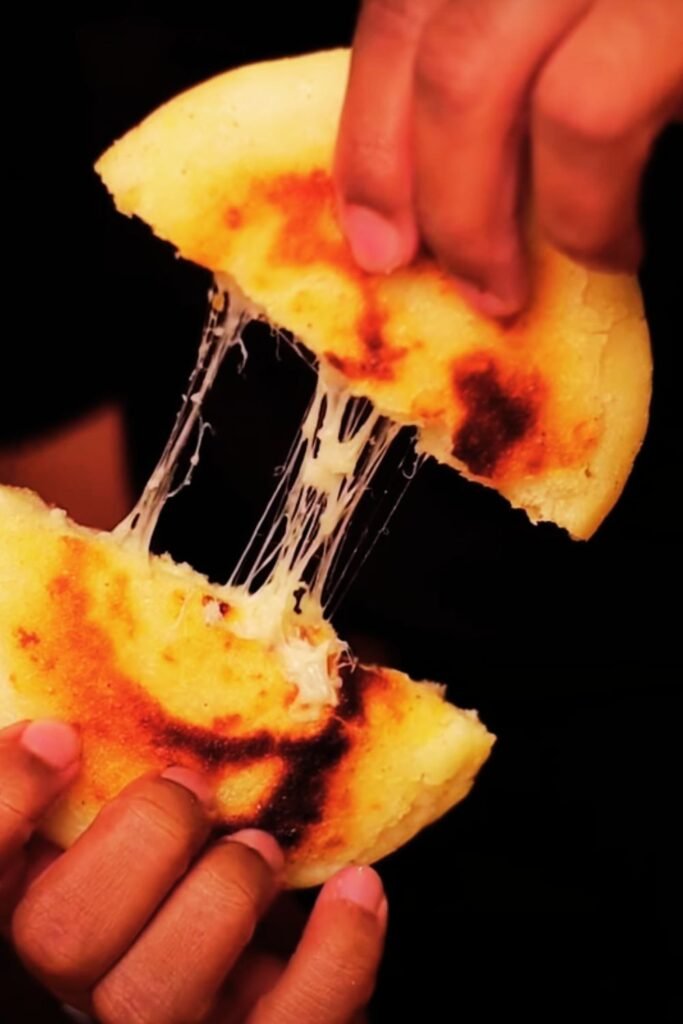
There’s something absolutely magical about the first bite of a perfectly made arepa con queso. The crispy exterior gives way to a tender, pillowy interior, while molten cheese stretches in delicious strings that make your heart sing. I’ve been perfecting my arepa recipe for over a decade, and I’m thrilled to share everything I’ve learned about creating these Venezuelan and Colombian treasures in your own kitchen.
Arepas con queso aren’t just a meal – they’re a cultural experience wrapped in golden cornmeal goodness. Whether you’re looking for a satisfying breakfast, a quick lunch, or a comforting dinner, these cheese-filled delights deliver every single time. My journey with arepas began during a trip to Caracas, where I watched street vendors craft these beauties with such skill and passion that I knew I had to master the technique myself.
Understanding the Arepa Foundation
Arepa : A round, flat bread made from pre-cooked white or yellow corn flour, traditionally stuffed with various fillings
Harina de Maíz Precocida : Pre-cooked corn flour specifically designed for making arepas, with Harina P.A.N. being the most recognized brand
Masa : The dough formed when mixing corn flour with water and salt, which should have a smooth, pliable consistency
Budare : Traditional Venezuelan griddle used for cooking arepas, though any heavy-bottomed pan works excellently
The beauty of arepas lies in their simplicity. Unlike regular bread that requires yeast and rising time, arepas come together quickly with just three basic ingredients. However, don’t let this simplicity fool you – achieving the perfect texture requires understanding the proper ratios and techniques.
Essential Ingredients for Perfect Arepas con Queso
| Ingredient | Quantity | Purpose | Quality Notes |
|---|---|---|---|
| Pre-cooked white corn flour | 2 cups | Forms the base structure | Use Harina P.A.N. or Goya brand for authentic flavor |
| Warm water | 2½ cups | Hydrates the flour | Temperature should be comfortably warm to touch |
| Salt | 1 teaspoon | Enhances flavor | Fine sea salt distributes more evenly |
| Mozzarella cheese | 8 oz, shredded | Primary filling | Low-moisture variety melts better |
| Queso fresco | 4 oz, crumbled | Adds authentic flavor | Can substitute with farmer’s cheese |
| Venezuelan white cheese | 4 oz, grated | Traditional touch | Queso llanero if available |
Step-by-Step Arepa Preparation
Creating the Perfect Masa
I always start by warming my water to just the right temperature – it should feel like a comfortable bath. Too hot, and you’ll create lumps; too cool, and the flour won’t hydrate properly.
• Dissolve the salt: Add salt to warm water and stir until completely dissolved • Add flour gradually: Pour the corn flour into the water while stirring constantly with a wooden spoon • Mix thoroughly: Continue stirring for 2-3 minutes until no dry flour remains • Rest the dough: Let the mixture sit for 5 minutes to fully hydrate • Knead briefly: Use your hands to knead the dough for 1-2 minutes until smooth
The dough should feel soft and pliable, similar to Play-Doh. If it’s too dry, add water one tablespoon at a time. If it’s too wet, sprinkle in more flour gradually.
Shaping Your Arepas
Portion the dough into 8 equal pieces, each about the size of a tennis ball. I like to weigh mine to ensure consistency – each should be approximately 3.5 ounces.
• Form balls: Roll each portion between your palms until perfectly round • Flatten carefully: Press each ball between your palms to create a disc about ½ inch thick • Smooth the edges: Run your finger around the perimeter to eliminate cracks • Create uniform thickness: Ensure each arepa is evenly thick for consistent cooking
The key to beautiful arepas is taking your time with this step. Cracks in the edges will expand during cooking, so I always spend extra time making sure my edges are perfectly smooth.
Cooking Techniques for Golden Perfection
Griddle Method (Traditional)
Heat a heavy-bottomed pan or griddle over medium heat. I prefer cast iron for its even heat distribution, but any heavy pan works well.
| Cooking Stage | Temperature | Time | Visual Cues |
|---|---|---|---|
| Initial searing | Medium-high | 7-8 minutes per side | Golden brown crust forms |
| Oven finishing | 350°F | 15-20 minutes | Hollow sound when tapped |
| Resting | Room temperature | 5 minutes | Steam settles, easier to cut |
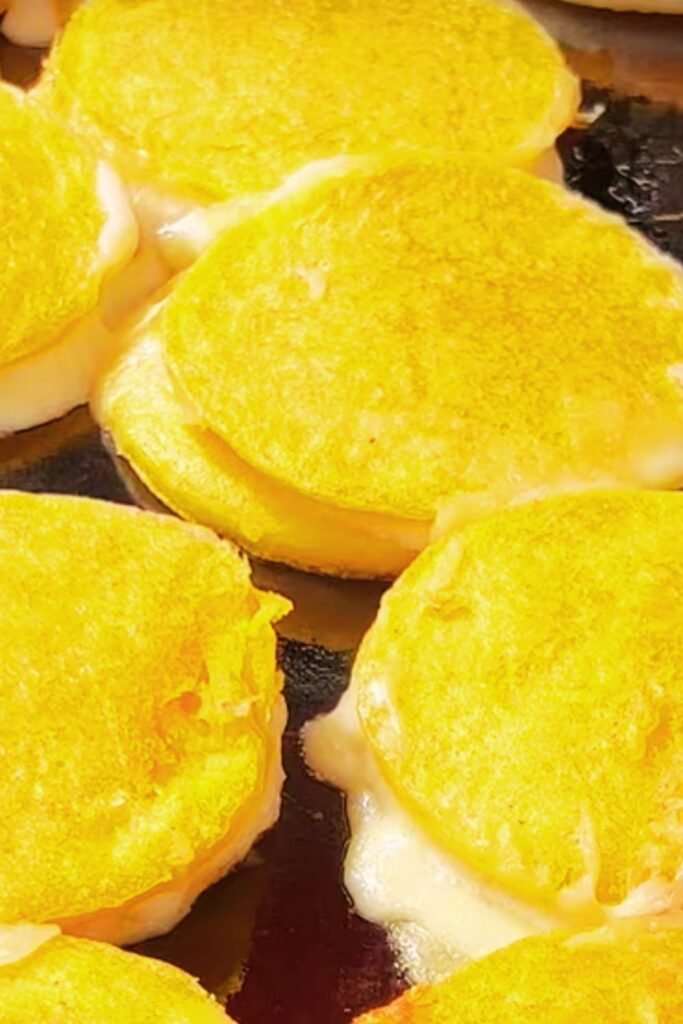
Cook the arepas for 7-8 minutes on the first side without moving them. You’ll know they’re ready to flip when the bottom is golden brown and they release easily from the pan. Flip carefully and cook the second side for another 7-8 minutes.
Oven Finishing
After both sides are golden, transfer the arepas to a 350°F oven for 15-20 minutes. This ensures the interior cooks completely while maintaining the crispy exterior. They’re done when they sound hollow when tapped – just like testing bread.
Cheese Selection and Preparation
The cheese filling is where arepas con queso truly shine. I’ve experimented with countless combinations over the years, and my favorite blend creates the perfect balance of meltability and flavor.
Traditional Venezuelan Blend : Combines queso llanero, queso guayanés, and a touch of queso de freír
Accessible Alternative : Mix mozzarella, queso fresco, and a small amount of cream cheese
Flavor Enhancement : Add finely chopped chives or a pinch of garlic powder to the cheese mixture
The secret to amazing cheese-filled arepas is using cheese at room temperature. Cold cheese doesn’t distribute evenly and can cause the arepa to crack when you stuff it.
Assembly and Stuffing Techniques
Once your arepas have rested for 5 minutes after cooking, it’s time for the most exciting part – adding the cheese!
• Create the pocket: Use a sharp knife to cut about ¾ of the way through each arepa • Open gently: Use your fingers to create a pocket, being careful not to tear the walls • Stuff generously: Add about ¼ cup of cheese mixture to each arepa • Seal if desired: Some prefer to leave them open, others press the edges lightly together
I learned from a Venezuelan grandmother that the key is being generous with the cheese but not overstuffing. You want the cheese to melt and flow slightly, but not ooze out completely.
Nutritional Information and Health Benefits
| Nutrient | Per Arepa con Queso | Daily Value % |
|---|---|---|
| Calories | 285 | – |
| Protein | 12g | 24% |
| Carbohydrates | 38g | 13% |
| Fat | 8g | 12% |
| Fiber | 3g | 12% |
| Calcium | 245mg | 25% |
| Iron | 2.1mg | 12% |
Arepas made from pre-cooked corn flour are naturally gluten-free, making them an excellent option for those with celiac disease or gluten sensitivity. The corn flour is also enriched with vitamins and minerals, particularly iron and B vitamins.
Serving Suggestions and Accompaniments
My favorite way to serve arepas con queso is with a selection of traditional accompaniments that complement their rich, cheesy interior.
• Fresh avocado slices: The creamy texture pairs beautifully with the cheese • Pico de gallo: Adds freshness and acidity to balance the richness
• Black beans: Provides protein and earthy flavors • Plantain chips: Offers delightful textural contrast • Hot sauce: Venezuelan or Colombian ají adds authentic heat • Fresh cilantro: Brightens the overall flavor profile
For breakfast, I love serving arepas con queso alongside scrambled eggs and fresh fruit. The combination creates a satisfying meal that keeps me energized throughout the morning.
Troubleshooting Common Issues
Problem: Arepas crack during cooking Solution: The dough was likely too dry. Add water gradually until the dough is pliable and smooth.
Problem: Centers remain raw Solution: Lower the heat and cook longer on each side before transferring to the oven.
Problem: Cheese leaks out during cooking Solution: Don’t overstuff, and ensure the arepa walls are thick enough to contain the filling.
Problem: Tough, chewy texture Solution: The water was probably too hot when mixing, or the dough was overworked.
Storage and Reheating Methods
| Storage Method | Duration | Best Practice |
|---|---|---|
| Room temperature | 2 days | Wrap in clean kitchen towel |
| Refrigerator | 5 days | Store in airtight container |
| Freezer | 3 months | Wrap individually in plastic wrap |
To reheat refrigerated arepas, I slice them open and warm them in a dry skillet for 2-3 minutes per side. For frozen arepas, thaw completely before reheating, or bake directly from frozen at 350°F for 20-25 minutes.
Regional Variations and Cultural Significance
Throughout my travels in South America, I’ve discovered fascinating regional differences in arepa preparation and filling preferences.
Venezuelan Style : Typically larger and fluffier, often split completely open and stuffed generously
Colombian Style
: Usually smaller and denser, sometimes topped rather than stuffed
Coastal Variations : Often include coconut milk in the dough for added richness and tropical flavor
In Venezuela, arepas aren’t just food – they’re a symbol of national identity. Families often gather around the kitchen to make them together, with each generation passing down their preferred techniques and secret ingredient combinations.
Advanced Tips from Professional Kitchens
After working with several Venezuelan chefs, I’ve picked up some professional techniques that elevate homemade arepas to restaurant quality.
• Double-cooking method: Some chefs partially cook arepas on the griddle, then finish them in a very hot oven for extra crispiness • Steam finishing: Place cooked arepas in a steamer for 2-3 minutes to ensure the center is perfectly tender • Cheese timing: Add cheese just before the final oven stage to prevent overcooking • Oil brushing: Lightly brush the exterior with oil before the final cooking stage for extra golden color
Pairing with Traditional Beverages
While exploring authentic pairings, I’ve found several beverages that complement arepas con queso beautifully:
• Café con leche: The rich coffee balances the cheese perfectly • Fresh fruit juices: Mango, passion fruit, or guava provide acidic contrast • Chicha: Traditional fermented corn beverage • Agua fresca: Light, refreshing flavored waters • Hot chocolate: Especially wonderful for breakfast arepas
Q&A Section
Q: Can I make arepas without pre-cooked corn flour? I don’t recommend it. Regular corn flour or cornmeal won’t give you the proper texture. Pre-cooked corn flour has been specially processed to create the right consistency for arepas. If you can’t find Harina P.A.N., look for other brands of pre-cooked white corn flour at Latin American grocery stores.
Q: Why do my arepas fall apart when I try to stuff them? This usually happens when the dough is too dry or when you try to stuff them while they’re still too hot. Make sure your dough is properly hydrated and let the arepas cool for at least 5 minutes before cutting. Also, don’t cut too deep – about ¾ of the way through is perfect.
Q: Can I make arepas ahead of time? Absolutely! I often make the dough in the morning and keep it covered at room temperature for up to 4 hours. You can also cook the arepas completely and reheat them later. They actually taste fantastic the next day when properly stored and reheated.
Q: What’s the best cheese substitute for hard-to-find Venezuelan cheeses? My go-to substitute is a combination of mozzarella and queso fresco. The mozzarella provides great melting qualities, while the queso fresco adds that slightly tangy flavor you get from traditional Venezuelan cheeses. Some people also add a small amount of cream cheese for extra creaminess.
Q: How do I know when the arepa dough has the right consistency? The dough should feel smooth and pliable, similar to Play-Doh. It shouldn’t stick to your hands, but it also shouldn’t be so dry that it cracks when you shape it. If you can roll it into a ball and then flatten it without the edges cracking, you’ve got the perfect consistency.
Q: Can I freeze the dough before cooking? I don’t recommend freezing the raw dough as it changes the texture. However, you can cook the arepas completely, let them cool, and then freeze them. They reheat beautifully from frozen – just pop them in a 350°F oven for about 20 minutes.
Q: Is there a way to make arepas healthier? While arepas are naturally gluten-free and relatively healthy, you can make them even better by adding finely grated vegetables like zucchini or carrots to the dough. You can also use part-skim mozzarella and add more vegetables to your filling. The corn flour itself is enriched with vitamins and minerals.
Q: What should I do if I can’t find pre-cooked corn flour anywhere? While it’s increasingly available in regular supermarkets, your best bet is Latin American grocery stores. You can also order it online. In a pinch, some people have had success with instant polenta, though the texture won’t be quite the same.
Making perfect arepas con queso is truly an art form that rewards patience and practice. Each time you make them, you’ll discover little ways to improve your technique and adjust the flavors to your family’s preferences. The joy of sharing these warm, cheesy delights with loved ones makes every moment spent perfecting your method absolutely worthwhile.
Remember, the best arepas come from the heart – don’t stress too much about perfection on your first try. Even imperfect arepas taste absolutely delicious, and with each batch, you’ll get closer to that ideal texture and flavor that makes this dish so beloved throughout South America.