When I first discovered the magic of no-bake cheesecakes, my entire dessert-making world changed forever. There’s something absolutely liberating about creating an incredibly rich, creamy, and indulgent dessert without ever turning on your oven. Today, I’m sharing my favorite recipe that combines two beloved treats: the classic richness of chocolate cheesecake with the irresistible crunch and flavor of Oreo cookies.
This no-bake chocolate Oreo cheesecake has become my go-to dessert for every occasion. Whether I’m hosting a summer barbecue, preparing for a birthday celebration, or simply craving something sweet on a Tuesday evening, this recipe never fails to impress. The best part? You can have this stunning dessert ready in just 30 minutes of active preparation time, then let the refrigerator do all the work while you relax.
Understanding No-Bake Cheesecakes
No-Bake Cheesecake: A creamy dessert that achieves its signature texture through chilling rather than baking, typically using gelatin or whipped cream to provide structure.
Setting Agent: An ingredient that helps the cheesecake firm up without heat, such as gelatin, cornstarch, or the natural firmness achieved through proper cream cheese preparation.
Stabilization: The process by which ingredients bind together to create a smooth, sliceable texture that holds its shape when cut.
The science behind no-bake cheesecakes fascinates me. Unlike traditional baked versions that rely on eggs and heat to create structure, no-bake varieties depend on the natural firmness of cream cheese, the stabilizing properties of whipped cream, and the binding power of gelatin when used. This technique originated during hot summer months when home bakers wanted to avoid heating up their kitchens but still craved that beloved cheesecake experience.
Essential Ingredients Breakdown
Creating the perfect no-bake chocolate Oreo cheesecake requires understanding each ingredient’s role in the final product. I’ve learned through countless experiments that ingredient quality and temperature make or break this dessert.
Cream Cheese Foundation The star of any cheesecake, cream cheese must be at room temperature for optimal mixing. I always remove mine from the refrigerator at least two hours before beginning. Cold cream cheese creates lumps that are nearly impossible to eliminate, resulting in a grainy texture that diminishes the entire dessert experience.
Oreo Cookie Components I use Oreo cookies in two distinct ways throughout this recipe. The chocolate cookie portions create our crust base, while I reserve some whole cookies and cream filling for mixing into the cheesecake layer itself. This dual approach ensures Oreo flavor permeates every single bite.
Chocolate Integration For the chocolate element, I prefer using high-quality cocoa powder combined with melted semi-sweet chocolate. This combination provides both deep chocolate flavor and the smooth texture that makes each bite heavenly. Some recipes rely solely on cocoa powder, but I find the addition of melted chocolate creates a more luxurious mouthfeel.
Whipped Cream Considerations Heavy whipping cream adds essential lightness to our dense cheesecake base. I always whip it to soft peaks rather than stiff peaks, as over-whipped cream can make the final texture too airy and unstable.
Detailed Recipe Instructions
Crust Preparation
Ingredients for Crust:
- 36 Oreo cookies (chocolate wafers only)
- 6 tablespoons unsalted butter, melted
- 2 tablespoons granulated sugar
- 1/4 teaspoon salt
I begin by separating the Oreo cookies, scraping the cream filling into a separate bowl for later use. The chocolate cookie portions go into my food processor, where I pulse them into fine crumbs. The texture should resemble coarse sand – not powdery, but not chunky either.
Next, I drizzle the melted butter over the cookie crumbs, add the sugar and salt, then pulse everything together until the mixture holds together when squeezed. This is crucial: the mixture should clump in your hand but crumble apart easily when disturbed.
I press this mixture firmly into the bottom of my 9-inch springform pan, using the bottom of a measuring cup to ensure even distribution. The crust should extend slightly up the sides, creating a shallow well for our filling. Into the refrigerator it goes while I prepare the filling.
Cheesecake Filling Creation
Main Filling Ingredients:
- 24 ounces cream cheese, room temperature
- 1 cup powdered sugar
- 1/2 cup cocoa powder
- 6 ounces semi-sweet chocolate, melted and cooled
- 2 teaspoons vanilla extract
- 1/4 teaspoon salt
- 1 1/2 cups heavy whipping cream
- Reserved Oreo cream filling
- 12 additional Oreo cookies, roughly chopped

The filling process requires patience and attention to detail. I start by beating the room-temperature cream cheese in my stand mixer until completely smooth and fluffy, about 3-4 minutes on medium speed. This step cannot be rushed – any lumps present now will remain in the finished product.
Gradually, I add the powdered sugar, beating continuously until fully incorporated. The mixture should be noticeably lighter in color and texture. Next comes the cocoa powder, which I sift directly into the bowl to prevent clumping. I mix on low speed initially, then increase to medium once the cocoa is mostly incorporated.
The melted chocolate gets added slowly while the mixer runs, followed by vanilla extract and salt. At this point, I scrape down the bowl thoroughly and beat for another minute to ensure complete combination.
In a separate bowl, I whip the heavy cream to soft peaks. This typically takes 2-3 minutes with my stand mixer, but timing varies based on cream temperature and humidity. The cream should hold its shape but still appear glossy and smooth.
Now comes the crucial folding technique. I add one-third of the whipped cream to the chocolate cream cheese mixture, folding gently with a large spoon until mostly combined. I repeat this process with the remaining whipped cream in two additions, being careful not to deflate the airiness we’ve created.
Finally, I fold in the reserved Oreo cream filling and chopped cookies. The cream filling adds extra sweetness and authentic Oreo flavor, while the cookie pieces provide textural interest in every bite.
Assembly and Setting Process
Assembling this cheesecake requires a delicate touch and strategic thinking. I pour the filling over my chilled crust, using an offset spatula to spread it evenly. The surface should be smooth but doesn’t need to be perfect – we’ll be adding toppings later that will hide minor imperfections.
I cover the pan tightly with plastic wrap, ensuring the plastic doesn’t touch the surface of the cheesecake. This prevents condensation from creating water droplets on top. The cheesecake needs at least 6 hours to set properly, but I prefer overnight chilling for optimal texture and easier slicing.
Nutritional Information and Serving Details
| Nutrient | Per Slice (12 servings) | Daily Value % |
|---|---|---|
| Calories | 485 | 24% |
| Total Fat | 32g | 41% |
| Saturated Fat | 19g | 95% |
| Cholesterol | 95mg | 32% |
| Sodium | 345mg | 15% |
| Total Carbs | 48g | 17% |
| Dietary Fiber | 3g | 11% |
| Sugars | 38g | – |
| Protein | 7g | 14% |
| Calcium | 120mg | 9% |
| Iron | 2.1mg | 12% |
Storage and Make-Ahead Tips
| Storage Method | Duration | Quality Notes |
|---|---|---|
| Refrigerator (covered) | 5-7 days | Best texture days 2-4 |
| Freezer (wrapped) | 2-3 months | Thaw overnight in fridge |
| Individual slices | 3-4 days | Wrap separately in plastic |
| Room temperature | 2-3 hours max | Texture deteriorates quickly |
I’ve found that this cheesecake actually improves after the first day. The flavors meld together beautifully, and the texture becomes even more cohesive. When I’m planning ahead for entertaining, I often make this dessert two days before serving for optimal results.
For freezing, I wrap individual slices in plastic wrap, then place them in a freezer-safe container. This method allows me to thaw only what I need, preventing waste and ensuring fresh taste with each serving.
Decoration and Presentation Ideas
The visual presentation of this dessert can elevate it from homemade treat to restaurant-quality finale. I’ve experimented with numerous topping combinations over the years, and here are my most successful approaches:
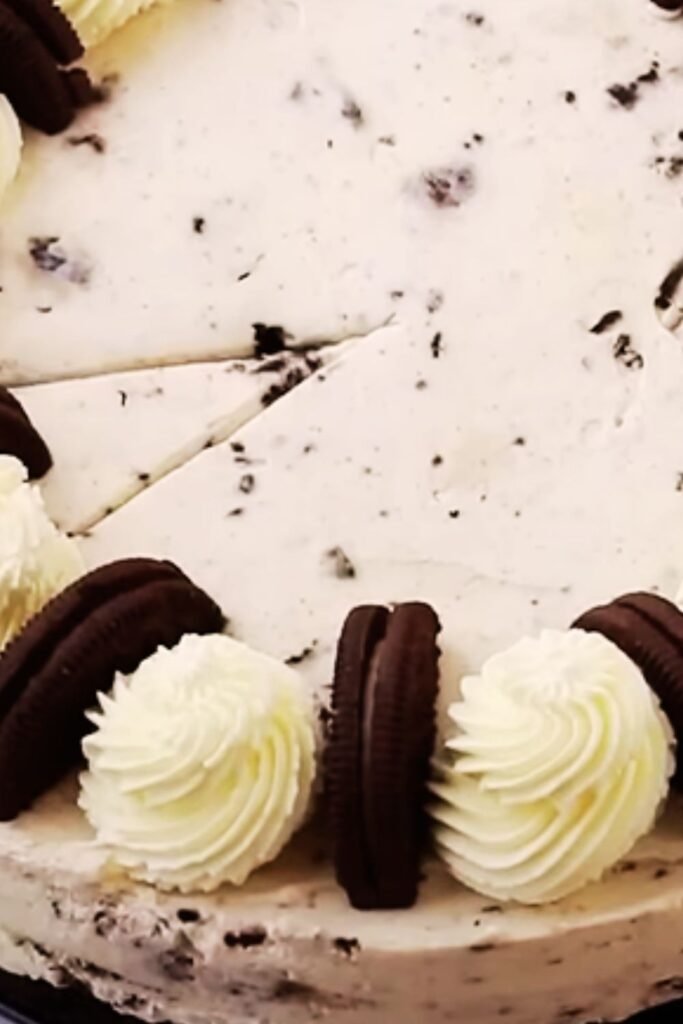
Classic Oreo Garden: I crush additional Oreo cookies and sprinkle them generously over the surface, then arrange whole cookies around the perimeter. Fresh mint leaves add a pop of color and hint of freshness that complements the rich chocolate.
Chocolate Drizzle Elegance: Melted chocolate drizzled in decorative patterns creates professional-looking results with minimal effort. I use both dark and white chocolate for contrast, creating a marbled effect that never fails to impress guests.
Whipped Cream Rosettes: Using a star tip and pastry bag, I pipe whipped cream rosettes around the edge, each topped with a mini Oreo or chocolate chip. This technique requires a bit more skill but creates stunning results.
Troubleshooting Common Issues
Through years of making this recipe, I’ve encountered and solved virtually every problem that can arise. Here’s my troubleshooting guide for the most common issues:
Grainy Texture Problems: This almost always stems from cold cream cheese or over-mixing after adding the whipped cream. Always ensure cream cheese reaches room temperature, and fold ingredients gently rather than beating.
Runny Consistency: Usually caused by under-whipped cream or warm chocolate being added too quickly. The chocolate must cool completely before incorporation, and cream should hold soft peaks consistently.
Cracked Surface: Typically results from temperature shock or over-setting. Avoid moving the cheesecake between extreme temperatures, and don’t leave it uncovered in the refrigerator.
Soggy Crust: Insufficient butter in the crust mixture or inadequate pressing causes this issue. The crust should hold together firmly when pressed and feel slightly moist but not wet.
Seasonal Variations and Adaptations
| Season | Variation | Key Changes |
|---|---|---|
| Summer | Berry Oreo Fusion | Add fresh strawberry puree |
| Fall | Pumpkin Spice Oreo | Include pumpkin puree and warm spices |
| Winter | Peppermint Bark | Add crushed candy canes and mint extract |
| Spring | Lemon Oreo Twist | Incorporate lemon zest and juice |
Each seasonal adaptation maintains the core structure while introducing flavors that complement the time of year. The summer berry version has become particularly popular at my family gatherings, combining the richness of chocolate with bright, fresh fruit flavors.
Advanced Techniques and Professional Tips
After making this recipe countless times, I’ve developed several advanced techniques that elevate the final product:
Temperature Control Mastery: I use an instant-read thermometer to ensure the melted chocolate reaches exactly 85°F before adding it to the cream cheese mixture. This prevents the chocolate from seizing while ensuring proper integration.
Layering Strategy: For special occasions, I create thin layers by dividing the filling in half, adding different mix-ins to each layer. This technique creates beautiful cross-sections when sliced and allows for flavor variety within a single dessert.
Texture Mapping: I deliberately vary the size of Oreo pieces throughout the cheesecake, using finely crushed pieces near the bottom and larger chunks toward the top. This creates textural interest with every bite.
Serving Suggestions and Pairings
The richness of this cheesecake pairs beautifully with various accompaniments that provide contrast and complement the intense chocolate and cookie flavors:
Fresh Fruit Complements: Strawberries, raspberries, and blackberries cut through the richness while adding natural sweetness and acidity. I often arrange them in decorative patterns for special occasions.
Coffee Connections: This dessert partners exceptionally well with espresso, cappuccino, or strong black coffee. The bitter notes in coffee balance the sweetness perfectly.
Textural Additions: Chopped toasted nuts, particularly pecans or hazelnuts, add crunch and complementary flavors. I sometimes create a mixed nut brittle specifically to accompany this cheesecake.
Temperature Play: Serving slightly chilled fruit sauces alongside the cool cheesecake creates temperature contrast that enhances the overall eating experience.
Quality Ingredient Sourcing
The difference between good and exceptional results often lies in ingredient quality. Here’s what I’ve learned about sourcing the best components:
Cream Cheese Selection: I always choose full-fat, name-brand cream cheese for consistency and flavor. Store brands can vary significantly in texture and tang level.
Oreo Cookie Considerations: Original Oreos work best due to their specific cookie-to-cream ratio. Double-stuffed varieties can make the final product too sweet, while reduced-fat versions lack the necessary richness.
Chocolate Quality Matters: Using high-quality cocoa powder and chocolate chips dramatically improves the final flavor profile. I prefer Dutch-processed cocoa for its smoother, less acidic taste.
Heavy Cream Standards: Cream with at least 36% fat content whips properly and maintains stability. Lower-fat alternatives often fail to achieve the necessary texture.
Questions and Answers
Q: Can I make this cheesecake without a springform pan? I’ve successfully made this recipe in regular cake pans, but removal becomes more challenging. Line the pan with parchment paper, leaving overhang for easy lifting. The presentation won’t be as clean, but the taste remains identical.
Q: How do I know when the cheesecake is properly set? The surface should feel firm to gentle touch and not jiggle when the pan is slightly shaken. If a knife inserted near the center comes out mostly clean with just a few moist crumbs, it’s ready to serve.
Q: Can I substitute the Oreo cookies with other sandwich cookies? While possible, different cookies will change the flavor profile significantly. Hydrox cookies work well, but avoid cookies with different cream flavors as they may clash with the chocolate base.
Q: What’s the best way to slice this cheesecake cleanly? I use a sharp, thin-bladed knife dipped in warm water and wiped clean between each cut. This technique prevents the filling from sticking to the blade and creates professional-looking slices.
Q: Can I reduce the sugar content without affecting texture? The powdered sugar contributes to texture as well as sweetness. You can reduce it by up to 1/4 cup, but any more may result in a less stable final product.
Q: Why does my cheesecake sometimes develop a skin on top? This happens when the surface is exposed to air during chilling. Always cover tightly with plastic wrap, ensuring the plastic doesn’t touch the surface to prevent both skin formation and condensation.
Q: Can I add alcohol to this recipe for adult versions? Small amounts of complementary liqueurs like Kahlua or Bailey’s can be incorporated, but reduce other liquid ingredients proportionally to maintain proper consistency.
Q: How far in advance can I prepare this for entertaining? This cheesecake actually improves with time. I often make it 2-3 days before serving, as the flavors develop and meld beautifully. It’s perfect for stress-free entertaining.
Q: What should I do if my filling turns out too thick or too thin? For thick filling, fold in a small amount of additional whipped cream. For thin filling, refrigerate for 30 minutes, then fold in more whipped cream that’s been whipped to slightly stiffer peaks.
Q: Can I make individual portions instead of one large cheesecake? Absolutely! I often use muffin tins lined with paper cups, adjusting the crust and filling proportionally. Individual portions set faster and are perfect for parties or portion control.
This no-bake chocolate Oreo cheesecake represents everything I love about dessert making: it’s approachable enough for beginners yet sophisticated enough to impress the most discerning palates. The combination of creamy chocolate richness with the beloved crunch and flavor of Oreo cookies creates a dessert that satisfies on every level.
Every time I serve this cheesecake, I’m reminded of why I fell in love with no-bake desserts in the first place. There’s something magical about creating such an impressive result without the stress of baking, temperature monitoring, or worrying about cracks and other common cheesecake pitfalls.
The flexibility of this recipe means you can adapt it to suit any occasion, dietary restriction, or flavor preference while maintaining the core appeal that makes it so special. Whether you’re a seasoned baker looking for a reliable showstopper or a novice wanting to create something impressive, this no-bake chocolate Oreo cheesecake will exceed your expectations every single time.