There’s something magical about the aroma of cinnamon rolls wafting through the kitchen on a lazy weekend morning. That sweet, spicy scent drawing everyone to the table, still in their pajamas, coffee in hand. For years, I thought making cinnamon rolls from scratch was reserved for experienced bakers or those with hours to spare. That was until I discovered the game-changing shortcut that is crescent roll dough.
As someone who loves to cut corners in the kitchen (without sacrificing flavor!), I’ve perfected these Easy Crescent Cinnamon Rolls that deliver all the comfort and satisfaction of traditional rolls with a fraction of the effort. No yeast-proofing, no dough-kneading, and no lengthy rising times. Just warm, gooey perfection in under 30 minutes.
Why You’ll Love This Recipe
Before diving into how to make these delightful treats, let me share why this particular recipe has become a staple in my home:
- Time-Saving Wonder: These rolls go from package to plate in less than 30 minutes
- Foolproof Method: Even kitchen novices can nail this recipe on the first try
- Versatile Base: Easily customizable with different fillings and toppings
- Budget-Friendly: Requires minimal ingredients that won’t break the bank
- Family Pleaser: Has consistently earned rave reviews from both kids and adults
I’ve made these for impromptu brunches, holiday mornings, and even as an afternoon pick-me-up with tea. The beauty of this recipe is its simplicity paired with impressive results that will have everyone thinking you spent hours in the kitchen.
Kitchen Equipment You’ll Need
One of the things I love most about this recipe is how little equipment it requires. No stand mixer or specialized baking tools necessary! Here’s what you’ll need:
- 9×13 inch baking pan
- Rolling pin (or a clean wine bottle in a pinch!)
- Measuring spoons
- Knife or pizza cutter
- Small mixing bowl
- Whisk or fork for mixing
- Spatula
- Parchment paper (optional but helpful)
Ingredients Breakdown
Let’s talk about what goes into these easy cinnamon rolls. I’ve broken down each component to help you understand exactly what you need:
For the Rolls:
- 2 cans (8 oz each) refrigerated crescent roll dough
- 4 tablespoons unsalted butter, softened
- 1/2 cup brown sugar, packed
- 2 tablespoons ground cinnamon
- 1/4 teaspoon ground nutmeg (my secret ingredient!)
- 1/4 cup chopped pecans or walnuts (optional)
- 1/4 cup raisins (optional)
For the Glaze:
- 1 cup powdered sugar
- 2-3 tablespoons milk or cream
- 1/2 teaspoon vanilla extract
- Pinch of salt
Ingredient Notes and Substitutions
I believe in making recipes work with what you have on hand, so here are some helpful substitutions:
- Crescent Roll Dough: In a pinch, refrigerated pizza dough or puff pastry can work, though the texture will be slightly different
- Brown Sugar: Can substitute with coconut sugar for a slightly less sweet version
- Butter: For a dairy-free option, coconut oil works wonderfully
- Cinnamon: Using a mix of cinnamon and cardamom creates a more complex flavor profile
- Nutmeg: Can omit or replace with allspice
- Glaze: Cream cheese can be added to the glaze for a tangier finish
Step-by-Step Instructions
Now for the fun part! Follow these simple steps to create your own batch of Easy Crescent Cinnamon Rolls:
Preparing the Dough
- Preheat your oven to 375°F (190°C) and lightly grease your baking pan.
- Open the crescent roll cans and unroll the dough sheets. Important: Don’t separate along the perforations!
- Gently press the perforations together with your fingers to create a seamless sheet of dough.
- If using two cans, place the sheets side by side and press the edges together to form one large rectangle.
Creating the Filling
- In a small bowl, mix together the brown sugar, cinnamon, and nutmeg until well combined.
- Using a spatula or the back of a spoon, spread the softened butter evenly across the entire surface of the dough.
- Sprinkle the sugar-cinnamon mixture evenly over the buttered dough, leaving about a 1/4-inch border around the edges.
- If using, scatter the chopped nuts and raisins evenly over the cinnamon sugar.
Rolling and Cutting
- Starting from the long edge of the rectangle, slowly and tightly roll the dough into a log shape.
- To prevent the log from falling apart, gently pinch the seam to seal it.
- Using a sharp knife or dental floss (my preferred method!), cut the log into 12 equal pieces, about 1-inch thick each.
- Place the rolls cut-side up in your prepared baking pan, allowing a bit of space between each roll for expansion.
Baking to Perfection
- Bake in your preheated oven for 15-18 minutes, or until the rolls are golden brown and fully cooked through.
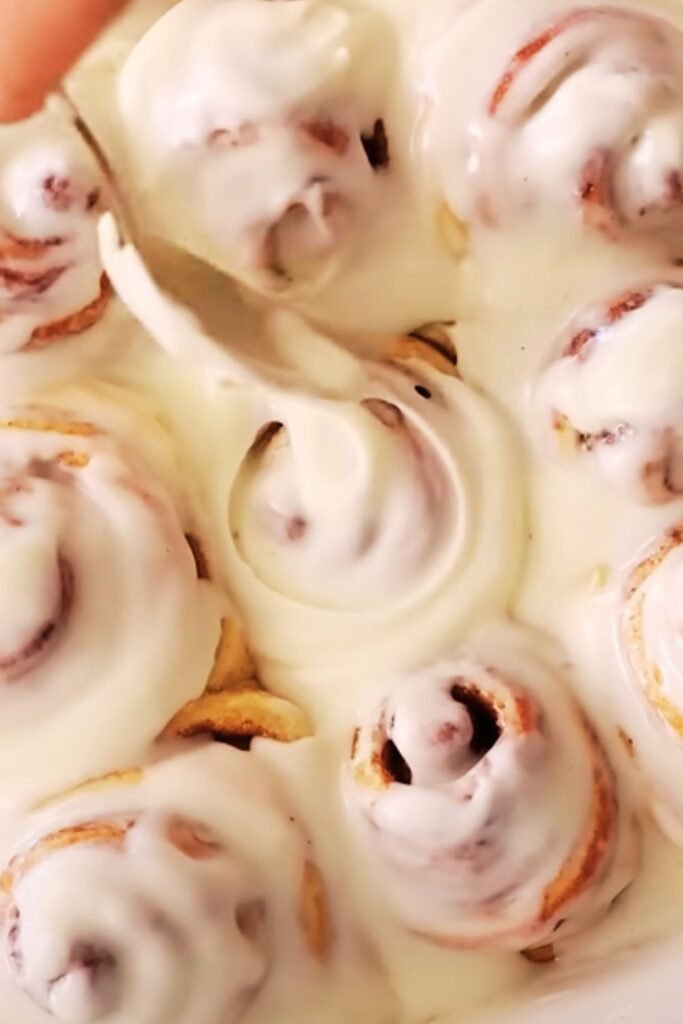
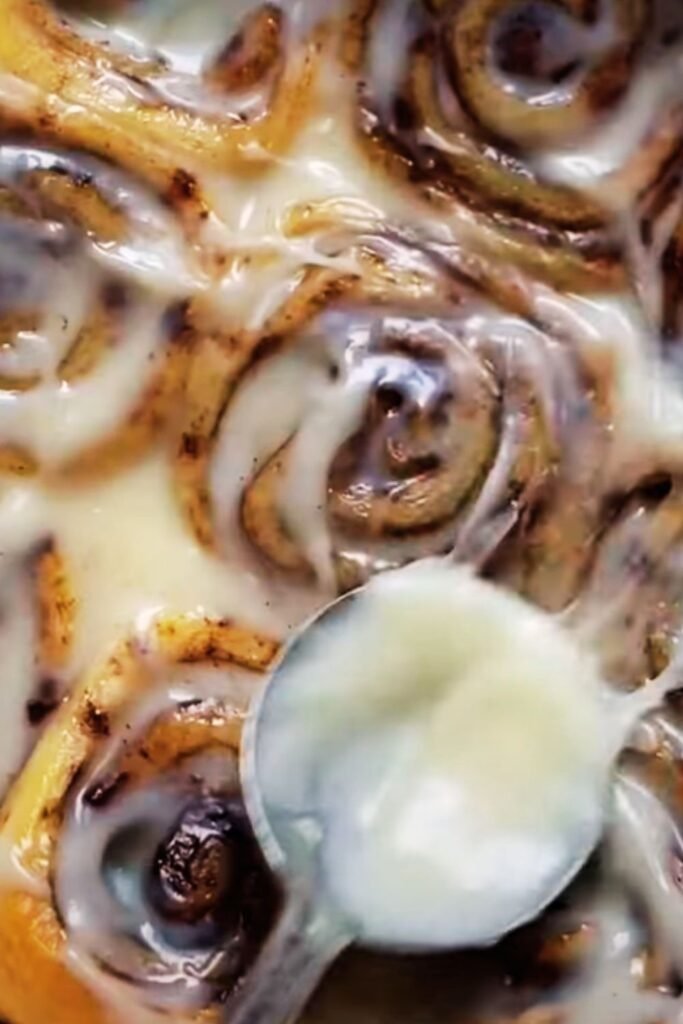
- While baking, prepare the glaze by whisking together powdered sugar, milk, vanilla extract, and salt until smooth.
- Once baked, allow the rolls to cool for 5 minutes before drizzling the glaze over the warm rolls.
Pro Tips for Success
After making these rolls dozens of times, I’ve picked up some tricks that make a big difference:
- Chill the dough: If the dough becomes too soft while working with it, place it in the refrigerator for 5-10 minutes to firm up.
- Use dental floss for cutting: For clean cuts without squishing the roll, slide unflavored dental floss under the log, cross it over the top, and pull to cut through.
- Don’t overbake: These rolls can go from perfect to dry quickly, so start checking at the 13-minute mark.
- Apply glaze strategically: For a prettier presentation, reserve half the glaze to drizzle just before serving.
- Even spacing matters: Leave equal space between rolls for even baking and to allow for expansion.
Common Issues and Solutions
| Problem | Possible Cause | Solution |
|---|---|---|
| Rolls are doughy in center | Undercooked | Bake 2-3 minutes longer, covering with foil if tops are browning too quickly |
| Filling leaks out during baking | Too much butter used | Use less butter or chill rolls for 10 minutes before baking |
| Rolls unravel while baking | Rolling not tight enough | Roll dough more firmly and pinch seams well |
| Glaze is too thick | Not enough liquid | Add milk 1/2 teaspoon at a time until desired consistency |
| Glaze is too thin | Too much liquid | Add more powdered sugar until desired thickness |
| Rolls are too pale | Oven temperature too low | Check oven temperature with separate thermometer |
| Uneven baking | Hot spots in oven | Rotate pan halfway through baking time |
Flavor Variations to Try
One of the reasons I make these rolls so often is that they’re incredibly versatile. Here are some of my favorite variations:
Apple Cinnamon Rolls
Add 1 cup of finely diced apples (Granny Smith works best) to the filling and sprinkle with 1/4 teaspoon of cloves for an autumn-inspired treat.
Orange Cranberry Rolls
Add 1 tablespoon of orange zest to the filling, substitute dried cranberries for raisins, and add orange juice to the glaze instead of milk.
Chocolate Lover’s Rolls
Add 1/3 cup mini chocolate chips to the filling and drizzle with chocolate ganache instead of vanilla glaze.
Pumpkin Spice Rolls
Replace the cinnamon with pumpkin pie spice and add 1/4 cup of pumpkin puree to the glaze for a fall favorite.
Make-Ahead and Storage Tips
While these rolls are best enjoyed fresh from the oven, there are several ways to prepare them in advance:
Make-Ahead Options:
- Refrigerate Before Baking: Prepare rolls up to the point of baking, cover tightly with plastic wrap, and refrigerate overnight. Let sit at room temperature for 20 minutes before baking.
- Freeze Before Baking: Place cut rolls in a disposable aluminum pan, cover tightly with plastic wrap and foil, and freeze for up to 1 month. Thaw overnight in refrigerator before baking.
- Prepare Components Separately: Mix the cinnamon-sugar filling ahead of time and store in an airtight container at room temperature for up to 2 weeks.
Storage Solutions:
- Room Temperature: Store completely cooled rolls in an airtight container for up to 2 days.
- Refrigerator: Extend freshness by refrigerating for up to 5 days.
- Freezer: Wrap individual baked rolls in plastic wrap, then foil, and freeze for up to 3 months.
Reheating Methods:
- Microwave: 15-20 seconds per roll
- Oven: 350°F for 5-7 minutes
- Air Fryer: 300°F for 2-3 minutes
Nutritional Information
I believe in making informed choices about what we eat, so here’s an approximate nutritional breakdown per roll (without optional nuts or raisins):
| Nutrient | Amount per Roll |
|---|---|
| Calories | 210 |
| Total Fat | 9g |
| Saturated Fat | 4g |
| Cholesterol | 10mg |
| Sodium | 310mg |
| Total Carbohydrates | 31g |
| Dietary Fiber | 0.5g |
| Sugars | 18g |
| Protein | 2g |
Note: Values are approximate and may vary based on specific brands used.
Serving Suggestions
These cinnamon rolls are versatile enough to fit into any meal or occasion:
Breakfast Pairings:
- Fresh fruit salad
- Yogurt parfait
- Crispy bacon or breakfast sausage
- Scrambled eggs
Beverage Companions:
- Hot coffee or espresso
- Tea (chai works wonderfully)
- Cold milk or chocolate milk for the kids
- Hot chocolate for a decadent treat
- Fresh-squeezed orange juice
Special Occasion Ideas:
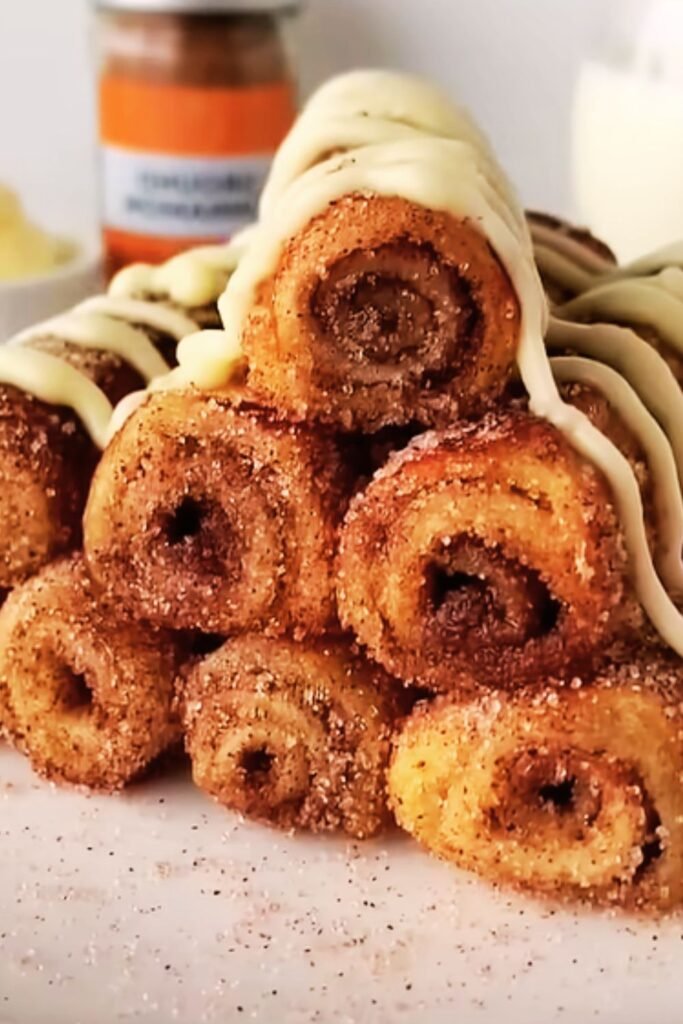
- Create a cinnamon roll board with different glazes and toppings
- Stack in a pyramid for a birthday “cake” alternative
- Serve mini versions as part of a brunch buffet
Why This Recipe Works
As someone who has experimented with many cinnamon roll recipes over the years, I can confidently say that using crescent roll dough creates a uniquely delightful texture. Here’s why this shortcut version works so well:
- The Science: Crescent roll dough already contains fat layers that create flakiness similar to a croissant, giving these rolls a light texture that contrasts beautifully with the gooey filling.
- The Convenience Factor: By eliminating the yeast-rising process, you not only save time but also remove the most common point of failure in traditional cinnamon roll recipes.
- The Customization Potential: The neutral flavor of crescent dough provides the perfect canvas for various flavor additions without competing with them.
- The Consistent Results: Unlike homemade dough that can vary based on humidity, temperature, and flour protein content, crescent roll dough delivers reliable results every time.
Frequently Asked Questions
Based on questions I’ve received from friends and family who’ve tried this recipe, here are some helpful answers:
Q: Can I make these the night before and bake in the morning? A: Absolutely! Prepare them completely, cover the pan with plastic wrap, and refrigerate overnight. Let them sit at room temperature for about 20 minutes before baking. You may need to add 2-3 minutes to the baking time.
Q: My rolls seem to unravel during baking. What am I doing wrong? A: This usually happens when the roll isn’t tight enough or the seam isn’t properly sealed. Make sure to roll the dough firmly and pinch the seam well. Chilling the rolled log for 10 minutes before cutting can also help.
Q: Can I use the reduced-fat crescent roll dough? A: Yes, though the texture may be slightly less rich. The baking time remains the same.
Q: How do I know when the rolls are done baking? A: The rolls should be golden brown on top and feel set when gently pressed in the center. If you’re uncertain, you can use a toothpick to check the center of a roll – it should come out clean or with a few moist crumbs.
Q: Can I add cream cheese to the filling? A: Yes! Mix 4 ounces of softened cream cheese with 2 tablespoons of sugar and spread it on the dough before adding the cinnamon-sugar mixture. This creates a cheesecake-like filling that’s divine.
Q: What if I don’t have powdered sugar for the glaze? A: You can make your own by blending granulated sugar in a food processor until fine, then adding a bit of cornstarch. Alternatively, drizzle with honey or maple syrup, or simply dust with granulated sugar while the rolls are still hot.
Q: Is there a way to make these less sweet? A: Reduce the brown sugar in the filling to 1/4 cup and skip the glaze altogether, or make a simple glaze using greek yogurt with just a touch of honey.
Q: My family doesn’t like nuts. Will the recipe still work without them? A: Absolutely! The nuts are completely optional. You can simply omit them or replace with dried fruit if desired.
Personal Touches and Memories
I first discovered this recipe when hosting an impromptu brunch for friends who showed up unexpectedly one Sunday morning. With limited ingredients and even less time, I spotted two tubes of crescent rolls in my refrigerator and had a moment of inspiration. The resulting cinnamon rolls were such a hit that they’ve become my signature breakfast treat.
What I love most about making these rolls is watching people’s faces light up when they take that first bite. There’s something about the combination of warm dough, cinnamon spice, and sweet glaze that brings instant joy. Even better is when they ask for the complicated recipe, and I get to share just how simple it really is!
Every family has their own traditions, and in mine, these cinnamon rolls have become our Christmas morning staple. I prepare them the night before while the kids are hanging stockings, and then pop them in the oven first thing in the morning. The smell of cinnamon and sugar wafting through the house has become as much a part of our holiday as the presents under the tree.
Final Thoughts
In a world where we’re often made to feel that shortcuts in the kitchen somehow equate to cutting corners on quality, these Easy Crescent Cinnamon Rolls stand as delicious proof to the contrary. They remind us that cooking should be fun, accessible, and most importantly, delicious.
I hope this recipe brings as much joy to your kitchen as it has to mine. Whether you’re making them for a special occasion brunch, a cozy weekend morning, or just because you deserve a treat on a random Tuesday, these rolls are sure to bring smiles all around.
Happy baking! And remember, sometimes the best traditions start with the simplest recipes.
Q&A Section
Q: How do these compare to traditional yeast cinnamon rolls? A: While traditional yeast rolls have a chewier, bread-like texture, these crescent roll versions are lighter and flakier. Think of them as a hybrid between a cinnamon roll and a croissant. They’re different but equally delicious in their own right!
Q: Can I double this recipe for a larger crowd? A: Absolutely! This recipe scales beautifully. For a double batch, use a larger baking sheet or two 9×13 pans. The baking time remains roughly the same, but start checking them at the 15-minute mark.
Q: What’s the best way to serve these for a brunch party? A: For brunches, I like to prepare them the night before and refrigerate unbaked. In the morning, I let them come to room temperature while the oven preheats, then bake fresh. Serve them on a warming tray or in a dish towel-lined basket to keep them warm longer.
Q: If I want to make them more indulgent, what can I add? A: For an extra decadent version, add a layer of softened cream cheese under the cinnamon-sugar mixture, increase the butter by 2 tablespoons, and top with a brown butter glaze instead of the standard vanilla one.
Q: Do these work well with gluten-free crescent roll dough? A: I’ve tried them with several gluten-free crescent roll brands with good success. The texture is slightly different, but still delicious. You may need to bake them 2-3 minutes longer, as gluten-free dough often takes a bit more time to cook through.
Q: What’s your favorite way to eat leftovers? A: My favorite way to enjoy leftover rolls is to split them in half, toast them lightly, and spread with a bit of butter. They also make an amazing base for bread pudding if you have several left over!
Q: Can children help make these? A: Absolutely! This is a very kid-friendly recipe. Little ones can help spread the butter and sprinkle the cinnamon sugar. Older kids can help with rolling and cutting the dough. It’s a great way to introduce children to baking.
Q: What’s the most common mistake people make with this recipe? A: The most common mistake is not sealing the perforations in the crescent dough properly. Take an extra minute to really press those perforations together well, or your filling might leak out during baking.