There’s something almost magical about the perfect roast potato. That contrast between the shatteringly crisp exterior and the fluffy, cloud-like interior is the holy grail of potato cookery. After years of Sunday roasts and holiday feasts, I’ve perfected my technique for creating what I firmly believe are the best roast potatoes you’ll ever taste. These aren’t just good roast potatoes—they’re the kind that will have your dinner guests fighting over the last one and requesting your recipe before they’ve even finished their meal.
The Secret to Perfect Crispy Potatoes
The journey to exceptional roast potatoes isn’t complicated, but it does require attention to detail. I’ve experimented with countless methods over the years, and I’ve distilled the process down to several key principles that make all the difference between merely good potatoes and truly magnificent ones.
The foundation of great roast potatoes lies in creating maximum surface area for crispiness while ensuring the interiors cook to fluffy perfection. This is achieved through proper potato selection, parboiling to roughen the exteriors, and using the right fat at the right temperature.
Choosing the Right Potato
Not all potatoes are created equal when it comes to roasting. The starch content of the potato you select will dramatically impact your results.
- Russet/Idaho potatoes: High starch content makes them fluffy when cooked, perfect for roasting
- Yukon Gold: Medium starch, creates a balance between crispiness and creaminess
- Red potatoes: Lower starch content, hold their shape well but won’t get as fluffy inside
For the ultimate crispy roast potato, I always reach for Russets. Their high starch content creates that ideal fluffy interior, while their starchy exterior transforms into a gloriously crisp shell when properly roasted. Yukon Golds make a fine substitute if you prefer a slightly more buttery flavor, but nothing beats a Russet for sheer textural contrast.
The Essential Equipment
Before we dive into the recipe, I want to share the tools that help me achieve consistent results:
- A large, heavy-duty rimmed baking sheet (aluminum conducts heat beautifully)
- Parchment paper (optional, but helps with cleanup)
- A large pot for parboiling
- A colander for draining
- A wooden spoon or potato masher for roughening the edges
Ingredients That Make the Difference
For 4-6 generous servings:
- 3 pounds Russet potatoes, peeled and cut into 2-inch chunks
- 4 tablespoons high-quality olive oil or duck fat
- 6-8 cloves garlic, lightly crushed with skins on
- 4-5 sprigs fresh rosemary
- 2 tablespoons kosher salt (divided)
- 1 tablespoon baking soda
- Freshly ground black pepper
- 2 tablespoons fresh parsley, finely chopped (for serving)
- Flaky sea salt for finishing
The Method: Breaking It Down Step by Step
Step 1: Preparing the Potatoes
I always start by selecting potatoes of relatively uniform size to ensure even cooking. Peeling is non-negotiable for this recipe—the exposed starchy surface is what gives us that unbeatable crispiness. After peeling, I cut them into chunks roughly 2 inches in size. Any smaller and they’ll disintegrate; any larger and the interiors won’t cook through properly by the time the exteriors are crisp.
Step 2: The Parboil (The Game-Changing Step)
This step is absolutely critical and where many recipes fall short. Here’s my approach:
- Fill a large pot with water (enough to cover the potatoes by at least an inch)
- Add 1 tablespoon of kosher salt and 1 tablespoon of baking soda
- Bring the water to a rolling boil
- Add the potato chunks carefully to the boiling water
- Boil for exactly 10 minutes (set a timer!)
The baking soda raises the pH of the water, which helps break down the exterior of the potatoes more quickly, creating more surface area for crisping. Those rough, craggly edges are potato perfection in the making.
Step 3: The Roughening
Once the potatoes have parboiled for exactly 10 minutes, drain them immediately in a colander. This is where the magic happens. Give the colander a few good shakes to roughen up the edges of the potatoes. You’ll see a starchy paste form on the exterior—this is exactly what we want! This paste will transform into the crispiest crust you’ve ever experienced.

For even better results, I sometimes return the drained potatoes to the hot, empty pot and give them a gentle toss with a wooden spoon. The residual heat helps dry them out further and roughens them up even more.
Step 4: Preheating the Oil
While the potatoes are parboiling, I place my rimmed baking sheet in the oven and preheat to 450°F (230°C). Once the oven reaches temperature, I add the olive oil or duck fat to the hot baking sheet and return it to the oven for about 5 minutes until the fat is shimmering hot.
Using preheated oil is a game-changer. When the parboiled potatoes hit that screaming hot fat, they immediately begin to form a crust rather than absorbing the oil and becoming greasy.
Step 5: The Roast
Now for the main event:
- Carefully remove the hot baking sheet from the oven
- Gently tip the roughened potatoes onto the hot oil (they should sizzle immediately)
- Using tongs or two spoons, turn each potato to coat in the hot oil
- Sprinkle with the remaining 1 tablespoon of kosher salt and a generous amount of freshly ground black pepper
- Arrange the potatoes in a single layer with plenty of space between each piece
- Scatter the garlic cloves and rosemary sprigs among the potatoes
- Return the baking sheet to the oven
The spacing is crucial—overcrowded potatoes will steam rather than roast, and we want each piece to have direct contact with the hot pan on at least one side.
Step 6: The Turn
After about 25 minutes, the bottoms of the potatoes should be developing a beautiful golden crust. This is when I carefully turn each potato using a thin spatula or tongs. Be gentle here—the crust is forming but still delicate.
Return the potatoes to the oven for another 25-30 minutes. During this time, the incredible aroma of rosemary and garlic will fill your kitchen, making the wait almost unbearable.
Step 7: The Final Crisping
For an extra boost of crispiness in the final 10 minutes, I increase the oven temperature to 475°F (245°C). This final blast of heat ensures that every edge and corner achieves that perfect golden-brown crunch.
How to Know When They’re Done
Perfect roast potatoes should be:
- Deeply golden brown on the exterior
- Audibly crisp when tapped with a utensil
- Easily pierced with a fork or knife
- Fluffy and steaming when split open
If you’ve followed the steps above, you should achieve this holy grail of potato perfection after about 55-60 minutes of total roasting time.

Serving Suggestions
These potatoes are so magnificent that they deserve to be the star of the meal, but they pair beautifully with:
- A perfectly roasted chicken with lemon and thyme
- Slow-roasted leg of lamb with mint sauce
- Grilled steak with compound butter
- Baked salmon with dill
- A simple green salad with a bright vinaigrette to cut through the richness
For an extra touch of luxury, I sometimes sprinkle the hot potatoes with finely grated Parmesan cheese right as they come out of the oven. The residual heat melts the cheese into the crispy nooks and crannies, creating an irresistible umami boost.
Make-Ahead Tips and Storage
While these potatoes are at their absolute best fresh from the oven, I understand that meal prep is sometimes necessary. Here’s how to work ahead:
You can parboil the potatoes up to a day in advance. After roughening them up, allow them to cool completely, then store in an airtight container in the refrigerator. When ready to roast, allow them to come to room temperature for about 30 minutes before proceeding with the hot oil step.
If you have leftovers (an unlikely scenario in my house!), store them in the refrigerator and reheat in a 400°F (200°C) oven for about 10-15 minutes. Never microwave them—this will destroy the crispy texture you worked so hard to achieve.
Troubleshooting Common Issues
Even with a foolproof recipe, things can sometimes go awry. Here are solutions to common roast potato problems:
| Problem | Cause | Solution |
|---|---|---|
| Potatoes sticking to the pan | Pan not hot enough when potatoes added | Ensure oil is shimmering hot before adding potatoes |
| Soggy exteriors | Overcrowded pan or oven temperature too low | Give potatoes plenty of space and verify oven temperature with an oven thermometer |
| Potatoes too dark before fully cooked | Oven temperature too high | Reduce temperature by 25°F and cover loosely with foil |
| Undercooked interiors | Potato pieces too large | Cut into smaller, uniform pieces next time |
| Burnt herbs | Added too early in the cooking process | Add herbs in the last 15-20 minutes of roasting |
| Bland flavor | Insufficient seasoning | Season the water generously and add salt immediately after roasting while potatoes are still hot |
Variations to Try
While the classic rosemary and garlic combination is hard to beat, here are some delicious variations to experiment with:
Mediterranean Twist
- Add lemon zest, oregano, and a sprinkle of crumbled feta after roasting
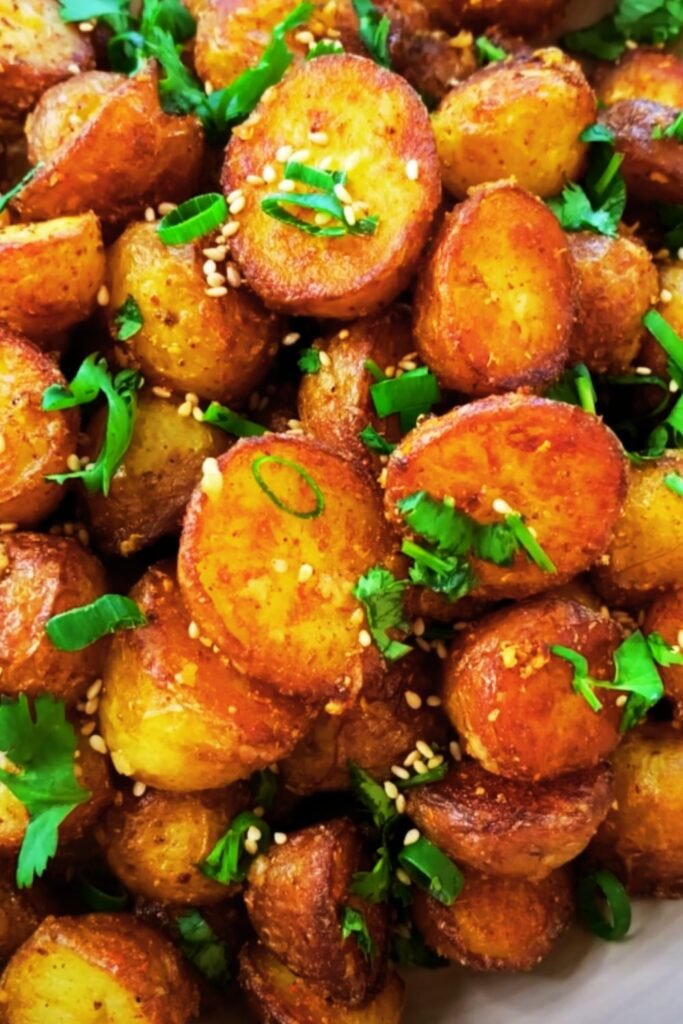
Spicy Kick
- Toss with smoked paprika and cayenne before roasting
- Finish with chopped fresh cilantro
Herb Garden Medley
- Replace rosemary with a mixture of thyme, sage, and parsley
- Add a tablespoon of finely chopped chives just before serving
Truffle Indulgence
- Drizzle with high-quality truffle oil after roasting
- Sprinkle with grated Pecorino Romano cheese
The Complete Recipe
Here’s the entire process from start to finish:
- Preheat oven to 450°F (230°C) with a rimmed baking sheet inside
- Peel 3 pounds of Russet potatoes and cut into 2-inch chunks
- Bring a large pot of water to boil with 1 tablespoon kosher salt and 1 tablespoon baking soda
- Boil potatoes for 10 minutes until exteriors are softened but centers are still firm
- Drain potatoes and shake in colander to roughen edges
- Add 4 tablespoons olive oil or duck fat to the hot baking sheet and return to oven for 5 minutes
- Carefully add roughened potatoes to hot oil, turning to coat
- Season with remaining 1 tablespoon kosher salt and freshly ground black pepper
- Add 6-8 lightly crushed garlic cloves and 4-5 rosemary sprigs
- Roast for 25 minutes, then turn potatoes carefully
- Roast for another 25-30 minutes
- Increase heat to 475°F (245°C) for the final 10 minutes
- Remove from oven, discard rosemary stems (leaving the needles)
- Garnish with fresh parsley and flaky sea salt
- Serve immediately while crackling hot
Nutrient Profile
For those keeping track of nutritional information, here’s a breakdown per serving (assuming 6 servings):
| Nutrient | Amount per Serving |
|---|---|
| Calories | 225 |
| Total Fat | 9g |
| – Saturated Fat | 1.3g |
| Cholesterol | 0mg |
| Sodium | 650mg |
| Total Carbohydrates | 34g |
| – Dietary Fiber | 2g |
| – Sugars | 1g |
| Protein | 4g |
| Vitamin C | 15% DV |
| Potassium | 15% DV |
| Iron | 8% DV |
Questions & Answers
Q: Can I use other types of potatoes if I can’t find Russets? While Russets are ideal, Yukon Golds make an excellent substitute. Their medium starch content will still give you a nice contrast between crispy exterior and fluffy interior. Waxy potatoes like red or new potatoes won’t give you the same fluffy centers, but they’ll still taste delicious.
Q: Why do you add baking soda to the water? The baking soda creates an alkaline environment that breaks down the exterior of the potatoes more efficiently during parboiling. This creates more surface area for crisping and helps form that perfect crust during roasting.
Q: Can I use a different herb instead of rosemary? Absolutely! Thyme works beautifully, as does sage. Fresh herbs are always preferable to dried for this recipe, as they infuse the oil with more flavor and don’t burn as easily.
Q: What’s the best fat to use for the crispiest potatoes? Duck fat produces the most spectacular results, but a good quality olive oil works wonderfully too. Ghee (clarified butter) is another excellent option with a rich flavor profile.
Q: Can I make these potatoes ahead of time for a dinner party? These potatoes are at their absolute peak straight from the oven. However, you can parboil them up to a day ahead, store them in the refrigerator, and then roast them just before serving. They take about an hour to roast, so plan accordingly.
Q: My oven runs hot/cold. How can I tell when the potatoes are done? The visual cues are most important—look for a deep golden brown color on the exteriors. When tapped with a utensil, they should sound crisp, and a knife should slide easily into the center.
Q: Why didn’t my potatoes get crispy? The most common culprit is overcrowding the pan. Each potato needs space around it for air circulation. Other possibilities include an oven that isn’t hot enough, potatoes that weren’t dried well enough after parboiling, or oil that wasn’t preheated.
Q: How do I keep the garlic from burning? Leaving the skins on the garlic cloves provides some protection from the high heat. If you find they’re still burning, you can add them halfway through the roasting time instead.
Whether you’re preparing a special holiday feast or simply elevating your Sunday roast, these crispy potatoes with rosemary and garlic deserve a place at your table. The technique may seem fussy at first glance, but once you taste the results, you’ll understand why each step matters—and why these might just be the best roast potatoes you’ll ever make. Happy cooking!