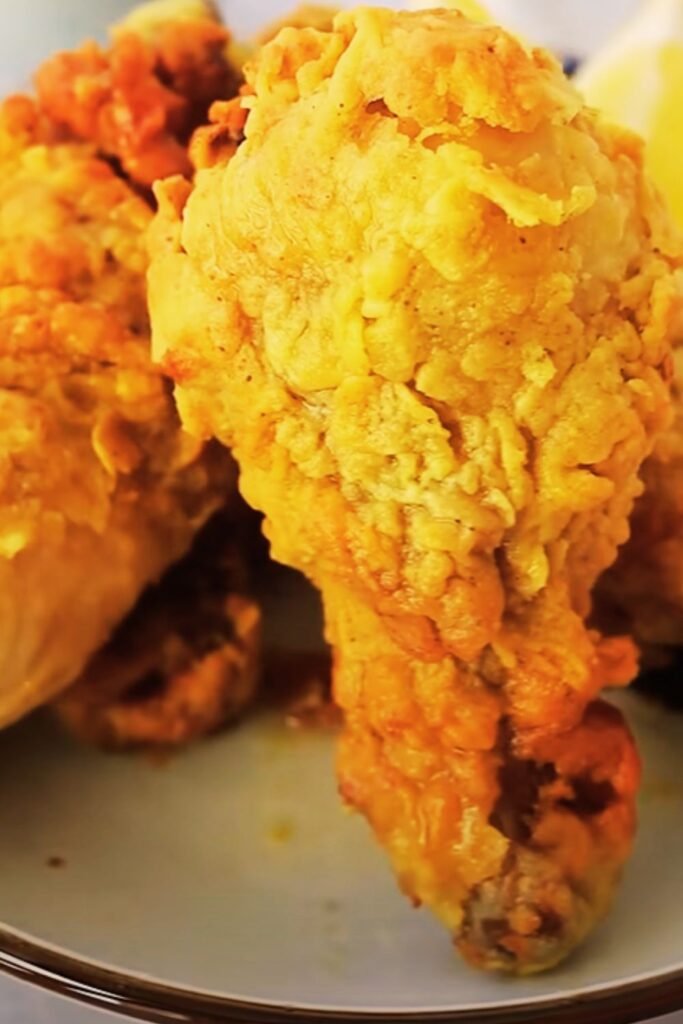
There’s something magical about biting into a piece of perfectly fried chicken—that satisfying crunch giving way to juicy, tender meat that practically melts in your mouth. For years, I avoided making fried chicken at home because, let’s face it, traditional deep-frying is messy, unhealthy, and frankly intimidating.
That all changed when I discovered the wonder of air fryer fried chicken. This game-changing method delivers that same addictive crunch and mouthwatering flavor with a fraction of the oil and none of the splatter or cleanup headaches. It’s the perfect solution for anyone who loves classic Southern fried chicken but wants a healthier, easier option that doesn’t sacrifice taste.
In this guide, I’ll share my perfected air fryer fried chicken recipe that’s taken me years to get just right. You’ll get that authentic golden-brown, crispy coating and juicy interior that rivals any restaurant version. Plus, I’ll share all my tips and tricks for ensuring success every single time—from the perfect seasoning blend to the ideal cooking temperature and time.
What Makes Air Fryer Fried Chicken Special?
Before diving into the recipe, let’s talk about why air fryer fried chicken deserves a place in your cooking repertoire:
- Healthier Option: Uses up to 80% less oil than traditional deep-frying methods
- Less Mess: No more oil splatters all over your kitchen
- Faster Cooking: Ready in about 30 minutes once prepared
- Crispy Exterior: Achieves that coveted crunch without soaking in oil
- Juicy Interior: Circulating hot air locks in moisture for tender meat
- Consistent Results: More controlled cooking environment than stovetop frying
My journey to perfect air fryer fried chicken wasn’t without obstacles. I’ve had my share of soggy coatings, dry meat, and under-seasoned batches. But through plenty of trial and error, I’ve developed a foolproof method that delivers restaurant-quality results right in your kitchen.
Essential Equipment
Before we begin, make sure you have these tools on hand:
- Air fryer (3.5 quart or larger recommended)
- Mixing bowls (at least 3)
- Measuring cups and spoons
- Meat thermometer
- Tongs
- Wire cooling rack
- Baking sheet
- Paper towels
- Oil sprayer or mister (optional but recommended)
Ingredients You’ll Need
For the Chicken:
- 8 pieces chicken (I prefer a mix of thighs and drumsticks, bone-in and skin-on)
- 1 cup buttermilk
- 1 tablespoon hot sauce (I use Frank’s RedHot)
- 1 teaspoon garlic powder
- 1 teaspoon onion powder
- 1 teaspoon salt
For the Seasoned Flour:
- 2 cups all-purpose flour
- 1 tablespoon paprika
- 1 tablespoon garlic powder
- 1 tablespoon onion powder
- 2 teaspoons salt
- 1 teaspoon black pepper
- 1 teaspoon cayenne pepper (adjust to taste)
- 1 teaspoon dried thyme
- 1 teaspoon dried oregano
- ½ teaspoon celery salt
For Coating:
- 2 large eggs
- ¼ cup water
- Olive oil spray or mister
The Perfect Air Fryer Fried Chicken: Step-by-Step
Preparing the Chicken (Marinade)
- Pat the chicken pieces dry with paper towels to remove excess moisture.
- In a large bowl, whisk together the buttermilk, hot sauce, garlic powder, onion powder, and salt.
- Add the chicken pieces to the buttermilk mixture, ensuring each piece is fully submerged.
- Cover the bowl with plastic wrap and refrigerate for at least 4 hours, or ideally overnight. This step is crucial for tenderizing the meat and infusing flavor.
Creating the Dredging Station
- In a large shallow bowl or dish, whisk together all the seasoned flour ingredients until well combined.
- In another bowl, beat the eggs with water until smooth.
- Set up your dredging station in this order: seasoned flour, egg wash, seasoned flour again.
- Place a wire rack over a baking sheet nearby to hold your coated chicken.

Coating the Chicken
- Remove the chicken from the buttermilk mixture one piece at a time, allowing excess marinade to drip off.
- Dredge each piece thoroughly in the seasoned flour, pressing the flour into the chicken to ensure it adheres well.
- Dip the floured chicken into the egg wash, allowing excess to drip off.
- Return to the seasoned flour for a second coating, again pressing firmly to create a thick, textured crust.
- Place the coated chicken on the prepared wire rack and let rest for 10-15 minutes. This resting period helps the coating adhere better during cooking.
Air Frying the Chicken
- Preheat your air fryer to 375°F (190°C) for 3-5 minutes.
- Lightly spray the air fryer basket with cooking oil to prevent sticking.
- Arrange chicken pieces in the basket in a single layer, making sure they don’t touch. Don’t overcrowd – you’ll likely need to cook in batches.
- Lightly spray the tops of the chicken pieces with cooking oil for that golden-brown finish.
- Cook for 12 minutes, then flip the chicken pieces over, spray lightly with oil again, and cook for another 10-12 minutes.
- Check the internal temperature with a meat thermometer – it should register at least 165°F (74°C) for dark meat and 160°F (71°C) for white meat.
- If the chicken isn’t crispy enough but has reached temperature, increase heat to 400°F (205°C) and cook for an additional 2-3 minutes.
- Transfer cooked chicken to a clean wire rack and let rest for 5 minutes before serving.
Critical Success Factors
The difference between good and great air fryer fried chicken often comes down to these key details:
Temperature and Timing Chart
| Chicken Cut | Weight/Size | Temperature | First Side | Second Side | Target Internal Temp |
|---|---|---|---|---|---|
| Drumsticks | 4-5 oz | 375°F | 12 mins | 10 mins | 175°F |
| Thighs | 5-6 oz | 375°F | 12 mins | 12 mins | 175°F |
| Wings | 2-3 oz | 380°F | 10 mins | 8 mins | 165°F |
| Breast (cut in half) | 5-6 oz per half | 370°F | 12 mins | 10 mins | 160°F |
| Tenders | 1.5-2 oz | 380°F | 6 mins | 5 mins | 165°F |
Troubleshooting Common Issues
| Problem | Potential Cause | Solution |
|---|---|---|
| Coating falls off | Didn’t pat chicken dry | Ensure chicken is patted completely dry before marinating |
| Didn’t rest after coating | Allow coated chicken to rest 10-15 minutes before air frying | |
| Flipped too early | Wait until first side is golden before flipping | |
| Chicken not crispy | Air fryer too crowded | Cook in smaller batches with space between pieces |
| Not enough oil spray | Lightly spray coating before cooking | |
| Temperature too low | Finish at 400°F for extra crispiness | |
| Dry meat | Overcooked | Use meat thermometer to prevent overcooking |
| Wrong cuts used | Dark meat (thighs/drumsticks) tends to stay juicier | |
| Bland flavor | Insufficient marinating time | Marinate at least 4 hours, preferably overnight |
| Under-seasoned flour | Be generous with seasonings in your flour mixture |
Expert Tips for Perfect Results Every Time
After countless batches and refinements, I’ve discovered these game-changing tips that make all the difference:
- Temperature matters: Always bring chicken to room temperature for 20-30 minutes before cooking for even results.
- Double dredge technique: The flour-egg-flour method creates those coveted craggy, crispy bits that make fried chicken irresistible.
- Let the coating rest: That 10-15 minute rest after coating allows the flour to hydrate and create a better bond with the chicken.
- Don’t crowd the basket: Air needs to circulate around each piece for maximum crispiness.
- Spritz, don’t soak: A light spray of oil helps achieve the golden color without making the chicken greasy.
- Check for doneness: Different pieces cook at different rates – always use a meat thermometer.
- Rest before serving: Let the chicken rest for 5 minutes after cooking to allow juices to redistribute.
Flavor Variations to Try
Once you’ve mastered the basic recipe, try these exciting variations:
Spicy Nashville-Style
Add 2 tablespoons cayenne pepper and 1 tablespoon brown sugar to your flour mixture. After cooking, brush with a mixture of 2 tablespoons melted butter mixed with 1 tablespoon cayenne pepper.
Lemon Herb
Add the zest of 1 lemon, 1 tablespoon fresh thyme, and 1 tablespoon fresh rosemary to your flour mixture.
Garlic Parmesan
Mix ½ cup grated Parmesan cheese and 1 tablespoon garlic powder into your second flour dredge. Sprinkle with more Parmesan during the last 2 minutes of cooking.
Honey Butter
Keep the original recipe as is, but after cooking, brush with a mixture of 3 tablespoons melted butter and 2 tablespoons honey.
Make-Ahead and Storage Tips
Refrigerating:
- Store leftover fried chicken in an airtight container in the refrigerator for up to 3 days.
- For best results, allow chicken to come to room temperature before reheating.
Freezing:
- Cooked air fryer fried chicken can be frozen for up to 3 months.
- Place cooled chicken pieces on a baking sheet and freeze until solid (about 2 hours).
- Transfer to freezer bags or containers, removing as much air as possible.
Reheating:
- In the air fryer: Preheat to 350°F and heat for 3-4 minutes until warmed through and crispy again.
- In the oven: Place on a wire rack over a baking sheet and heat at 350°F for 10-12 minutes.
- Avoid using the microwave as it will make the coating soggy.
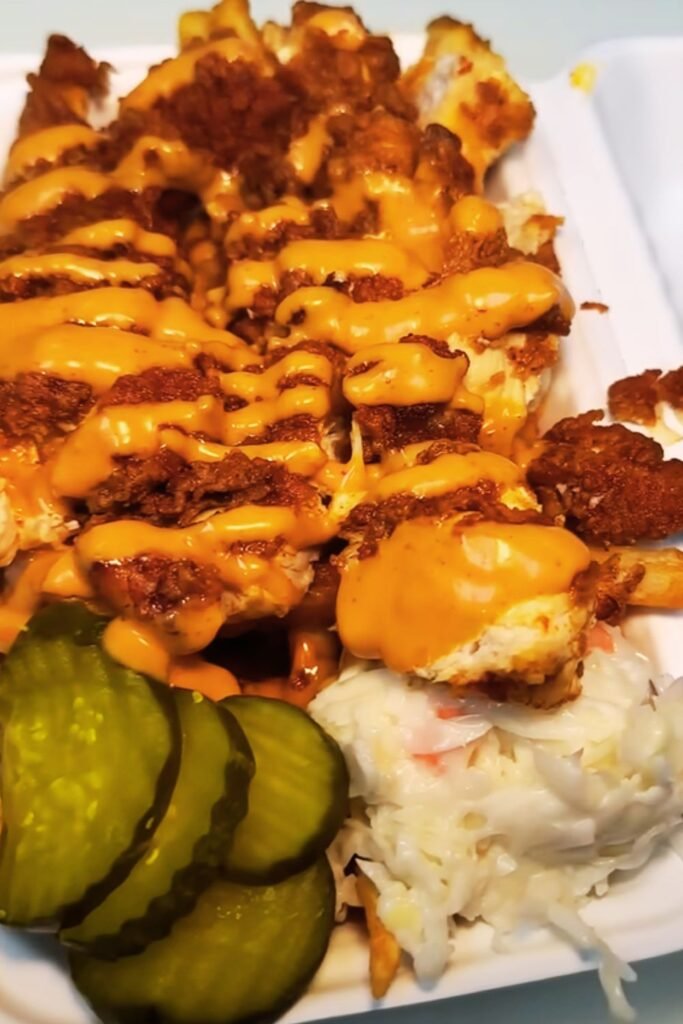
Perfect Pairings: What to Serve with Your Fried Chicken
Complete your meal with these classic sides that pair beautifully with air fryer fried chicken:
Traditional Southern Sides:
- Creamy coleslaw
- Buttermilk biscuits
- Macaroni and cheese
- Mashed potatoes and gravy
- Collard greens
- Corn on the cob
Lighter Options:
- Garden salad with ranch dressing
- Roasted vegetables
- Sweet potato fries (also made in the air fryer!)
- Fresh fruit salad
- Cucumber and tomato salad
Sauce Options:
- Honey mustard
- Ranch dressing
- Buffalo sauce
- BBQ sauce
- Maple syrup (trust me on this one!)
Nutritional Comparison: Air Fryer vs. Traditional Deep-Fried
| Nutritional Factor | Traditional Deep-Fried (Per Serving) | Air Fryer Method (Per Serving) | Percentage Reduction |
|---|---|---|---|
| Calories | 380-420 calories | 250-280 calories | ~35% |
| Total Fat | 22-25g | 11-14g | ~50% |
| Saturated Fat | 6-8g | 3-4g | ~50% |
| Cholesterol | 140mg | 140mg | 0% |
| Sodium | 550-650mg | 550-650mg | 0% |
| Protein | 30-32g | 30-32g | 0% |
| Cooking Oil Used | 2-3 cups | 1-2 tablespoons | ~95% |
Frequently Asked Questions
Q: Can I use boneless, skinless chicken for this recipe? A: Absolutely! Boneless, skinless chicken works well but cooks faster. Reduce cooking time by about 3-4 minutes per side and be vigilant with your meat thermometer to prevent overcooking.
Q: My air fryer is smaller than recommended. Can I still make this recipe? A: Yes, but you’ll need to cook in more batches. Never stack or crowd chicken pieces, as this prevents proper air circulation and results in uneven cooking.
Q: Can I skip the buttermilk marinade if I’m short on time? A: While the marinade adds significant flavor and tenderness, you can create a quick version by soaking the chicken in buttermilk for just 30 minutes at room temperature. The results won’t be quite as good, but still delicious.
Q: Is there a dairy-free alternative to buttermilk? A: Yes! Mix 1 cup non-dairy milk (like almond or oat milk) with 1 tablespoon of lemon juice or vinegar. Let it sit for 5-10 minutes until slightly thickened before using.
Q: How can I make this recipe gluten-free? A: Simply substitute the all-purpose flour with your favorite gluten-free flour blend. For extra crispiness, consider adding 2 tablespoons of cornstarch to your gluten-free flour mixture.
Q: My coating isn’t getting as golden as I’d like. What am I doing wrong? A: Make sure you’re spraying the coated chicken with oil before air frying. Also, check that your air fryer is properly preheated. If needed, you can increase the temperature by 10-15 degrees for the last few minutes of cooking.
Q: Can I prepare the chicken ahead of time and cook it later? A: Yes, but only up to a point. You can marinate the chicken up to 24 hours in advance. However, once coated, the chicken should be cooked within 30 minutes or the coating may become soggy.
Why This Recipe Works
This air fryer fried chicken recipe succeeds where others fail because it incorporates several crucial techniques:
- The buttermilk brine not only adds flavor but the lactic acid tenderizes the meat, ensuring juiciness.
- The double-dredge method creates a substantial coating that mimics traditional deep-fried chicken.
- The precise temperature control of the air fryer ensures even cooking without the need for excessive oil.
- The balanced seasoning blend in the flour mixture provides layers of flavor without any single spice overwhelming the others.
- The rest periods (both after coating and after cooking) are often overlooked but critical steps for texture development and juice redistribution.
Final Thoughts
There’s something deeply satisfying about mastering a healthier version of a beloved classic like fried chicken. With this air fryer method, you can enjoy that indulgent, crispy, juicy chicken experience without the guilt or mess of traditional deep-frying.
What I love most about this recipe is its versatility. Once you understand the basic technique, you can customize it countless ways to suit your taste preferences or what you have on hand. It’s become a regular in my dinner rotation, and the leftovers (if there are any!) make fantastic next-day lunches.
Whether you’re cooking for a family dinner, meal prepping for the week ahead, or impressing guests at a casual get-together, this air fryer fried chicken delivers restaurant-quality results with minimal effort. Give it a try, and I’m confident it will become one of your go-to recipes too!
Remember, the key to truly exceptional fried chicken—whether traditional or air fried—is patience. Don’t rush the marinating time, the dredging process, or the cooking. Your reward will be perfectly crispy, juicy chicken that might just be the best you’ve ever made at home.
Recipe Card Summary
Air Fryer Southern Fried Chicken
Prep Time: 15 minutes (plus 4+ hours marinating)
Cook Time: 25 minutes
Total Time: 40 minutes (plus marinating time)
Servings: 4
Calories: 275 per serving
Equipment Needed:
- Air fryer
- Mixing bowls
- Meat thermometer
- Wire rack
Ingredients:
- 8 pieces bone-in, skin-on chicken (mixture of thighs and drumsticks)
- 1 cup buttermilk
- 1 tablespoon hot sauce
- 2 cups all-purpose flour
- Various seasonings as listed above
- 2 large eggs
- Cooking spray
Instructions:
- Marinate chicken in buttermilk mixture for at least 4 hours.
- Dredge in seasoned flour, dip in egg wash, then dredge again.
- Air fry at 375°F for 12 minutes, flip, then 10-12 minutes more.
- Rest 5 minutes before serving.
Notes:
- Check internal temperature (165°F minimum) with meat thermometer.
- Cook in batches if needed to avoid overcrowding.
- Store leftovers in refrigerator for up to 3 days.