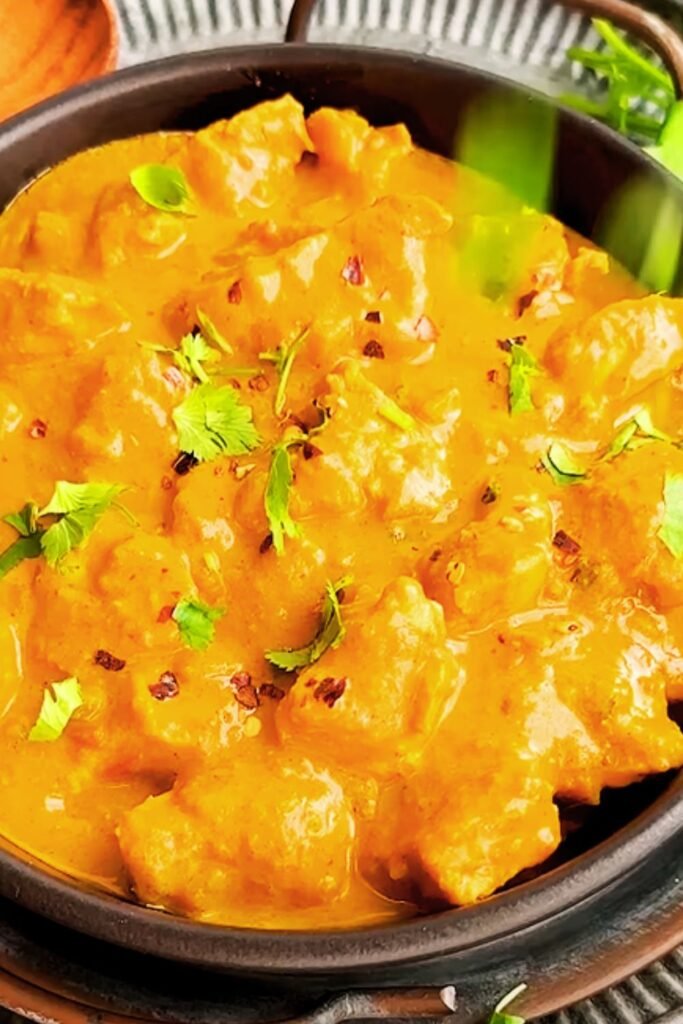
There’s something magical about the aroma of butter chicken simmering on my stovetop. The rich, creamy tomato sauce mingling with tender pieces of chicken creates an experience that transports me straight to the bustling streets of Delhi. I’ve spent years perfecting this recipe, and today I’m sharing my streamlined version that delivers authentic flavors in just 30 minutes.
Butter chicken, or murgh makhani, holds a special place in my heart. It’s the dish that first introduced me to Indian cuisine, and over the years, I’ve discovered that you don’t need hours of preparation or a restaurant kitchen to create this masterpiece. My simplified approach maintains all the complex flavors while fitting perfectly into a busy weeknight schedule.
What Makes This Recipe Special
I’ve designed this recipe around accessibility and speed without compromising on taste. Unlike traditional methods that require overnight marination and multiple cooking stages, my approach uses strategic ingredient combinations and cooking techniques that build layers of flavor quickly. The result is a dish that tastes like it simmered for hours but comes together in half an hour.
The secret lies in my spice blend ratios and the order of operations. I use a combination of ground spices and fresh aromatics, creating depth through careful timing rather than lengthy cooking processes. This method has been a game-changer in my kitchen, especially when unexpected guests arrive or when I’m craving comfort food after a long day.
Essential Ingredients Breakdown
Understanding your ingredients is crucial for success. Here’s my detailed breakdown of what makes this butter chicken extraordinary:
Protein Selection
- Boneless chicken thighs: 1.5 pounds, cut into bite-sized pieces
- Alternative: Boneless chicken breasts (though thighs provide superior flavor and tenderness)
Spice Arsenal
- Garam masala: 2 teaspoons (the heart of the dish)
- Ground cumin: 1 teaspoon (earthy foundation)
- Ground coriander: 1 teaspoon (citrusy brightness)
- Paprika: 1 teaspoon (color and mild heat)
- Turmeric: 1/2 teaspoon (golden hue and earthiness)
- Cayenne pepper: 1/4 teaspoon (adjust to taste)
Sauce Components
- Unsalted butter: 4 tablespoons (richness base)
- Heavy cream: 1/2 cup (luxurious texture)
- Crushed tomatoes: 14 ounces can (acidic backbone)
- Tomato paste: 2 tablespoons (concentrated flavor)
- Full-fat coconut milk: 1/4 cup (subtle sweetness and creaminess)
Aromatics and Fresh Elements
- Large yellow onion: 1 medium, finely diced
- Fresh garlic: 4 cloves, minced
- Fresh ginger: 2 inches, grated
- Fresh cilantro: 1/4 cup, chopped (for garnish)
Preparation Techniques That Matter
My approach to butter chicken focuses on building flavor through proper technique rather than extended cooking time. Here’s how I maximize taste in minimal time:
Spice Blooming Method I always bloom my spices in butter before adding other ingredients. This 30-second process activates the essential oils and creates a more complex flavor foundation than adding raw spices later in the cooking process.
Chicken Preparation I season the chicken pieces with salt and half the spice mixture before cooking. This preliminary seasoning ensures flavor penetrates the meat rather than sitting on the surface.
Sauce Development My sauce-building technique involves creating a rich base with sautéed onions, garlic, and ginger, then adding tomato paste to caramelize before introducing the crushed tomatoes. This method prevents the raw tomato taste that can plague quick-cooking versions.
Step-by-Step Cooking Process
Phase 1: Chicken Preparation (5 minutes)
Begin by cutting your chicken into uniform pieces, roughly 1-inch cubes. I prefer this size because it cooks evenly and provides the perfect bite-to-sauce ratio. Season generously with salt and 1 teaspoon of the garam masala mixture.
Heat 2 tablespoons of butter in a large, heavy-bottomed pan over medium-high heat. The pan choice matters here – I use either a cast-iron skillet or heavy stainless steel pan because they retain heat well and create better browning.
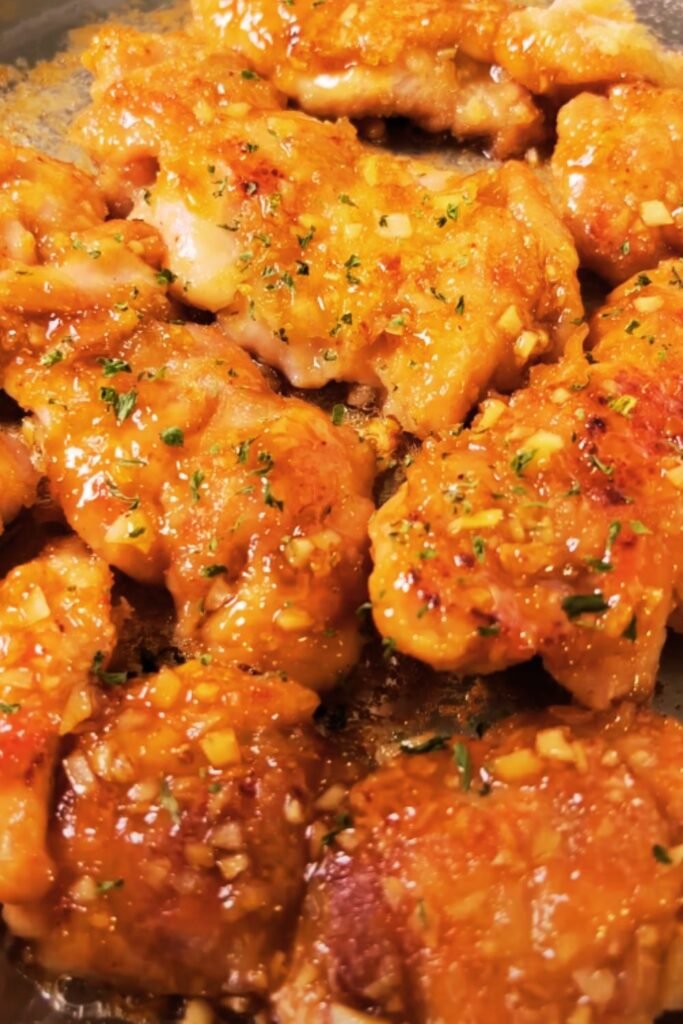
Add the seasoned chicken pieces in a single layer. Don’t overcrowd the pan; work in batches if necessary. Cook for 2-3 minutes per side until golden brown. The chicken doesn’t need to be fully cooked at this stage since it will finish cooking in the sauce.
Remove the chicken and set aside. The brown bits left in the pan (fond) will add tremendous flavor to our sauce, so don’t clean the pan.
Phase 2: Aromatics and Spice Base (7 minutes)
Reduce heat to medium and add the remaining 2 tablespoons of butter to the same pan. Add the diced onion and cook for 3-4 minutes until softened and lightly golden.
Add the minced garlic and grated ginger, stirring constantly for 30 seconds until fragrant. Be careful not to burn these aromatics as they can turn bitter quickly.
Add the remaining spice mixture (garam masala, cumin, coriander, paprika, turmeric, and cayenne) and stir for 30 seconds until the spices are fragrant and well combined with the aromatics.
Add the tomato paste and cook for 1-2 minutes, stirring frequently. This step is crucial – you want the tomato paste to caramelize slightly and lose its raw taste.
Phase 3: Sauce Construction (10 minutes)
Pour in the crushed tomatoes, scraping up any brown bits from the bottom of the pan. These fond bits are flavor gold, so make sure to incorporate them fully.
Add 1/2 teaspoon of salt and bring the mixture to a gentle simmer. Let it cook for 5-6 minutes, stirring occasionally, until the sauce thickens slightly and the raw tomato taste mellows.
During this time, I like to taste and adjust seasonings. The sauce should be rich and slightly tangy at this point.
Phase 4: Final Assembly (8 minutes)
Return the browned chicken to the pan, along with any accumulated juices. Stir gently to coat the chicken with the sauce.
Reduce heat to low and add the coconut milk, stirring to combine. The coconut milk adds a subtle sweetness and helps balance the acidity of the tomatoes.
Simmer for 3-4 minutes until the chicken is cooked through (internal temperature of 165°F).
Remove from heat and stir in the heavy cream. I add the cream off the heat to prevent curdling.
Taste and adjust seasoning with salt, additional garam masala, or a pinch of sugar if the sauce seems too acidic.
Nutritional Information and Serving Details
| Nutrient | Per Serving (Serves 4) | % Daily Value |
|---|---|---|
| Calories | 485 | 24% |
| Protein | 38g | 76% |
| Total Fat | 28g | 36% |
| Saturated Fat | 16g | 80% |
| Carbohydrates | 12g | 4% |
| Dietary Fiber | 3g | 11% |
| Sugars | 8g | – |
| Sodium | 680mg | 30% |
| Vitamin A | 1250 IU | 25% |
| Vitamin C | 12mg | 13% |
| Iron | 2.8mg | 16% |
| Calcium | 85mg | 6% |
Spice Level and Customization Guide
| Spice Level | Cayenne Amount | Additional Heat Sources | Target Audience |
|---|---|---|---|
| Mild | 1/8 teaspoon | None | Children, heat-sensitive |
| Medium | 1/4 teaspoon | None | Most adults |
| Medium-Hot | 1/2 teaspoon | Pinch of red pepper flakes | Heat lovers |
| Hot | 3/4 teaspoon | 1/2 teaspoon red pepper flakes | Spice enthusiasts |
| Very Hot | 1 teaspoon | 1 jalapeño, minced | Extreme heat lovers |
Serving Suggestions and Accompaniments
Butter chicken shines brightest when paired with the right accompaniments. Over the years, I’ve discovered combinations that elevate this dish from good to extraordinary.
Rice Varieties My go-to pairing is basmati rice, prepared with a bay leaf and a few cardamom pods for aromatic enhancement. The long grains don’t clump together and provide the perfect vehicle for the rich sauce. For a more indulgent experience, I sometimes prepare jeera rice (cumin rice) by briefly sautéing basmati with whole cumin seeds.
Bread Options Naan bread remains the classic choice, and I often make a quick stovetop version using store-bought pizza dough. Brush it with garlic butter after cooking for an extra flavor boost. Roti or chapati work wonderfully for a lighter option, while crusty dinner rolls can serve as an accessible substitute.
Vegetable Sides I love serving roasted cauliflower or sautéed green beans alongside butter chicken. The vegetables provide textural contrast and help balance the richness of the dish. A simple cucumber raita (yogurt sauce) offers cooling refreshment between bites.
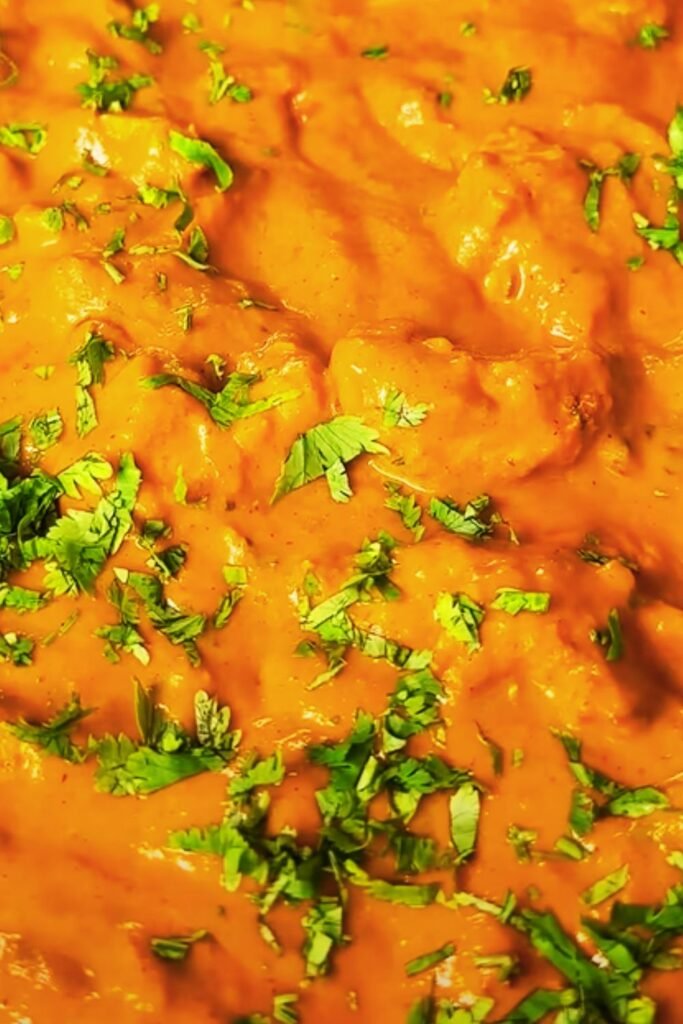
Garnish Elements Fresh cilantro is non-negotiable – it adds brightness and color to the finished dish. I also like to include a dollop of plain Greek yogurt and a sprinkle of garam masala for visual appeal and flavor enhancement.
Storage and Reheating Guidelines
Proper storage techniques ensure your butter chicken tastes just as good the next day. I store leftovers in the refrigerator for up to three days in airtight containers. The flavors actually develop and improve overnight, making leftovers a special treat.
For reheating, I use low heat and add a splash of cream or coconut milk to restore the sauce’s consistency. Avoid high heat, which can cause the dairy components to curdle or separate.
Freezing works well for up to three months. I freeze portions in freezer-safe containers, leaving space for expansion. When ready to eat, I thaw overnight in the refrigerator and reheat gently with additional liquid as needed.
Troubleshooting Common Issues
Sauce Too Thin If your sauce lacks body, simmer uncovered for a few additional minutes to reduce liquid. Alternatively, mix 1 tablespoon of tomato paste with 2 tablespoons of warm cream and stir into the sauce.
Sauce Too Thick Add warm chicken broth or additional coconut milk, one tablespoon at a time, until you reach the desired consistency. I prefer a sauce that coats the chicken but isn’t overly thick.
Lack of Heat Beyond adding more cayenne, consider fresh chilies like serrano or jalapeño, added with the aromatics. Red pepper flakes work well too, but add them early in the cooking process for better integration.
Too Spicy Counter excessive heat with additional cream, coconut milk, or a pinch of sugar. A dollop of plain yogurt served alongside can also help temper the spice level.
Sauce Separation If dairy components separate, remove from heat immediately and whisk in a tablespoon of cold cream. Prevention is better – always add dairy off the heat and avoid boiling after cream addition.
Ingredient Substitutions and Variations
Understanding substitutions allows you to adapt this recipe to your pantry and dietary needs:
Dairy-Free Adaptations Replace butter with ghee or coconut oil, and use full-fat coconut milk instead of heavy cream. The result is naturally dairy-free while maintaining richness.
Protein Alternatives Firm tofu, paneer, or cauliflower florets work beautifully in place of chicken. Adjust cooking times accordingly – tofu and paneer need less time, while cauliflower may require a few extra minutes.
Spice Substitutions If garam masala isn’t available, create a blend using 1 teaspoon ground cumin, 1/2 teaspoon ground coriander, 1/4 teaspoon each of ground cardamom, cinnamon, and cloves.
Regional Variations and Cultural Context
Butter chicken’s origins trace back to the 1950s in Delhi, created by accident when leftover tandoori chicken was combined with tomato gravy. My version honors this heritage while adapting to modern home cooking realities.
Different regions of India have their own interpretations. Some prefer a sweeter profile with more cream and less spice, while others lean toward a more robust, spice-forward approach. My recipe strikes a balance that appeals to diverse palates while remaining authentically flavored.
The beauty of this dish lies in its adaptability. I’ve served this recipe to Indian friends who appreciate its authentic taste and to those completely new to Indian cuisine who find it approachable and delicious.
Meal Planning and Batch Cooking
This recipe scales beautifully for meal prep enthusiasts. I often double the recipe and freeze half for future meals. The sauce actually improves with time, making it perfect for batch cooking.
For weekly meal planning, I prepare the sauce base ahead of time, storing it separately from cooked chicken. When ready to eat, I simply reheat the sauce, add fresh chicken, and simmer until cooked through. This method saves significant time on busy weeknights.
Consider preparing rice in a rice cooker while the butter chicken cooks, creating a complete meal in 30 minutes with minimal active preparation time.
Frequently Asked Questions
Q: Can I use chicken breast instead of thighs? Absolutely, though I recommend reducing the cooking time slightly to prevent overcooking. Chicken breast can become dry more easily than thighs, so watch carefully during the final simmering phase.
Q: Is this recipe suitable for meal prep? Yes, it’s excellent for meal prep. The flavors actually improve overnight, and it reheats beautifully. Store in portions for easy weekday lunches or dinners.
Q: Can I make this dish less spicy for children? Definitely. Reduce the cayenne to just a pinch and consider adding a touch more cream or coconut milk. The other spices provide flavor without significant heat.
Q: What’s the best way to achieve restaurant-style richness? The key is using full-fat ingredients and not skipping the butter. Some restaurants use cashew paste or heavy cream – my recipe balances richness with home-cooking practicality.
Q: Can I prepare this recipe in a slow cooker? While possible, I don’t recommend it for this particular recipe. The quick-cooking method preserves the bright flavors and prevents overcooking. However, you could brown the chicken and sauté aromatics first, then transfer everything to a slow cooker for 2-3 hours on low.
Q: How do I know when the chicken is properly cooked? The chicken should reach an internal temperature of 165°F. Visually, it should be white throughout with no pink areas, and the juices should run clear when pierced.
Q: Can I make this dairy-free? Yes, substitute coconut oil for butter and use full-fat coconut milk instead of heavy cream. The flavor profile changes slightly but remains delicious.
Q: Why does my sauce sometimes separate? Sauce separation usually occurs from too high heat after adding dairy or from using low-fat dairy products. Always add cream off the heat and use full-fat products for best results.
Q: Can I freeze leftover butter chicken? Yes, it freezes well for up to three months. Freeze in portion-sized containers and thaw overnight in the refrigerator before reheating gently with a splash of cream or broth.
Q: What’s the difference between butter chicken and chicken tikka masala? While similar, butter chicken typically has a smoother, more tomato-forward sauce with a sweeter profile. Chicken tikka masala often includes bell peppers and onions and has a slightly different spice blend.
This butter chicken recipe has become my signature dish for good reason. It delivers complex, satisfying flavors in a timeframe that works for real life, without sacrificing the authentic taste that makes this dish so beloved. Whether you’re new to Indian cooking or looking to streamline your favorite recipes, this approach will serve you well.