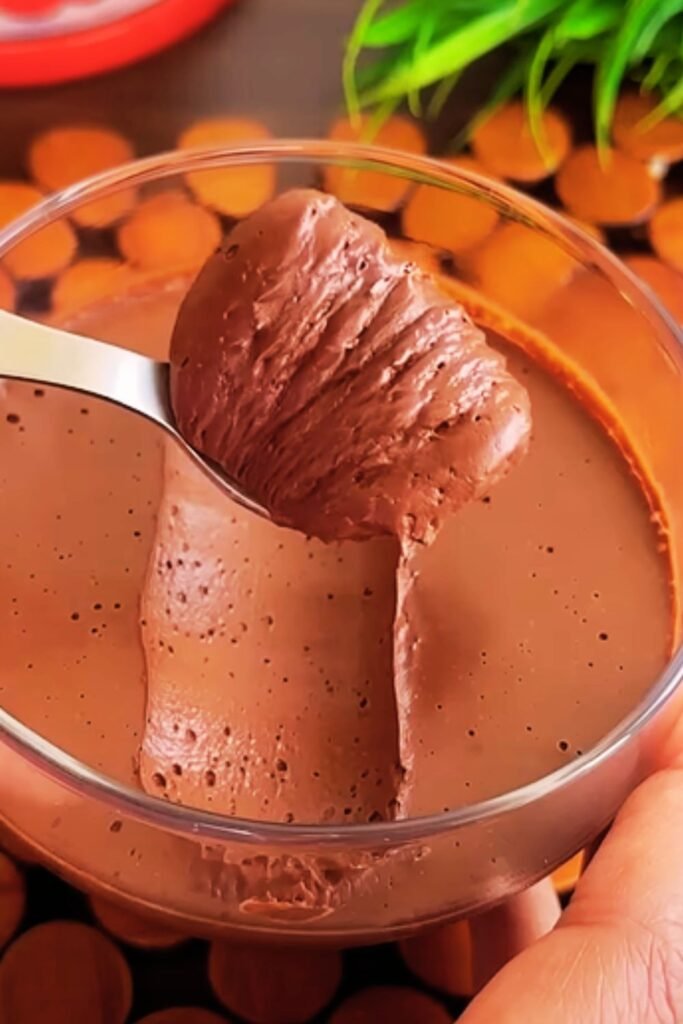
I’ve been making chocolate mousse for over a decade, and I can confidently say it’s one of those desserts that never fails to impress. There’s something magical about transforming simple ingredients into a cloud-like, intensely chocolatey treat that melts on your tongue. Today, I’m sharing my foolproof method for creating the perfect chocolate mousse that’s both beginner-friendly and sophisticated enough for any special occasion.
The beauty of chocolate mousse lies in its simplicity and elegance. With just a handful of ingredients and some basic techniques, you can create a dessert that rivals any high-end restaurant. I’ve perfected this recipe through countless trials, tweaks, and taste tests, and I’m excited to walk you through every step of the process.
Understanding Chocolate Mousse: The Foundation of Excellence
Chocolate Mousse: A light, airy dessert made by folding whipped cream or beaten egg whites into a chocolate base, creating a foam-like texture that’s both rich and delicate.
Emulsion: The process of combining fat (chocolate/butter) with liquid (cream/eggs) to create a smooth, unified mixture that forms the base of our mousse.
Tempering: Gradually adjusting the temperature of ingredients to prevent curdling or separation, crucial for achieving the perfect mousse consistency.
Folding Technique: A gentle mixing method that preserves air bubbles in whipped cream or beaten eggs, maintaining the mousse’s characteristic lightness.
The science behind chocolate mousse is fascinating. When I first started making this dessert, I didn’t understand why sometimes my mousse turned out perfectly smooth and other times it became grainy or separated. The key lies in understanding how chocolate behaves at different temperatures and how air incorporation affects the final texture.
Chocolate contains cocoa butter, which has specific melting points and crystalline structures. When we melt chocolate properly and combine it with other ingredients at the right temperatures, we create an emulsion that can hold air bubbles, giving us that signature mousse texture. The proteins in eggs help stabilize this structure, while the fat in cream adds richness and helps maintain the smooth mouthfeel.
Essential Ingredients and Their Roles
| Ingredient | Quantity | Purpose | Quality Tips |
|---|---|---|---|
| Dark Chocolate (70% cocoa) | 8 oz (225g) | Primary flavor base | Choose high-quality chocolate; avoid chips |
| Heavy Cream | 2 cups (480ml) | Creates texture and richness | Must be at least 35% fat content |
| Large Eggs | 4 | Structure and stability | Room temperature works best |
| Granulated Sugar | 1/3 cup (65g) | Sweetness and texture | Superfine dissolves more easily |
| Vanilla Extract | 2 teaspoons | Flavor enhancement | Pure vanilla, not imitation |
| Unsalted Butter | 2 tablespoons | Silkiness and shine | European-style preferred |
| Salt | 1/4 teaspoon | Flavor enhancer | Sea salt or kosher salt |
| Optional: Espresso | 1 tablespoon | Chocolate flavor intensifier | Strong, cooled coffee works |
I’ve learned that ingredient quality makes an enormous difference in the final product. When I first started making mousse, I used whatever chocolate I had on hand, often chocolate chips or lower-quality bars. The difference between using premium chocolate and standard chocolate is night and day. Premium chocolate melts more smoothly, has a more complex flavor profile, and creates a silkier texture.
The cream is equally important. I always use heavy cream with at least 35% fat content because it whips better and creates a more stable mousse. Lower-fat alternatives simply don’t provide the same richness or structural integrity. I’ve tried making mousse with half-and-half and even whole milk, but the results were disappointing – the mousse lacked body and didn’t hold its shape well.
Equipment Essentials for Perfect Mousse
Having the right tools makes this process so much smoother. I remember my early attempts using a regular whisk and a basic mixing bowl – it was exhausting and the results were inconsistent. Investing in proper equipment transformed my mousse-making experience.
Double Boiler or Heat-Proof Bowl: Essential for melting chocolate without burning. I prefer a glass bowl that fits snugly over a saucepan.
Electric Mixer: Hand mixer or stand mixer for whipping cream and eggs. A stand mixer frees up your hands for other tasks.
Rubber Spatula: For folding ingredients together without deflating the mixture.
Fine-Mesh Sieve: Ensures smooth texture by catching any lumps.
Serving Glasses or Ramekins: Individual portions look elegant and are easier to serve.
Instant-Read Thermometer: Helps monitor temperatures for perfect results.
The Complete Step-by-Step Process
Phase 1: Preparing the Chocolate Base
I always start by setting up my workspace and gathering all ingredients. This French technique called “mise en place” saves time and reduces mistakes. First, I separate my eggs while they’re cold – it’s much easier – then let them come to room temperature.
For melting the chocolate, I use the double boiler method. I bring about an inch of water to a gentle simmer in a saucepan, then place my heat-proof bowl on top, making sure the bottom doesn’t touch the water. I chop the chocolate into uniform pieces – this ensures even melting.
As the chocolate begins to melt, I stir it occasionally with a rubber spatula. I’m looking for complete melting without any lumps, but I’m careful not to overheat it. If the chocolate gets too hot, it can seize up and become grainy. Once melted, I remove it from heat and stir in the butter until smooth. This creates what we call a chocolate base.
Phase 2: Creating the Egg Mixture
This is where many home cooks get nervous, but I’ve developed a foolproof technique. I whisk the egg yolks with half of the sugar until they’re pale and slightly thickened – this takes about 2-3 minutes of vigorous whisking.
The key is tempering the eggs with the chocolate. I take a small amount of the warm (not hot) chocolate and slowly whisk it into the egg yolks. This gradually raises the temperature of the eggs without cooking them. I continue adding chocolate in small amounts until about half is incorporated, then I can add the rest more quickly.
This mixture should be smooth and glossy. If I see any lumps or if it looks separated, I strain it through a fine-mesh sieve to ensure smoothness.
Phase 3: Whipping and Folding
Now comes the magic part. I whip the egg whites until they form soft peaks, then gradually add the remaining sugar and continue whipping until I have firm, glossy peaks. Overbeaten whites will break and won’t fold in properly, so I watch carefully.
In a separate bowl, I whip the cream to medium peaks – not quite as firm as the egg whites. The cream should hold its shape but still look slightly soft and billowy.
The folding technique is crucial here. I add about one-third of the egg whites to the chocolate mixture and fold gently but thoroughly. This lightens the chocolate base and makes it easier to fold in the remaining whites without deflating them.
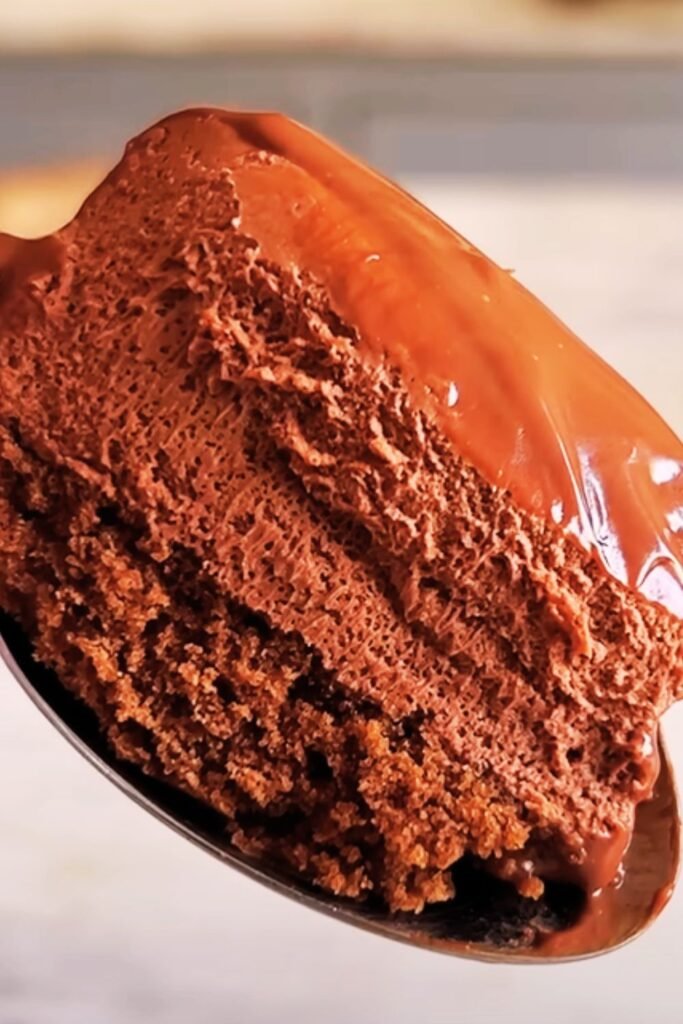
I add the remaining whites in two additions, folding each in completely before adding the next. Finally, I fold in the whipped cream using the same gentle technique. The finished mousse should be uniform in color with no streaks of white.
Texture Troubleshooting Guide
| Problem | Cause | Solution | Prevention |
|---|---|---|---|
| Grainy texture | Chocolate overheated | Strain through fine sieve | Use lower heat, stir constantly |
| Separated mixture | Temperature shock | Whisk vigorously, add cream | Temper ingredients properly |
| Dense, heavy mousse | Deflated whites/cream | Start over with fresh whites | Fold more gently |
| Runny consistency | Under-whipped elements | Re-whip cream/whites separately | Check for proper peaks |
| Bitter taste | Too much dark chocolate | Balance with extra sugar/cream | Taste chocolate before using |
| Won’t set | Incorrect ratios | Add gelatin if needed | Follow recipe measurements |
I’ve encountered every one of these issues at some point in my mousse-making journey. The grainy texture was particularly frustrating in my early attempts – I kept overheating the chocolate because I was impatient. Learning to work at lower temperatures and take my time was a game-changer.
When the mixture separates, don’t panic. I’ve saved many seemingly ruined batches by whisking vigorously and adding a little cream. Sometimes the emulsion just needs encouragement to come back together.
Chilling and Setting Techniques
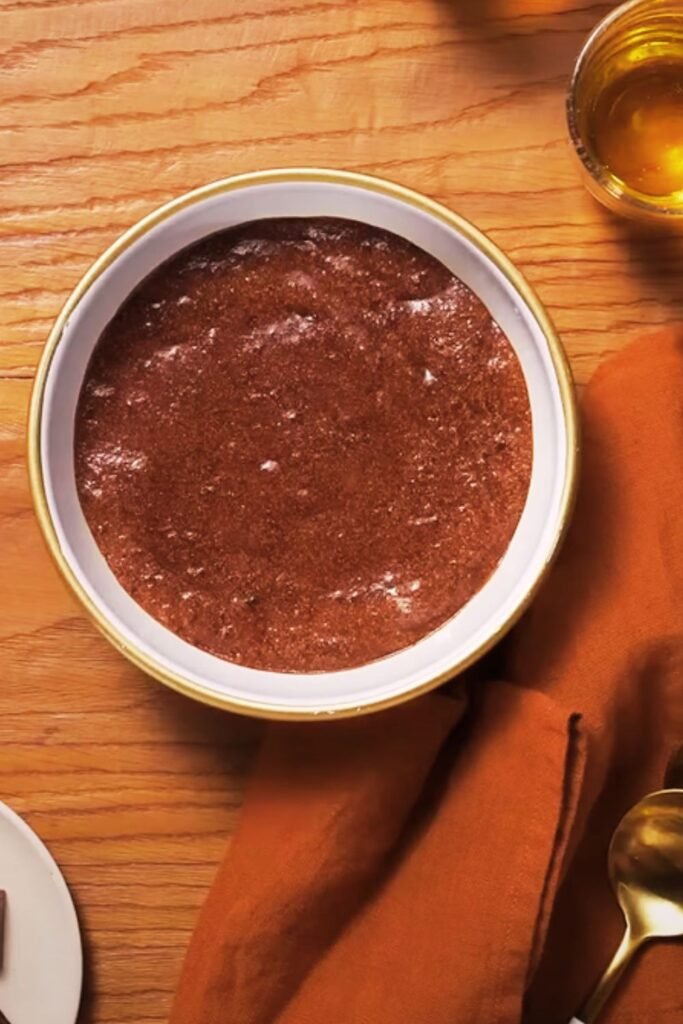
After I’ve achieved the perfect mousse consistency, the chilling process is critical for the final texture. I divide the mousse among individual serving glasses or one large bowl, depending on how I plan to serve it. I always cover the surface directly with plastic wrap to prevent a skin from forming.
The ideal chilling time is at least 4 hours, but I prefer overnight chilling for the best texture. The mousse continues to set and develop flavor during this time. I’ve found that mousse actually tastes better the next day – the flavors meld and become more complex.
Temperature consistency is important during chilling. I make sure my refrigerator isn’t too crowded around the mousse containers, allowing for proper air circulation. Sudden temperature changes can affect the texture, so I avoid opening the refrigerator door frequently while the mousse is setting.
Creative Variations and Flavor Profiles
Over the years, I’ve developed numerous variations of this base recipe. Each brings its own character while maintaining the classic mousse texture I love.
Orange Chocolate Mousse: I add 2 tablespoons of orange zest and 1 tablespoon of Grand Marnier to the chocolate base. The citrus brightens the rich chocolate and creates a sophisticated flavor profile.
Mint Chocolate Mousse: Fresh mint leaves steeped in the cream (then strained out) plus a few drops of peppermint extract create a refreshing twist. I’m careful with the extract – too much can be overpowering.
Coffee Chocolate Mousse: I dissolve 2 tablespoons of instant espresso in 1 tablespoon of hot water and add it to the chocolate base. This intensifies the chocolate flavor rather than making it taste like coffee.
Salted Caramel Chocolate Mousse: I swirl in 3 tablespoons of homemade salted caramel sauce just before chilling. The sweet and salty combination is irresistible.
White Chocolate Berry Mousse: Using white chocolate instead of dark and folding in fresh berry puree creates an elegant, lighter variation perfect for spring and summer.
Presentation and Serving Excellence
| Serving Style | Best Occasions | Garnish Ideas | Temperature |
|---|---|---|---|
| Individual glasses | Dinner parties | Fresh berries, mint | Chilled (38-42°F) |
| Large bowl family style | Casual gatherings | Chocolate shavings | Chilled (38-42°F) |
| Piped into cups | Formal events | Gold leaf, tuile cookies | Chilled (38-42°F) |
| Layered parfaits | Brunches | Crushed cookies, fruit | Chilled (38-42°F) |
| Molded shapes | Special celebrations | Sauce drizzle, powdered sugar | Chilled (38-42°F) |
Presentation makes such a difference in how the mousse is received. I love serving individual portions in clear glasses – it shows off the smooth, rich color and looks professional. For casual family dinners, I often make one large bowl and let people serve themselves.
My favorite garnishing technique involves using a vegetable peeler to create chocolate curls from a room-temperature chocolate bar. I also like to dust the surface lightly with cocoa powder just before serving – it adds visual appeal and a slight bitter note that complements the sweetness.
Storage and Make-Ahead Strategies
One of the things I love about chocolate mousse is how well it keeps and how perfectly it fits into make-ahead entertaining. Properly stored mousse maintains its quality for up to three days in the refrigerator, though it’s best within the first two days.
I always cover the mousse directly with plastic wrap, pressing it gently onto the surface to prevent oxidation and skin formation. If I’m making individual servings, I cover each one individually. For longer storage, I’ve successfully frozen mousse for up to one month, though the texture becomes slightly denser after thawing.
When I’m entertaining, I make the mousse the day before serving. This gives me one less thing to worry about on the day of the event, and as I mentioned earlier, the flavors actually improve with time.
Nutritional Considerations and Dietary Adaptations
While chocolate mousse is undeniably a rich dessert, understanding its nutritional profile helps with portion planning and dietary considerations.
Traditional Recipe Nutrition (per serving, serves 8):
- Calories: 285
- Fat: 22g
- Carbohydrates: 18g
- Protein: 6g
- Sugar: 15g
I’ve successfully adapted this recipe for various dietary needs:
Dairy-Free Version: I substitute coconut cream for heavy cream and use dairy-free chocolate. The texture is slightly different but still delicious.
Sugar-Free Option: Using erythritol or stevia reduces calories significantly, though the texture may be slightly less smooth.
Egg-Free Variation: Aquafaba (chickpea liquid) whipped to peaks can replace egg whites, creating a vegan-friendly version.
Reduced-Fat Version: Using Greek yogurt in place of some cream reduces fat content while maintaining creaminess.
Professional Tips and Advanced Techniques
After years of making mousse, I’ve picked up several professional techniques that elevate the final product:
Temperature Control: I use an instant-read thermometer to ensure my chocolate base stays between 85-90°F when adding eggs. This prevents cooking the eggs while maintaining proper texture.
Gelatin Reinforcement: For mousse that needs to hold its shape for elaborate presentations, I bloom 1 teaspoon of unflavored gelatin in cold water and dissolve it into the warm chocolate base.
Texture Testing: I always taste the mousse before final chilling to adjust sweetness, but I also check texture by dropping a small spoonful on a plate. It should hold its shape while remaining creamy.
Professional Plating: Using a piping bag fitted with a star tip allows for elegant presentation and consistent portions.
Common Mistakes and How to Avoid Them
Through my own experiences and helping friends troubleshoot their mousse attempts, I’ve identified the most common pitfalls:
Mistake 1: Rushing the tempering process. This leads to scrambled eggs or seized chocolate. I always take my time with this step.
Mistake 2: Over-whipping the cream or egg whites. Once they become grainy or start to separate, they can’t be fixed. I watch carefully and stop as soon as proper peaks form.
Mistake 3: Using low-quality chocolate. The chocolate is the star of this dessert, so investing in good chocolate makes an enormous difference.
Mistake 4: Folding too aggressively. This deflates the air bubbles that create the light texture. Gentle, confident folding motions work best.
Mistake 5: Not chilling long enough. Impatience leads to serving mousse that hasn’t properly set, resulting in a disappointing texture.
Seasonal Adaptations and Holiday Variations
I love adapting this basic mousse recipe for different seasons and holidays. Each variation brings new excitement to this classic dessert.
Spring: I incorporate lemon zest and fold in fresh strawberry puree for a lighter, brighter flavor profile that celebrates the season’s fresh fruits.
Summer: White chocolate mousse with fresh peach or raspberry swirls creates a refreshing warm-weather dessert that’s not too heavy.
Fall: Adding pumpkin pie spice and a tablespoon of pumpkin puree creates an autumn-inspired treat that’s perfect for Thanksgiving.
Winter/Holidays: Peppermint extract and crushed candy canes transform the mousse into a festive holiday dessert.
Valentine’s Day: I add raspberry puree and serve in heart-shaped molds with fresh raspberry garnish for a romantic presentation.
Questions and Answers
Q. Can I make chocolate mousse without raw eggs? I completely understand concerns about raw eggs. You can make an excellent mousse using pasteurized eggs, which are available in most grocery stores. Alternatively, you can heat the egg yolk mixture to 160°F while whisking constantly, then cool it before proceeding. Some people use aquafaba (the liquid from canned chickpeas) whipped to peaks as an egg white substitute.
Q. Why did my mousse turn out grainy instead of smooth? Graininess usually results from overheating the chocolate or shocking it with temperature changes. Make sure your chocolate doesn’t get too hot, and always temper your egg mixture gradually. If your mousse is already grainy, try straining it through a fine-mesh sieve while it’s still warm.
Q. How long can I store chocolate mousse in the refrigerator? Properly covered chocolate mousse keeps well for up to 3 days in the refrigerator. I always press plastic wrap directly onto the surface to prevent a skin from forming. The flavor actually improves after the first day as all the elements meld together.
Q. Can I freeze chocolate mousse for later use? Yes, you can freeze chocolate mousse for up to one month. The texture becomes slightly denser after thawing, but it’s still delicious. I recommend thawing it slowly in the refrigerator overnight and giving it a gentle stir before serving.
Q. What’s the best chocolate to use for mousse? I prefer dark chocolate with 60-70% cocoa content. It provides rich flavor without being too bitter. Brands like Ghirardelli, Lindt, or Valrhona work beautifully. Avoid chocolate chips as they contain stabilizers that can affect the smooth texture.
Q. Can I make this recipe dairy-free? Absolutely! I substitute full-fat coconut cream for the heavy cream and use dairy-free chocolate. Chill the coconut cream overnight and whip only the solid portion. The texture is slightly different but still wonderfully creamy.
Q. My mousse won’t set properly. What went wrong? Usually this happens when the cream or egg whites weren’t whipped to proper peaks, or if the folding technique deflated too much air. Sometimes the ratios are off. Make sure you’re measuring accurately and achieving proper peaks before folding.
Q. Is it safe to eat mousse made with raw eggs? Using fresh, high-quality eggs from a reputable source minimizes risks. If you’re serving to pregnant women, young children, elderly people, or anyone with compromised immunity, I recommend using pasteurized eggs or making an eggless version.
Q. Can I add alcohol to chocolate mousse? Yes! Liqueurs like Grand Marnier, Kahlua, or rum add wonderful flavor complexity. I typically add 2-3 tablespoons to the chocolate base. The alcohol doesn’t cook out, so be mindful if serving to people who avoid alcohol.
Q. Why does my mousse have a bitter taste? This usually indicates the chocolate percentage is too high for your taste preference, or you may have added too much cocoa powder. Try using chocolate with lower cocoa content or balance the bitterness by adding a bit more sugar or vanilla.
Q. Can I make individual portions ahead of time for a party? This is actually ideal for entertaining! I make individual servings up to two days ahead and cover each one with plastic wrap. They look elegant and eliminate the need for plating during the party. Just add garnishes right before serving.
Q. What should I do if my chocolate seizes while melting? If your chocolate becomes thick and grainy, it has seized due to moisture contact. Try whisking in a tablespoon of warm water or cream to bring it back together. Prevention is better – keep all utensils dry and avoid steam from the double boiler.
Creating the perfect chocolate mousse has been one of my most rewarding culinary journeys. This dessert embodies everything I love about cooking – it requires technique and understanding, but the results are pure magic. Whether you’re making it for a special celebration or simply treating yourself to something extraordinary, this mousse will deliver that perfect combination of elegance and indulgence that makes any meal memorable.
The beauty of mastering this recipe lies not just in the delicious results, but in understanding the techniques that can be applied to countless other desserts. Once you’ve conquered the art of tempering, folding, and creating stable emulsions, you’ll find yourself approaching other challenging recipes with confidence.
I encourage you to make this recipe your own through experimentation and adaptation. Every time I make chocolate mousse, I discover something new about the process or find a small way to improve the result. That’s the joy of cooking – there’s always room for creativity and growth, even with classic recipes that have been perfected over generations.