There’s something magical about the aroma of freshly baked focaccia wafting through my kitchen. The golden, dimpled surface glistening with olive oil, the herb-scented steam rising from the warm bread – it’s a sensory experience that never fails to transport me straight to the Italian countryside. After years of perfecting my focaccia technique, I’m thrilled to share with you this foolproof recipe that will have you creating bakery-quality bread in your own home.
Focaccia isn’t just bread; it’s a canvas for creativity, a foundation for countless flavor combinations, and surprisingly, one of the most forgiving bread recipes you’ll ever encounter. Whether you’re a complete beginner or an experienced baker looking to expand your repertoire, this comprehensive guide will walk you through every step of creating the perfect focaccia.
What Makes Focaccia Special?
Before we dive into the recipe, let me explain what sets focaccia apart from other breads. This Italian flatbread originated in ancient Rome and has evolved into the beloved rustic bread we know today. The key characteristics that make focaccia unique include its high hydration dough, generous olive oil coating, and the distinctive dimpled surface created by pressing your fingers into the dough.
Key Terms and Definitions:
- High Hydration Dough: A dough with a water content of 70% or higher relative to flour weight, creating an open, airy crumb structure
- Autolyse: A resting period where flour and water combine without kneading, allowing enzymes to break down proteins and starches
- Bulk Fermentation: The first rise of the dough after mixing all ingredients, crucial for flavor development
- Proofing: The final rise after shaping, allowing the dough to reach optimal volume before baking
- Dimpling: The characteristic finger-pressing technique that creates focaccia’s signature textured surface
Essential Ingredients for Perfect Focaccia
The beauty of focaccia lies in its simplicity. With just a handful of quality ingredients, you can create something truly extraordinary. Here’s what you’ll need:
Core Ingredients
| Ingredient | Amount | Purpose | Quality Tips |
|---|---|---|---|
| Bread Flour | 500g (4 cups) | Structure and protein content | Use high-protein flour (12-14% protein) |
| Warm Water | 375ml (1½ cups) | Hydration and yeast activation | Use filtered water at 105-110°F |
| Active Dry Yeast | 7g (1 packet) | Leavening agent | Check expiration date, proof before using |
| Fine Sea Salt | 10g (2 tsp) | Flavor and gluten development | Avoid iodized salt |
| Extra Virgin Olive Oil | 60ml (¼ cup) + extra | Flavor and texture | Use good quality, fruity olive oil |
| Sugar | 5g (1 tsp) | Yeast food and browning | Optional but helps with fermentation |
Topping Options
| Category | Options | Flavor Profile | Preparation Notes |
|---|---|---|---|
| Herbs | Rosemary, thyme, oregano, sage | Earthy, aromatic | Use fresh when possible, strip leaves from stems |
| Vegetables | Cherry tomatoes, red onion, bell peppers | Sweet, savory | Pre-cook harder vegetables, slice thinly |
| Cheese | Parmesan, mozzarella, goat cheese | Rich, creamy | Add during last 10 minutes of baking |
| Aromatics | Garlic, shallots, fennel seeds | Pungent, complex | Mince finely, distribute evenly |
Step-by-Step Focaccia Recipe
Phase 1: Creating the Dough
I always start by proofing my yeast – it’s a crucial step that ensures your bread will rise properly. In a small bowl, I combine the warm water with sugar and sprinkle the yeast on top. Within 5-10 minutes, you should see a foamy, bubbly mixture. If your yeast doesn’t foam, it’s likely dead, and you’ll need to start over with fresh yeast.
While the yeast activates, I measure my flour into a large mixing bowl. I create a well in the center and add the foamy yeast mixture along with 2 tablespoons of olive oil and the salt. Using a wooden spoon or my hands, I mix everything until a shaggy dough forms.
Here’s where focaccia differs from many bread recipes – we’re not aiming for a smooth, well-kneaded dough initially. The high hydration means the dough will be quite sticky and wet. Resist the urge to add more flour; this stickiness is what creates focaccia’s characteristic open crumb.
Phase 2: The Folding Technique
Instead of traditional kneading, I use a series of folds to develop the gluten. Every 30 minutes for the next 2 hours, I perform a set of folds:
- Wet your hands to prevent sticking
- Grab one side of the dough and fold it over to the opposite side
- Rotate the bowl 90 degrees and repeat
- Continue until you’ve folded all four sides
- Let the dough rest for 30 minutes
This folding technique builds strength in the dough while maintaining its delicate structure. After 2 hours and 4 sets of folds, you’ll notice the dough has become smoother, more elastic, and significantly increased in size.
Phase 3: The First Rise
After the folding process, I transfer my dough to a lightly oiled container for its first rise. I prefer using a clear container so I can monitor the dough’s progress. The dough should nearly double in size, which typically takes 1-2 hours at room temperature.
During this time, the yeast is working its magic, creating carbon dioxide that forms the bread’s structure and producing the complex flavors that make homemade bread so superior to store-bought versions.
Phase 4: Shaping and Final Proof
Once the dough has completed its first rise, I prepare my baking pan. I use a 9×13 inch rectangular pan or a large round pan, coating it generously with olive oil. This isn’t just for non-stick purposes – the oil will create a beautiful, crispy bottom crust.
I gently transfer the dough to the oiled pan, being careful not to deflate it too much. Using oiled hands, I stretch the dough to fit the pan. If the dough springs back, I let it rest for 10-15 minutes and try again. The goal is to fill the pan evenly without tearing the dough.
Now comes the fun part – creating those characteristic dimples. Using my fingertips, I press firmly into the dough, creating deep indentations across the entire surface. These dimples will hold pools of olive oil and seasonings, creating incredible flavor pockets.
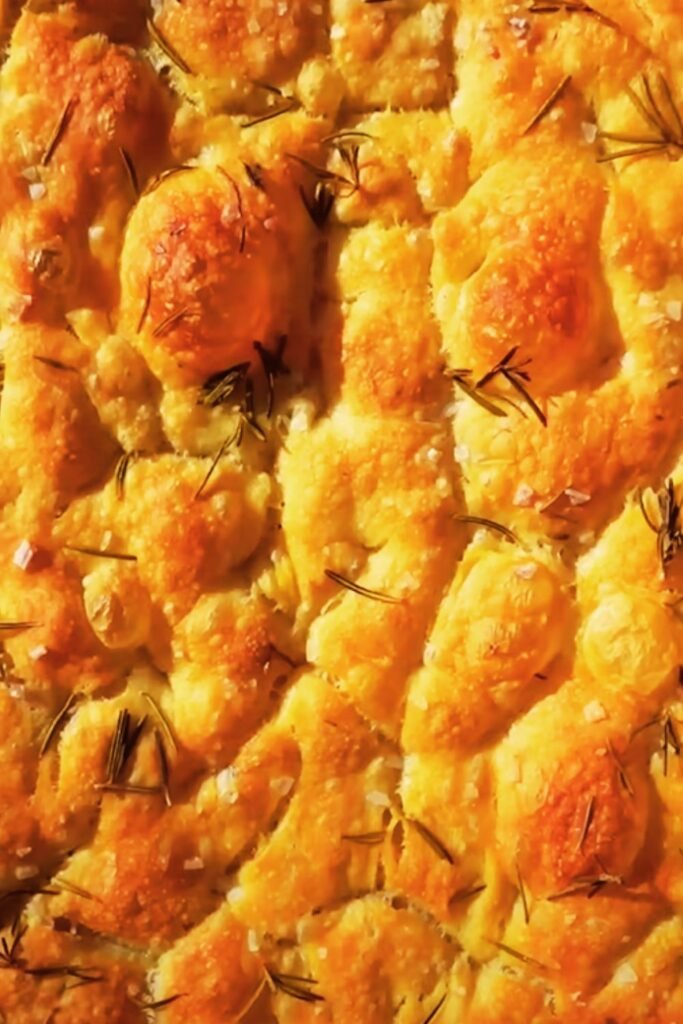
I drizzle the dimpled surface generously with olive oil, ensuring it pools in the indentations. Then I add my chosen toppings – today I’m using fresh rosemary, flaky sea salt, and halved cherry tomatoes.
Phase 5: Baking to Perfection
The final proof takes about 30-45 minutes. During this time, I preheat my oven to 425°F (220°C). The dough should look puffy and jiggly when gently shaken.
Before baking, I give the focaccia one final drizzle of olive oil and a sprinkle of coarse sea salt. Into the oven it goes for 25-30 minutes, until the top is golden brown and the edges are crispy.
The hardest part is waiting for it to cool slightly before cutting. The aroma filling my kitchen is almost unbearable, but patience is rewarded with the perfect texture and flavor.

Advanced Techniques and Variations
Overnight Fermentation Method
For even more complex flavors, I sometimes use an overnight fermentation technique. After the initial mixing, I place the dough in the refrigerator for 12-24 hours. This slow fermentation develops incredible depth of flavor. When ready to proceed, I remove the dough from the refrigerator and let it come to room temperature before continuing with the folding process.
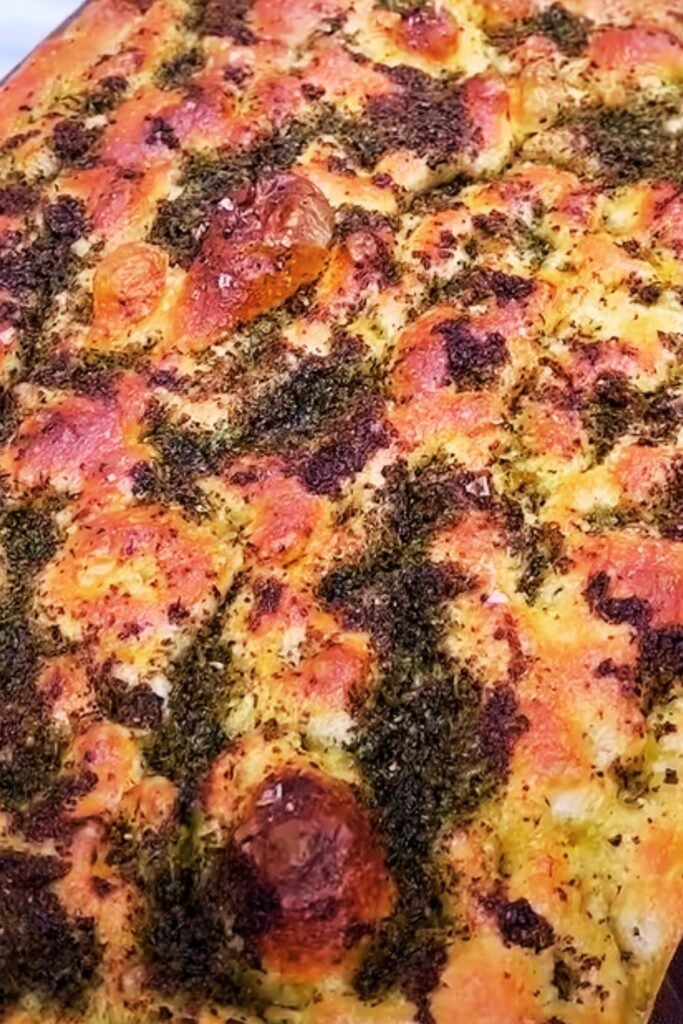
Flavor Combinations I Love
Over the years, I’ve experimented with countless topping combinations. Here are some of my favorites:
Mediterranean Classic: Rosemary, cherry tomatoes, Kalamata olives, and a sprinkle of oregano Caramelized Onion and Thyme: Sweet, slow-cooked onions with fresh thyme and a hint of balsamic vinegar Potato and Sage: Thinly sliced potatoes with crispy sage leaves and a generous amount of olive oil Fig and Goat Cheese: Fresh figs, creamy goat cheese, and a drizzle of honey (added after baking)
Troubleshooting Common Issues
| Problem | Cause | Solution |
|---|---|---|
| Dense, heavy texture | Over-mixing or insufficient hydration | Use gentle folding technique, ensure proper water ratio |
| Flat, didn’t rise | Dead yeast or too cool environment | Always proof yeast, maintain 75-80°F ambient temperature |
| Burnt bottom | Oven too hot or rack too low | Lower temperature to 400°F, move rack to center position |
| Soggy center | Underbaked or too thick | Bake longer, spread dough thinner in pan |
| Tough crust | Not enough oil or steam | Increase olive oil, place pan of water in oven |
Serving Suggestions and Storage
Fresh focaccia is best enjoyed within hours of baking, when the crust is still crispy and the interior soft and airy. I love serving it alongside soups, using it as a sandwich base, or simply tearing off pieces and dipping them in good olive oil and balsamic vinegar.
For storage, I wrap cooled focaccia in plastic wrap or store it in an airtight container for up to 3 days. To refresh day-old focaccia, I warm it in a 350°F oven for 5-10 minutes, which restores much of its original texture.
Focaccia also freezes beautifully. I slice it before freezing, wrapping individual pieces in plastic wrap and storing them in freezer bags for up to 3 months. Frozen slices can be toasted directly from the freezer.
Nutritional Benefits and Considerations
Homemade focaccia offers several nutritional advantages over commercial bread. When made with quality ingredients, it provides:
- Complex carbohydrates for sustained energy
- Healthy fats from olive oil, including monounsaturated fats
- B vitamins and minerals from flour
- Antioxidants from herbs and vegetables used as toppings
The fermentation process also makes the bread easier to digest and may increase the bioavailability of certain nutrients. However, like all bread, focaccia should be enjoyed as part of a balanced diet.
The Science Behind Perfect Focaccia
Understanding the science behind focaccia helps explain why this recipe works so well. The high hydration creates steam during baking, which contributes to the open crumb structure. The olive oil serves multiple purposes: it adds flavor, creates tenderness, prevents sticking, and contributes to the beautiful golden color.
The dimpling technique isn’t just aesthetic – those indentations create varying thickness across the bread, resulting in different textures from the thin, crispy areas to the thicker, chewier sections. This textural contrast is one of focaccia’s most appealing characteristics.
Temperature control is crucial throughout the process. Yeast activity is temperature-dependent, with optimal activity occurring around 80°F. Too hot, and you’ll kill the yeast; too cold, and fermentation will be sluggish.
Questions and Answers
Q: Can I make focaccia without a stand mixer? A: Absolutely! This recipe is designed to be made entirely by hand. The folding technique actually works better than machine mixing for developing the proper texture.
Q: What if I don’t have bread flour? A: You can substitute all-purpose flour, though the texture will be slightly less chewy. Add an extra tablespoon of vital wheat gluten if you have it to improve the structure.
Q: How do I know when my focaccia is properly baked? A: The top should be golden brown, and when you tap the bottom of the pan, it should sound hollow. An internal temperature of 200-205°F indicates doneness.
Q: Can I make the dough ahead of time? A: Yes! After mixing, you can refrigerate the dough for up to 3 days. The flavor actually improves with longer fermentation. Just bring it to room temperature before shaping.
Q: Why does my focaccia turn out flat? A: This usually indicates dead yeast or insufficient proofing time. Always test your yeast’s viability, and ensure your kitchen is warm enough for proper rising.
Q: What’s the best olive oil to use? A: Use a good quality extra virgin olive oil with a fruity flavor. Since olive oil is such a prominent ingredient, its quality directly impacts the final taste.
Q: Can I freeze focaccia dough? A: Yes, you can freeze the dough after the first rise. Thaw it overnight in the refrigerator, then proceed with shaping and the final proof.
Q: How do I prevent the bottom from getting soggy? A: Ensure your oven is fully preheated, and consider placing the pan on a preheated baking stone or the bottom rack for extra heat from below.
Q: What herbs work best on focaccia? A: Rosemary is traditional, but thyme, oregano, sage, and even lavender work beautifully. Fresh herbs provide the best flavor, but dried herbs can be substituted in smaller quantities.
Q: Can I make gluten-free focaccia? A: While challenging, it’s possible using a good gluten-free flour blend designed for bread. You’ll need to add xanthan gum and adjust the liquid ratios, and the texture will be different from traditional focaccia.
Creating the perfect focaccia is a journey of discovery, and each batch teaches you something new. The beauty of this bread lies not just in its delicious taste and beautiful appearance, but in the meditative process of creating it. From the initial mixing to the final golden-brown result, every step connects you to centuries of Italian baking tradition while allowing for your own creative expression. So roll up your sleeves, dust your hands with flour, and embark on this wonderful bread-making adventure.