I’ve been fascinated by Greek cuisine for years, and nothing captures the essence of Mediterranean cooking quite like fresh, warm pita bread. When I first attempted to make authentic Greek pita at home, I was amazed by how this seemingly simple flatbread could be so complex in flavor and texture. Today, I’m sharing everything I’ve learned about creating perfect Greek pita that rivals what you’d find in the tavernas of Athens.
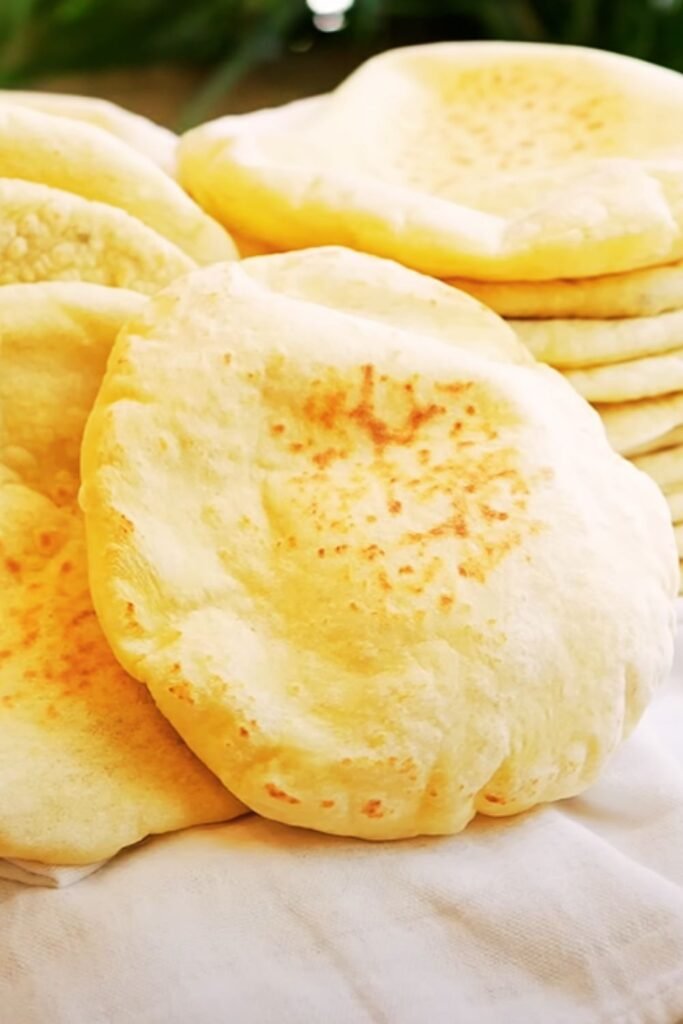
Greek pita isn’t just bread – it’s a canvas for countless Mediterranean delights. Unlike the pocket-style pita common in many Western countries, traditional Greek pita is typically thicker, chewier, and doesn’t always form a complete pocket. My journey with Greek pita began when I realized that store-bought versions simply couldn’t match the incredible aroma and taste of freshly baked homemade pita.
Understanding Greek Pita: Key Definitions
Pita (πίτα): A traditional Greek flatbread that serves as both a side dish and a vessel for various fillings. The word “pita” comes from the Greek word meaning “cake” or “pie.”
Yeast Activation: The process of awakening dormant yeast by combining it with warm water and sugar, creating the foundation for proper bread rising.
Gluten Development: The formation of elastic protein networks in dough through kneading, which gives pita its characteristic chewy texture.
Steam Pocket Formation: The phenomenon that occurs when moisture in the dough rapidly converts to steam during high-heat baking, creating the iconic pita pocket.
Autolyse: A resting period where flour and water combine before adding yeast, allowing for better hydration and easier kneading.
The Science Behind Perfect Greek Pita
My understanding of pita-making transformed when I learned about the science behind it. The magic happens at high temperatures – typically 450°F to 500°F. When the dough hits this intense heat, the moisture inside rapidly converts to steam, causing the bread to puff up dramatically. This steam creation is what forms the characteristic pocket, though traditional Greek pita doesn’t always achieve a complete separation.
I’ve discovered that the key lies in proper hydration. Greek pita dough should have a hydration level of approximately 60-65%, meaning for every 100 grams of flour, you need 60-65 grams of water. This creates the perfect balance between workability and steam generation.
Essential Ingredients for Authentic Greek Pita
| Ingredient | Amount (for 8 pitas) | Purpose | Quality Tips |
|---|---|---|---|
| All-purpose flour | 3 cups (360g) | Structure base | Use unbleached flour for better flavor |
| Warm water | 1 cup (240ml) | Hydration | Temperature should be 100-110°F |
| Active dry yeast | 1 packet (2¼ tsp) | Leavening agent | Check expiration date; should foam when activated |
| Sugar | 1 teaspoon | Yeast food | Helps with browning and flavor |
| Salt | 1 teaspoon | Flavor enhancer | Use fine sea salt for even distribution |
| Olive oil | 2 tablespoons | Texture and flavor | Extra virgin preferred for authentic taste |
The quality of ingredients makes a remarkable difference in my experience. I always use extra virgin olive oil because it adds that distinctive Mediterranean flavor that sets Greek pita apart from other flatbreads. The flour choice is crucial too – while bread flour can work, all-purpose flour actually produces a more tender result that’s closer to traditional Greek pita.
Step-by-Step Greek Pita Making Process
Preparation Phase
I start by activating the yeast, which I consider the most critical step. In a small bowl, I combine warm water (around 105°F) with sugar, then sprinkle the yeast on top. After 5-10 minutes, it should become frothy and aromatic – this tells me the yeast is alive and ready to work.
Mixing and Kneading
In a large mixing bowl, I combine the flour and salt, creating a well in the center. I pour the activated yeast mixture and olive oil into this well, then gradually incorporate the flour using a wooden spoon. Once the dough becomes too stiff to stir, I turn it onto a floured surface for kneading.
My kneading technique involves pushing the dough away with the heel of my hand, folding it back over itself, giving it a quarter turn, and repeating. I knead for about 8-10 minutes until the dough becomes smooth and elastic. A properly kneaded dough should spring back when poked gently.
Rising Process
I place the kneaded dough in an oiled bowl, cover it with a damp cloth, and let it rise in a warm place for 1-2 hours. The dough should double in size. I’ve found that a slightly warm oven (turned off) or a sunny windowsill works perfectly.
Shaping and Final Rise
After the first rise, I punch down the dough and divide it into 8 equal portions. I shape each portion into a ball, then roll them out into circles about ¼-inch thick and 6-7 inches in diameter. These shaped pitas need a second, shorter rise of about 30 minutes.
| Stage | Duration | Temperature | Key Indicators |
|---|---|---|---|
| Yeast activation | 5-10 minutes | 105°F water | Frothy, doubled volume |
| First rise | 1-2 hours | 75-80°F | Doubled in size |
| Second rise | 30 minutes | Room temperature | Slightly puffed, soft to touch |
| Baking | 3-5 minutes | 475°F | Puffed, light golden |
Baking Techniques for Perfect Results
The baking phase is where the magic truly happens. I preheat my oven to 475°F with a baking stone or heavy baking sheet inside. The preheating process takes at least 30 minutes – patience here is crucial for achieving that perfect puff.
When I’m ready to bake, I carefully transfer the shaped pitas directly onto the hot surface. Within 2-3 minutes, they should puff up dramatically. I resist the urge to open the oven door during this critical moment, as it would release the steam needed for proper rising.
Troubleshooting Common Issues
Through my years of pita-making, I’ve encountered various challenges. If pitas don’t puff, the usual culprits are insufficient oven heat, old yeast, or dough that’s too thick. Conversely, if they puff too much and become too crispy, the oven might be too hot or the dough too thin.
Nutritional Profile and Health Benefits
| Nutrient | Per Pita (approx.) | Daily Value % |
|---|---|---|
| Calories | 165 | 8% |
| Carbohydrates | 32g | 11% |
| Protein | 5g | 10% |
| Fat | 2g | 3% |
| Fiber | 1.5g | 6% |
| Sodium | 195mg | 8% |
| Iron | 1.8mg | 10% |
| Folate | 45mcg | 11% |
Greek pita offers several nutritional advantages. It’s a good source of complex carbohydrates, providing sustained energy. The inclusion of olive oil adds healthy monounsaturated fats, while the yeast contributes B vitamins. Compared to many commercial breads, homemade pita contains no preservatives or artificial additives.
Creative Serving Suggestions
My favorite ways to serve Greek pita extend far beyond the typical gyros and souvlaki, though those remain classics. I love creating Mediterranean breakfast spreads with warm pita, Greek yogurt drizzled with honey, fresh figs, and a sprinkle of chopped walnuts.
For lunch, I often prepare what I call “Greek pita pizzas” – brushing the bread with olive oil, adding crumbled feta, sliced tomatoes, olives, and oregano, then warming them briefly in the oven. The result is a delightful fusion that honors both Greek and Italian traditions.
Mediterranean Appetizer Combinations
- Classic Greek: Warm pita with tzatziki, dolmades, and Kalamata olives
- Mezze Platter: Accompanied by hummus, baba ganoush, and roasted red peppers
- Cheese Lover’s: With various Greek cheeses like kasseri, graviera, and fresh mizithra
- Vegetarian Delight: Stuffed with grilled vegetables, feta, and fresh herbs
Storage and Reheating Methods
Proper storage has been crucial in my pita-making journey. Fresh pitas are best consumed within 2-3 days when stored in an airtight container at room temperature. For longer storage, I wrap them individually in plastic wrap and freeze for up to 3 months.
Reheating requires care to maintain the bread’s texture. My preferred method is wrapping the pita in a damp paper towel and microwaving for 10-15 seconds, or warming them directly over a gas flame for a few seconds on each side. This restores the soft, pliable texture that makes pita perfect for wrapping and dipping.
Regional Variations Across Greece
During my culinary explorations, I’ve learned that Greek pita varies significantly across different regions. In Northern Greece, particularly around Thessaloniki, pitas tend to be thicker and are often used more like a plate than a pocket. The island variations, especially from Crete and the Cyclades, often incorporate local herbs and sometimes use a mixture of flours.
The Peloponnese region produces pitas with a slightly different texture, often achieved through variations in kneading time and rising conditions. I’ve experimented with these regional differences in my own kitchen, finding that even small adjustments in technique can produce notably different results.
Advanced Tips for Pita Perfection
After years of refinement, I’ve developed several advanced techniques that consistently produce superior pitas. Temperature control is paramount – I use an instant-read thermometer to ensure my water is exactly the right temperature for yeast activation. Too hot kills the yeast; too cool and it won’t activate properly.
I’ve also discovered that the humidity in my kitchen affects rising times significantly. On dry days, I place a small bowl of warm water in my oven during the rising phase to create the ideal environment. The dough should feel smooth and slightly tacky but not sticky when properly hydrated.
Professional Techniques
Rolling technique matters immensely. I use a light touch with my rolling pin, working from the center outward in all directions to maintain an even thickness. Uneven rolling leads to uneven puffing during baking.
The transfer to the oven is another critical moment. I use a large, flat spatula or pizza peel dusted with flour to slide the pitas onto the hot baking surface quickly and smoothly. Any hesitation or awkward movements can deflate the carefully risen dough.
Pairing Greek Pita with Traditional Dishes
| Traditional Dish | Pita Role | Flavor Profile | Preparation Style |
|---|---|---|---|
| Souvlaki | Wrapper | Grilled meat, tangy tzatziki | Warm and pliable |
| Greek Salad | Side bread | Fresh, acidic vegetables | Room temperature |
| Moussaka | Accompaniment | Rich, layered casserole | Lightly toasted |
| Spanakopita | Bread course | Spinach and feta filling | Fresh and soft |
The versatility of Greek pita never ceases to amaze me. It serves as both a utensil and a component of the meal itself. In traditional Greek dining, pita often replaces formal cutlery, allowing diners to scoop up sauces, wrap meats, and create personalized bites that combine multiple flavors.
Questions and Answers
Q. How do I know if my yeast is still active?
I always test my yeast before making pita. Mix it with warm water and a pinch of sugar – if it doesn’t foam within 10 minutes, it’s dead and needs replacement. Fresh yeast should smell pleasantly yeasty and create a thick foam layer.
Q. Why didn’t my pitas puff up in the oven?
Several factors can prevent proper puffing. The most common issues I’ve encountered are insufficient oven heat, rolled dough that’s too thick, or yeast that wasn’t properly activated. Make sure your oven is fully preheated and use a baking stone if possible for better heat retention.
Q. Can I make Greek pita without a stand mixer?
Absolutely! I actually prefer hand-mixing and kneading for pita dough. It gives me better control over the texture and helps me develop a feel for when the gluten is properly developed. The process takes about 10 minutes of active kneading.
Q. What’s the difference between Greek pita and other pita breads?
Greek pita is typically thicker and chewier than Lebanese or Syrian pita. It doesn’t always form a complete pocket and has a more substantial bite. The use of olive oil in the dough gives it a distinctive Mediterranean flavor that sets it apart from other regional variations.
Q. How can I make my pita more flavorful?
I enhance flavor through several methods: using high-quality extra virgin olive oil, adding dried herbs like oregano or rosemary to the dough, or incorporating a small amount of Greek yogurt for tanginess. Some bakers also add a tablespoon of honey for subtle sweetness.
Q. Is it possible to make gluten-free Greek pita?
While challenging, gluten-free pita is possible using a blend of alternative flours like rice flour, tapioca starch, and xanthan gum. However, the texture will be different from traditional pita, and achieving the characteristic puff is more difficult without gluten’s structural properties.
Q. How do I prevent my pita from becoming too hard?
Proper hydration and not overbaking are key. I ensure my dough has adequate moisture and remove pitas from the oven as soon as they’re puffed and lightly golden. Storing them properly wrapped while still slightly warm also helps maintain softness.
Q. Can I freeze pita dough for later use?
Yes, I often make extra dough and freeze portions after the first rise. Wrap individual portions tightly in plastic wrap and freeze for up to three months. Thaw overnight in the refrigerator, then proceed with shaping and the second rise.
Creating authentic Greek pita at home has become one of my most rewarding culinary adventures. The process connects me to centuries of Mediterranean baking traditions while providing the satisfaction of crafting something both delicious and fundamental to Greek cuisine. Each batch teaches me something new, whether it’s adjusting for weather conditions or perfecting my rolling technique. The joy of watching those rounds of dough transform into puffy, aromatic pitas never gets old, and neither does the pleasure of sharing them with family and friends around a table filled with Mediterranean flavors.