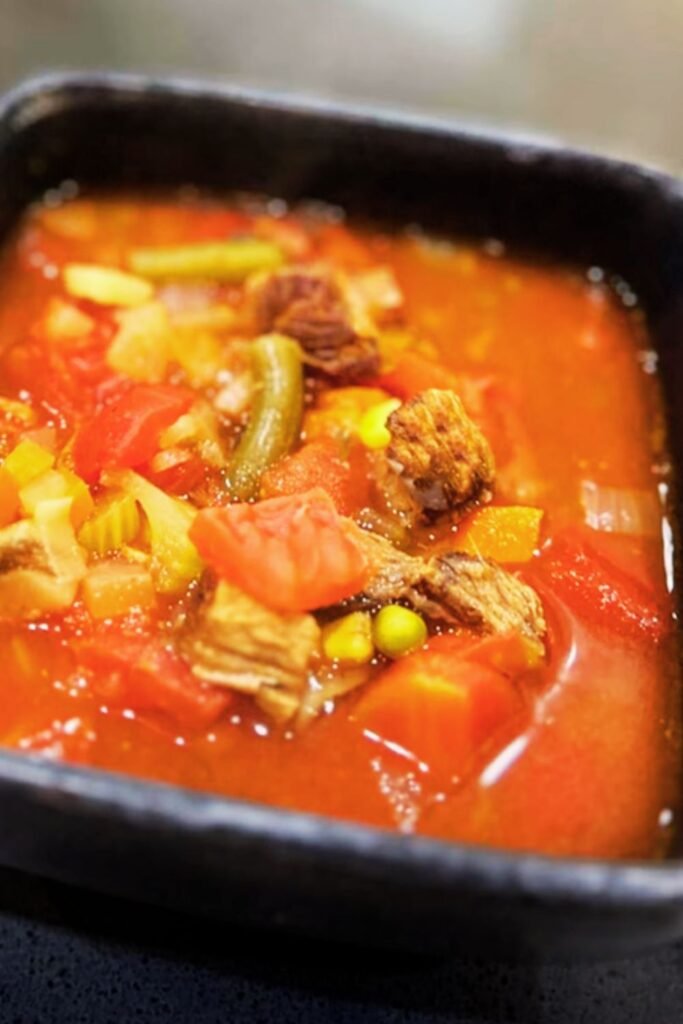
There’s something magical about the aroma of beef soup simmering on the stove that instantly transforms a house into a home. I’ve been perfecting this hearty vegetable beef soup recipe for years, and I can confidently say it’s become my family’s ultimate comfort food. Whether you’re battling a chilly winter evening or simply craving something soul-warming, this recipe delivers every single time.
My journey with this soup began during my early cooking days when I desperately wanted to create something that would rival my grandmother’s legendary soup. After countless trials and adjustments, I discovered the secret lies in building layers of flavor and choosing the right cut of beef. This isn’t just another soup recipe – it’s a complete meal that nourishes both body and spirit.
What Makes This Vegetable Beef Soup Special
I’ve tasted countless vegetable beef soups over the years, but this particular recipe stands out for several reasons. First, I use a combination of fresh and frozen vegetables that creates the perfect texture balance. The fresh vegetables provide that satisfying crunch, while the frozen ones break down slightly to thicken the broth naturally.
The beef selection is crucial here. I prefer using chuck roast cut into bite-sized pieces because it becomes incredibly tender during the slow cooking process. Unlike ground beef versions, these chunks of beef provide a more satisfying, restaurant-quality experience. The marbling in chuck roast also adds richness to the broth that you simply can’t achieve with leaner cuts.
Another distinguishing factor is my technique of browning the beef first. This step creates a beautiful fond on the bottom of the pot, which becomes the flavor foundation for the entire soup. Many recipes skip this step, but I consider it absolutely essential for developing that deep, complex taste.
Essential Ingredients Breakdown
Protein Selection
Chuck Roast (2 pounds): This is my preferred cut because it contains enough fat to stay moist during long cooking while developing incredible tenderness. I trim excess fat but leave some marbling for flavor.
Alternative Options: If chuck roast isn’t available, beef stew meat works well, though it may require longer cooking time. Short ribs provide exceptional flavor but need more preparation time.
Vegetable Components
Onions (2 large): I use yellow onions for their sweet, mellow flavor when cooked. They form the aromatic base alongside celery and carrots.
Carrots (4 large): Fresh carrots are non-negotiable here. They add natural sweetness and maintain their shape beautifully throughout cooking.
Celery (4 stalks): Provides essential aromatic depth and slight crunch. I include some leaves for extra flavor.
Potatoes (3 medium Russets): Russet potatoes hold their shape well and absorb flavors beautifully. I cut them into uniform pieces for even cooking.
Green Beans (1 pound fresh or frozen): These add color, nutrition, and textural variety. Fresh beans provide better texture, but frozen works in a pinch.
Corn (1 cup): Adds natural sweetness and creates visual appeal. I prefer fresh corn cut from the cob, but frozen works equally well.
Diced Tomatoes (28 oz can): Provides acidity that balances the richness and adds lovely color. I use high-quality canned tomatoes for consistency.
Broth and Seasonings
Beef Broth (8 cups): I use low-sodium broth to control salt levels. Homemade broth elevates this soup significantly if you have time.
Tomato Paste (3 tablespoons): Concentrates tomato flavor and adds depth. I cook it briefly with the aromatics to eliminate raw taste.
Worcestershire Sauce (2 tablespoons): Adds umami depth that makes people wonder about my “secret ingredient.”
Bay Leaves (3 whole): Essential for that classic soup flavor. I remove them before serving.
Fresh Herbs: Thyme and parsley are my go-to choices. Thyme goes in during cooking, parsley at the end for freshness.
Step-by-Step Cooking Instructions
Preparation Phase
I always start by organizing all ingredients before heating the pot. This soup involves multiple steps, and having everything ready prevents overcooking or missing crucial timing windows.
Cut the chuck roast into uniform 1-inch pieces, removing any large pieces of fat but leaving some marbling. Season generously with salt and pepper, allowing the meat to come to room temperature while you prepare vegetables.
Dice onions into medium pieces – not too small or they’ll disappear during cooking. Cut carrots into diagonal slices for visual appeal and even cooking. Celery should be cut into similar-sized pieces as the carrots. Cube potatoes into bite-sized pieces and keep them in cold water to prevent browning.
Building the Flavor Base
Heat two tablespoons of oil in a heavy-bottomed Dutch oven over medium-high heat. The oil should shimmer but not smoke. Working in batches to avoid overcrowding, brown the beef pieces on all sides. This takes about 8-10 minutes per batch and creates beautiful caramelization.
Don’t rush this step – proper browning is crucial for developing deep flavor. Remove browned beef to a plate and set aside. The bottom of your pot should have beautiful brown bits stuck to it – this is liquid gold for flavor.
Reduce heat to medium and add diced onions to the same pot. Cook for about 5 minutes until they begin to soften and pick up those brown bits. Add celery and cook another 3 minutes. The vegetables should be fragrant and slightly softened.
Add minced garlic and tomato paste, cooking for about 1 minute until fragrant. The tomato paste should darken slightly and lose its raw smell. Pour in about 1 cup of beef broth, scraping the bottom of the pot to release all those flavorful brown bits.
Simmering and Development
Return the browned beef to the pot along with any accumulated juices. Add remaining beef broth, diced tomatoes with their juice, Worcestershire sauce, and bay leaves. The liquid should cover the ingredients by about an inch.
Bring the mixture to a boil, then reduce heat to maintain a gentle simmer. Cover partially and cook for 1 hour, stirring occasionally. The beef should start becoming tender, and the flavors should begin melding together.
After the first hour, add carrots and potatoes. These vegetables need substantial cooking time to become tender without falling apart. Continue simmering for another 30 minutes, checking occasionally and adding more broth if needed.
Add green beans and corn during the final 15 minutes of cooking. These vegetables cook quickly and can become mushy if added too early. Taste and adjust seasoning with salt, pepper, and additional Worcestershire sauce if needed.
Nutritional Information and Benefits
| Nutrient | Per Serving (1 cup) | Daily Value % |
|---|---|---|
| Calories | 285 | 14% |
| Protein | 24g | 48% |
| Carbohydrates | 18g | 6% |
| Fiber | 4g | 16% |
| Fat | 12g | 18% |
| Sodium | 680mg | 30% |
| Iron | 3.2mg | 18% |
| Vitamin A | 4,200 IU | 84% |
| Vitamin C | 15mg | 25% |
| Potassium | 650mg | 19% |
This soup provides an excellent balance of macronutrients while delivering substantial vitamins and minerals. The high protein content from beef supports muscle maintenance and satiety, while the variety of vegetables contributes essential micronutrients and fiber.
The iron content is particularly notable, with beef providing heme iron that’s easily absorbed by the body. Combined with vitamin C from tomatoes and other vegetables, iron absorption is enhanced. The soup also provides significant vitamin A from carrots, supporting eye health and immune function.
Storage and Meal Prep Solutions
Refrigerator Storage
This soup stores beautifully in the refrigerator for up to 4 days. I prefer storing it in glass containers because they don’t retain odors and heat evenly for reheating. Allow the soup to cool completely before refrigerating to maintain food safety.
The flavors actually improve after a day in the refrigerator, making this an excellent make-ahead meal. The vegetables continue absorbing the rich broth flavors, creating an even more delicious result.
Freezer Storage Guidelines
| Storage Method | Duration | Best Practices |
|---|---|---|
| Freezer bags | 3 months | Lay flat, remove air, label with date |
| Freezer containers | 3 months | Leave 1-inch headspace for expansion |
| Ice cube trays | 2 months | Perfect for single servings |
| Vacuum sealed | 6 months | Best long-term option |
For freezing, I recommend slightly undercooking the vegetables since they’ll continue cooking during reheating. Potatoes can become grainy when frozen, so consider adding fresh potatoes when reheating if texture is important.
Reheating Instructions
Thaw frozen soup overnight in the refrigerator for best results. Reheat gently on the stovetop over medium-low heat, stirring occasionally. Add a splash of broth or water if the soup has thickened too much during storage.
Microwave reheating works for individual portions – heat in 30-second intervals, stirring between, until heated through. The key is gentle reheating to prevent overcooking the vegetables.
Serving Suggestions and Accompaniments
Bread Pairings
Nothing complements this hearty soup quite like fresh bread. My favorite accompaniments include crusty sourdough rolls, cornbread with honey butter, or garlic breadsticks. The bread provides textural contrast and helps make the meal more filling.
For a healthier option, I often serve whole grain dinner rolls or focaccia bread. The key is choosing something substantial enough to stand up to the rich, flavorful broth.
Additional Toppings
| Topping | Flavor Profile | Preparation |
|---|---|---|
| Fresh herbs | Bright, aromatic | Chopped parsley, thyme, or chives |
| Sour cream | Creamy, tangy | Dollop on top before serving |
| Grated cheese | Rich, savory | Sharp cheddar or Parmesan |
| Crackers | Crunchy texture | Oyster crackers or saltines |
| Hot sauce | Spicy kick | A few drops of favorite variety |
Complete Meal Ideas
This soup works beautifully as a complete meal, but I sometimes add simple sides for special occasions. A fresh green salad with vinaigrette provides a light contrast to the hearty soup. For heartier appetites, grilled cheese sandwiches create the ultimate comfort food combination.

Recipe Variations and Customizations
Vegetable Modifications
The beauty of this recipe lies in its adaptability. I’ve successfully substituted various vegetables based on seasons and preferences. Sweet potatoes work wonderfully in place of regular potatoes, adding natural sweetness and vibrant color.
Mushrooms make an excellent addition, providing umami depth and meaty texture. I sauté them separately before adding to prevent them from making the soup cloudy. Bell peppers, zucchini, and cabbage all work well, though timing adjustments may be necessary.
Protein Alternatives
While chuck roast remains my preferred choice, I’ve experimented with various proteins. Ground beef creates a different but equally satisfying soup – brown it first and drain excess fat. Turkey or chicken can substitute for lighter versions, though cooking times will be shorter.
For budget-friendly options, beef stew meat often goes on sale and works perfectly. Just allow extra cooking time for tenderization. Short ribs create an incredibly rich version but require longer cooking.
Seasoning Adjustments
The basic seasoning profile works for most palates, but customization opportunities abound. For Italian influence, add oregano, basil, and a parmesan rind during cooking. Mexican flavors work with cumin, chili powder, and a touch of lime juice at the end.
Herbs de Provence creates a French-inspired version, while smoked paprika adds wonderful depth and complexity. The key is adding stronger spices early in cooking and fresh herbs near the end.
Troubleshooting Common Issues
Tough Meat Problems
If your beef remains tough after the recommended cooking time, don’t worry – it simply needs more time. Continue simmering gently until fork-tender. This can take anywhere from 1.5 to 3 hours depending on the specific cut and size of pieces.
Avoid boiling vigorously, as this can make meat stringy rather than tender. Gentle simmering with occasional stirring produces the best results. If time is limited, cutting meat into smaller pieces reduces cooking time.
Thin Broth Solutions
Sometimes the broth doesn’t thicken as expected. My favorite solution involves mixing 2 tablespoons of cornstarch with cold water to create a slurry. Stir this into the simmering soup and cook for 5 minutes until thickened.
Alternatively, mash some of the potatoes against the side of the pot – this naturally thickens the broth while maintaining the soup’s rustic character. Adding a sliced potato that cooks completely and breaks down also works well.
Overseasoning Fixes
If you accidentally oversalt the soup, don’t panic. Add more broth or water to dilute, then adjust other seasonings accordingly. Potatoes naturally absorb salt, so adding extra cubed potatoes can help balance oversalted soup.
For other overseasoning issues, dairy products like cream or milk can mellow strong flavors. Add gradually and taste frequently to avoid overcorrection.
Questions and Answers
Q: Can I make this soup in a slow cooker?
Absolutely! I brown the beef and sauté aromatics on the stovetop first, then transfer everything to the slow cooker. Cook on low for 6-8 hours or high for 3-4 hours. Add quick-cooking vegetables like green beans during the last hour.
Q: What’s the best way to cut the beef for even cooking?
I cut against the grain in uniform 1-inch pieces. This ensures even cooking and easier chewing. Remove any large pieces of fat, but leave some marbling for flavor. Pat the pieces dry before seasoning for better browning.
Q: Can I use frozen vegetables throughout?
While fresh vegetables provide better texture, frozen can work in a pinch. Add frozen vegetables during the last 20 minutes of cooking to prevent mushiness. I still recommend using fresh onions, celery, and carrots for the flavor base.
Q: How do I prevent the potatoes from falling apart?
Choose waxy or all-purpose potatoes rather than russets if you want them to hold their shape better. Cut them into larger, uniform pieces and add them during the last 45 minutes of cooking. Avoid vigorous stirring once potatoes are added.
Q: What can I substitute for Worcestershire sauce?
Soy sauce provides similar umami depth, though the flavor profile differs slightly. Balsamic vinegar mixed with a touch of soy sauce also works. For homemade alternatives, combine anchovies, garlic, and vinegar, though the flavor won’t be identical.
Q: Is it necessary to brown the beef first?
While not absolutely necessary, browning creates significant flavor development that elevates the entire soup. The caramelized bits add depth and richness that can’t be achieved otherwise. If time is extremely limited, you can skip this step, but the result will be less flavorful.
Q: How can I make this soup spicier?
Add red pepper flakes during the sautéing phase, or include diced jalapeños with the other vegetables. Hot sauce at the end allows individual customization. Chipotle peppers in adobo sauce add both heat and smoky flavor.
Q: Can I double this recipe easily?
Yes, this recipe doubles well, though you’ll need a very large pot. Brown the beef in batches to avoid overcrowding. Cooking times remain essentially the same, though the initial heating may take longer with increased volume.
Q: What’s the best way to reheat individual portions?
Microwave works well for single servings – heat in 30-second intervals, stirring between. For stovetop reheating, use low heat and add a splash of broth if needed. Avoid rapid reheating, which can make vegetables mushy.
Q: How do I know when the beef is properly tender?
The beef should easily shred with a fork when properly cooked. It should not be chewy or require significant effort to bite through. If still tough after 2 hours, continue cooking – some cuts need longer depending on the specific piece of meat.
This hearty vegetable beef soup represents everything I love about comfort cooking – it’s nourishing, satisfying, and brings families together around the dinner table. The recipe creates enough for several meals, making it perfect for busy weekdays or weekend meal prep. I hope your family loves it as much as mine does, and I encourage you to make it your own with personal touches and favorite vegetables.