I’ve been making pita bread in my kitchen for over a decade, and I can tell you there’s nothing quite like the satisfaction of watching that magical puff happen in the oven. The aroma that fills your home, the soft texture, and that perfect pocket formation – it’s what keeps me coming back to this recipe time and time again.
Today, I’m sharing my foolproof method for creating restaurant-quality pita bread right in your own kitchen. Whether you’re planning a Mediterranean feast, looking for a healthier bread alternative, or simply want to impress your family with freshly baked bread, this comprehensive guide will walk you through every step of the process.
Understanding Pita Bread: The Foundation of Middle Eastern Cuisine
Pita bread is a round, flat bread that originated in the Middle East and Mediterranean regions. What makes pita unique is its ability to form a pocket when baked at high temperatures, creating a versatile vessel for various fillings.
Yeast activation refers to the process of dissolving dry yeast in warm water with sugar to create a foamy mixture that indicates the yeast is alive and ready to work its magic in your dough.
Gluten development is the formation of elastic protein networks in the dough through kneading, which gives pita bread its characteristic chewy texture and allows it to puff up properly.
Steam puffing is the scientific process behind pita’s signature pocket formation, where moisture in the dough turns to steam during high-heat baking, creating the hollow interior.
Essential Ingredients for Perfect Pita Bread
The beauty of pita bread lies in its simplicity. I use just six basic ingredients that you likely already have in your pantry:
Flour: I prefer bread flour for its higher protein content, which develops better gluten structure. However, all-purpose flour works perfectly fine and is what I recommend for beginners.
Water: The temperature matters here. I use water that’s between 105-110°F (40-43°C) – warm enough to activate the yeast but not so hot that it kills it.
Yeast: Active dry yeast is my go-to choice. I always check the expiration date because expired yeast can ruin your entire batch.
Sugar: Just a small amount helps feed the yeast and aids in browning. I use regular granulated sugar, but honey works beautifully too.
Salt: This enhances flavor and helps control yeast activity. I prefer fine sea salt, but table salt works just as well.
Olive oil: Adds richness and helps create a tender crumb. Extra virgin olive oil gives the best flavor, though any neutral oil can substitute.
| Ingredient | Amount | Purpose | Substitutions |
|---|---|---|---|
| Bread flour | 3 cups (360g) | Structure and chewiness | All-purpose flour, whole wheat flour (partial) |
| Warm water | 1 cup (240ml) | Hydration and yeast activation | Milk for richer flavor |
| Active dry yeast | 2¼ tsp (7g) | Leavening agent | Instant yeast (same amount) |
| Sugar | 1 tsp | Yeast food and browning | Honey, maple syrup |
| Salt | 1 tsp | Flavor enhancement | Sea salt, kosher salt |
| Olive oil | 2 tbsp | Tenderness and flavor | Vegetable oil, melted butter |
Step-by-Step Pita Bread Making Process
Preparing the Yeast Mixture
I start by combining the warm water, sugar, and yeast in a large mixing bowl. The water temperature is crucial here – I test it with my wrist, and it should feel comfortably warm, like a baby’s bath. I whisk everything together and let it sit for 5-10 minutes until it becomes foamy and bubbly. This tells me the yeast is active and ready to work.
If your mixture doesn’t foam, your yeast might be dead or your water too hot or cold. Don’t proceed with dead yeast – start over with fresh yeast and properly heated water.
Creating the Dough
Once my yeast mixture is foamy, I add the olive oil and salt, whisking to combine. Then I gradually add the flour, starting with 2½ cups and mixing with a wooden spoon until a shaggy dough forms. I add the remaining flour gradually until the dough pulls away from the sides of the bowl.
The dough should be slightly sticky but manageable. Different flours absorb water differently, so I sometimes need an extra tablespoon or two of flour, or occasionally a splash more water.
Kneading for Perfect Texture
I turn the dough onto a lightly floured surface and knead for 8-10 minutes until it becomes smooth and elastic. Proper kneading is essential for gluten development, which gives pita its characteristic texture and ability to puff.
My kneading technique involves pushing the dough away from me with the heel of my hand, folding it back over itself, giving it a quarter turn, and repeating. The dough is ready when it springs back when poked gently with my finger.
The First Rise
I place the kneaded dough in a lightly oiled bowl, turning it to coat all sides. Then I cover it with a damp kitchen towel and let it rise in a warm, draft-free place for 1-1.5 hours, until doubled in size.
My favorite rising spot is inside my oven with just the light on – it creates the perfect warm environment. In cooler weather, this process might take up to 2 hours, so I’m patient and let the dough tell me when it’s ready.
Shaping and Baking Techniques
Dividing and Shaping
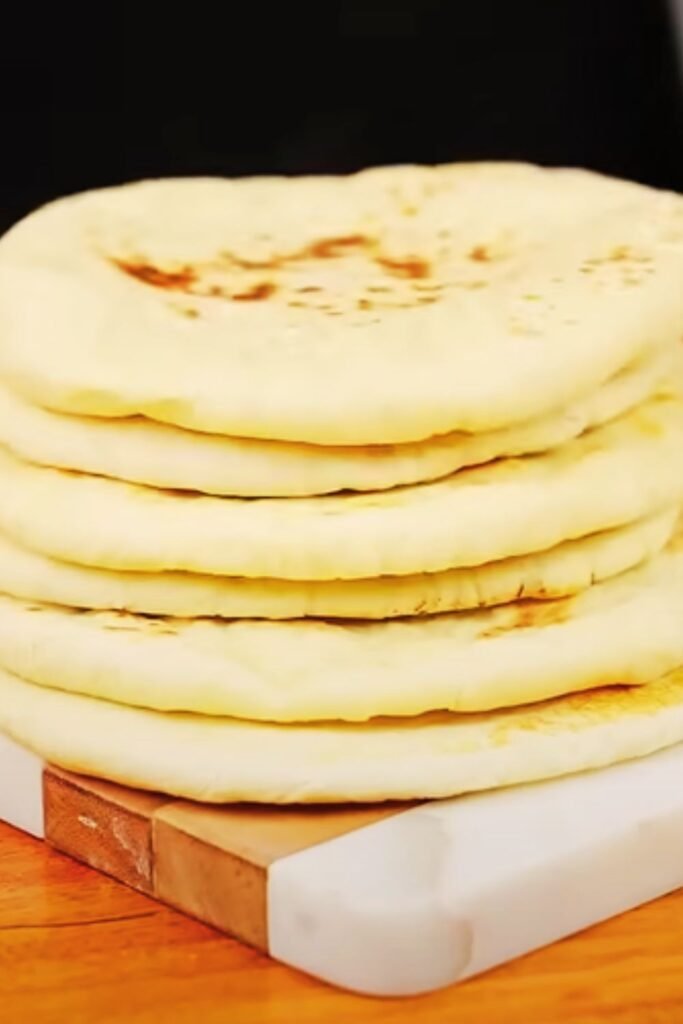
After the first rise, I punch down the dough to release air bubbles and turn it onto a lightly floured surface. I divide it into 8 equal portions, rolling each into a ball. Using a kitchen scale ensures even portions – each ball should weigh about 75-80 grams.
I keep the dough balls covered with a damp towel while working to prevent them from drying out. Working with one ball at a time, I roll each into a 6-7 inch circle, about ¼ inch thick. Consistent thickness is key for even puffing.
The Second Rise
I place the rolled circles on parchment-lined baking sheets, ensuring they don’t touch each other. Then I cover them with a damp towel and let them rise for another 30 minutes. This second rise is crucial for achieving that perfect puff.
During this time, I preheat my oven to 475°F (245°C) with a baking stone or inverted baking sheet inside. The key to pita’s signature puff is intense, immediate heat.
Baking for the Perfect Puff
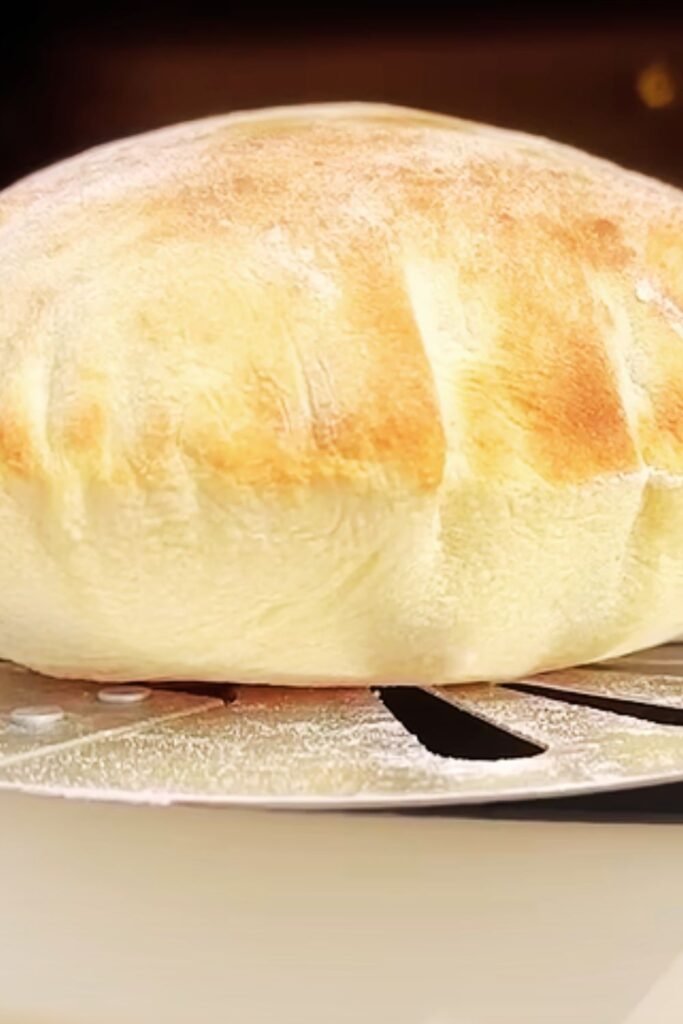
Here’s where the magic happens. I carefully transfer 2-3 pita rounds directly onto the hot baking stone using a pizza peel or the back of a baking sheet. The immediate contact with the hot surface creates steam that puffs the pita.
I bake for 3-4 minutes until they puff up like balloons. They should be lightly golden but still soft. Overbaking makes them crispy rather than soft and pliable.
Troubleshooting Common Pita Problems
| Problem | Cause | Solution |
|---|---|---|
| Pita doesn’t puff | Oven not hot enough | Preheat longer, use baking stone |
| Dough tears when rolling | Over-kneaded or under-rested | Let dough rest 10 minutes before rolling |
| Pita is too thick | Rolled incorrectly | Roll to consistent ¼ inch thickness |
| Dry, crumbly texture | Too much flour or overbaked | Measure accurately, reduce baking time |
| Dense, heavy pita | Yeast issues or insufficient rising | Check yeast freshness, ensure proper rising |
Storage and Serving Suggestions
Fresh pita bread is best enjoyed immediately, but I understand that’s not always practical. For short-term storage, I keep them in an airtight container at room temperature for up to 3 days. For longer storage, I freeze them in freezer bags for up to 3 months.
To reheat, I wrap them in a damp paper towel and microwave for 10-15 seconds, or toast them lightly in a dry skillet. This restores their soft, pliable texture.
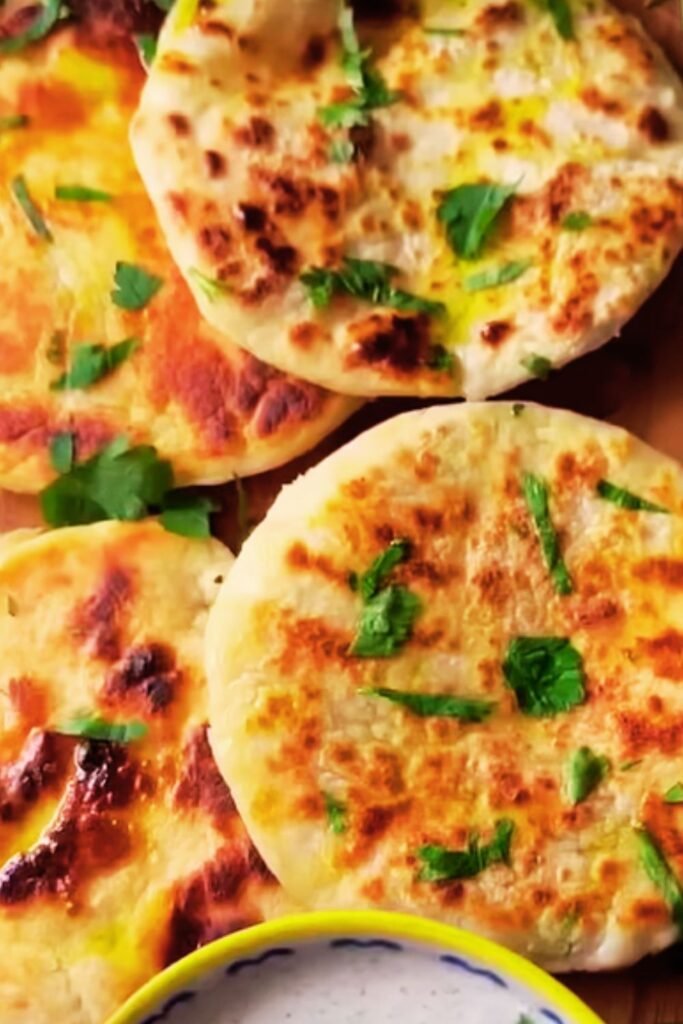
Creative Serving Ideas
I love using fresh pita bread in countless ways:
- Mediterranean mezze platters: Serve with hummus, baba ganoush, tabbouleh, and olives
- Stuffed pita pockets: Fill with falafel, grilled vegetables, or seasoned meats
- Pita chips: Cut into triangles, brush with olive oil, and bake until crispy
- Pizza bases: Top with sauce, cheese, and your favorite toppings
- Breakfast wraps: Fill with scrambled eggs, cheese, and fresh herbs
- Sandwich alternative: Use instead of regular bread for a more interesting lunch
Nutritional Benefits and Variations
Homemade pita bread offers several nutritional advantages over store-bought versions. By controlling the ingredients, I can reduce sodium content, avoid preservatives, and choose higher-quality flours.
Nutritional Information (per pita)
| Nutrient | Amount | % Daily Value |
|---|---|---|
| Calories | 165 | 8% |
| Carbohydrates | 32g | 11% |
| Protein | 5g | 10% |
| Fat | 2g | 3% |
| Fiber | 1g | 4% |
| Sodium | 295mg | 13% |
| Iron | 2mg | 11% |
Healthy Variations
Whole Wheat Pita: I substitute half the bread flour with whole wheat flour for added fiber and nutrients. The texture is slightly denser but equally delicious.
Herb-Infused Pita: I add dried herbs like oregano, thyme, or za’atar to the dough for extra flavor without additional calories.
Multigrain Pita: Incorporating seeds like sesame, poppy, or nigella seeds adds texture and nutritional value.
Gluten-Free Option: While challenging, I’ve had success using a blend of rice flour, tapioca starch, and xanthan gum for those with gluten sensitivities.
Advanced Tips for Pita Perfection
After years of making pita bread, I’ve learned several professional tricks that make a significant difference:
Temperature control: I use an instant-read thermometer to ensure my water is exactly 105-110°F. This consistency has dramatically improved my success rate.
Steam enhancement: I place a shallow pan of hot water on the oven’s bottom rack during baking. The additional steam helps with puffing and creates a softer crust.
Resting periods: I’ve found that letting the divided dough balls rest for 10 minutes before rolling makes them much easier to shape and less likely to shrink back.
Flour dusting: I dust my work surface lightly but avoid over-flouring, which can make the pita tough. Just enough to prevent sticking is perfect.
Timing coordination: I’ve learned to time everything so the oven is perfectly preheated when my second rise is complete. This coordination is crucial for optimal puffing.
Cultural Significance and History
Pita bread holds deep cultural significance across Middle Eastern and Mediterranean cultures. Archaeological evidence suggests that flatbreads similar to pita have been consumed for over 4,000 years, making it one of humanity’s oldest bread forms.
In my travels through Lebanon, Syria, and Palestine, I’ve observed how pita bread serves as more than just food – it’s a cultural connector, bringing families together around shared meals. The act of breaking bread together, literally tearing pieces of fresh pita to share, creates bonds that transcend language barriers.
The versatility of pita bread reflects the resourcefulness of Middle Eastern cuisine, where every ingredient serves multiple purposes and nothing goes to waste. Day-old pita becomes fattoush salad, while stale pieces are transformed into breadcrumbs or croutons.
Seasonal Adaptations
I’ve learned to adjust my pita-making process based on seasonal conditions:
Summer adaptations: In hot, humid weather, I use slightly less water and reduce rising times since the warm air accelerates fermentation.
Winter modifications: Cold weather requires longer rising times and sometimes a warmer environment. I often place my rising bowl near a heating vent or use the oven light trick.
Holiday versions: During special occasions, I incorporate seasonal flavors like pumpkin puree in fall or fresh herbs from my summer garden.
Questions and Answers
Q: Why didn’t my pita bread puff up in the oven? The most common reason is insufficient oven heat. Your oven must be thoroughly preheated to 475°F with a baking stone or inverted baking sheet inside. Also, ensure your dough isn’t too thick or thin – aim for exactly ¼ inch thickness.
Q: Can I make pita bread without a baking stone? Absolutely! I use an inverted baking sheet preheated in the oven. While a baking stone provides superior heat retention, a preheated baking sheet works remarkably well for home bakers.
Q: How long does homemade pita bread stay fresh? Fresh pita bread stays soft for 2-3 days when stored in an airtight container at room temperature. For longer storage, I freeze them in freezer bags for up to 3 months.
Q: Can I use instant yeast instead of active dry yeast? Yes, you can substitute instant yeast using the same amount. The difference is that instant yeast can be mixed directly with the flour without proofing, though I still prefer proofing to ensure yeast viability.
Q: What’s the secret to getting the perfect pocket? The secret lies in three factors: proper gluten development through adequate kneading, sufficient rising time, and intense oven heat. The steam created inside the dough at high temperatures forms the pocket.
Q: Can I make the dough ahead of time? Yes! After the first rise, you can refrigerate the dough for up to 24 hours. Let it come to room temperature before shaping and proceed with the second rise.
Q: Why is my pita bread tough and chewy? This usually results from too much flour during kneading or rolling, or overbaking. Measure flour accurately and bake just until puffed and lightly golden.
Q: Can I freeze shaped, unbaked pita rounds? I don’t recommend freezing unbaked pita as the texture suffers. Instead, bake them fully and freeze the finished pitas for best results.
Q: What should I do if my dough is too sticky to handle? Add flour gradually, one tablespoon at a time, until the dough is manageable. However, remember that slightly sticky dough often produces better texture than overly dry dough.
Q: How do I know when the dough has risen enough? The dough should double in size and feel light and airy. I test by gently poking it with my finger – if the indentation remains, it’s ready.
This comprehensive guide represents years of perfecting my pita bread technique. The key to success lies in understanding each step’s purpose and being patient with the process. Remember, bread-making is as much about feeling and intuition as it is about following recipes. Trust your instincts, and don’t be afraid to adjust based on your environment and ingredients.
The satisfaction of pulling perfectly puffed pita bread from your oven is incomparable. Whether you’re serving them alongside a elaborate Mediterranean feast or simply enjoying them fresh with a drizzle of olive oil and sprinkle of za’atar, homemade pita bread elevates any meal from ordinary to extraordinary.