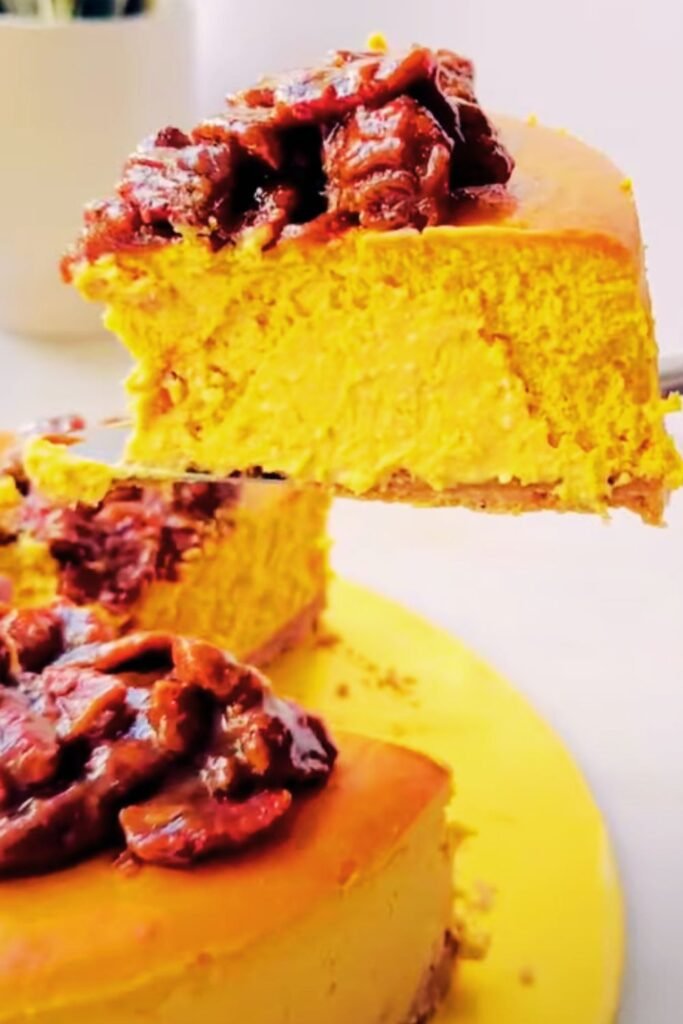
There’s something magical about combining two beloved fall desserts into one showstopping creation. I’ve been perfecting this Pecan Pie Pumpkin Cheesecake recipe for years, and I can confidently say it’s the dessert that steals the show at every holiday gathering. The creamy, spiced pumpkin cheesecake layer paired with the rich, gooey pecan pie topping creates a symphony of flavors that embodies everything we love about autumn.
When I first attempted this ambitious dessert, I was intimidated by the complexity of merging two classic recipes. However, after countless trials and plenty of delicious “mistakes,” I’ve developed a foolproof method that delivers consistent, restaurant-quality results. This dessert combines the best of both worlds: the silky smoothness of cheesecake with the caramelized sweetness of pecan pie.
Understanding the Components
Pumpkin Cheesecake Layer
: The foundation of this dessert features cream cheese blended with pumpkin puree and warm spices like cinnamon, nutmeg, and ginger. This layer provides the creamy, tangy base that balances the sweetness of the pecan topping.
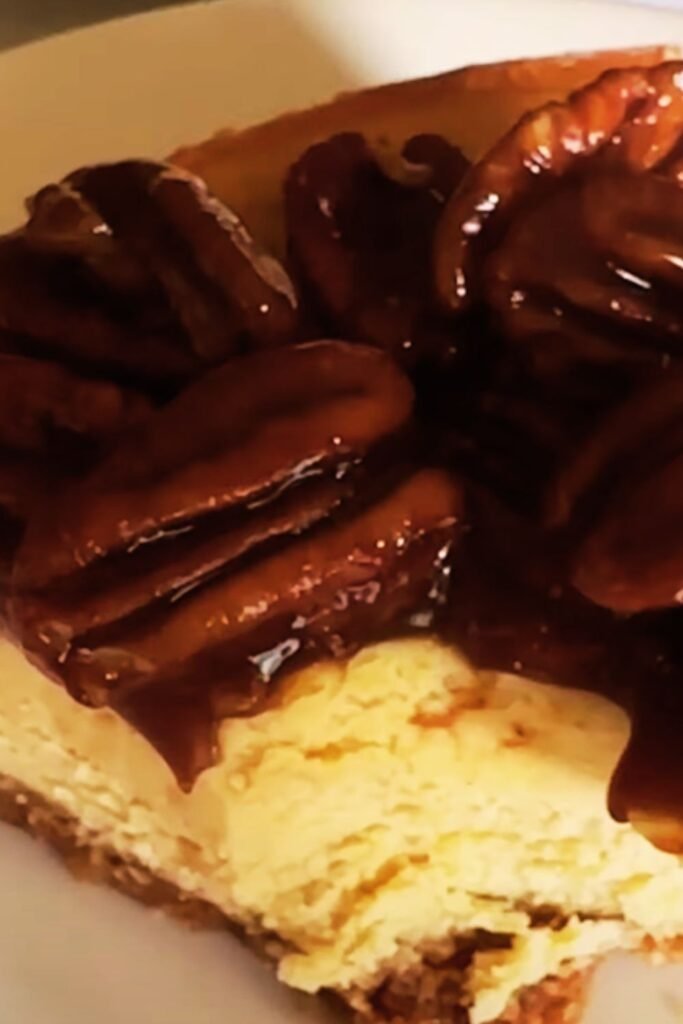
Pecan Pie Topping
: A rich mixture of corn syrup, eggs, butter, and pecans that creates the classic gooey texture we associate with traditional pecan pie. The topping caramelizes beautifully during baking, forming a golden-brown surface.
Graham Cracker Crust
: A buttery, spiced crust that provides structural support and adds a delightful crunch to contrast the smooth textures above.
Spice Blend
: A carefully balanced combination of warming spices that enhance both the pumpkin and pecan flavors without overwhelming either component.
Essential Ingredients and Their Roles

| Ingredient | Quantity | Purpose | Quality Tips |
|---|---|---|---|
| Cream Cheese | 32 oz (4 packages) | Base for cheesecake layer | Must be at room temperature |
| Pumpkin Puree | 15 oz can | Flavor and moisture | Use pure pumpkin, not pie filling |
| Large Eggs | 6 total | Binding and structure | Room temperature for best mixing |
| Granulated Sugar | 1 cup | Sweetening cheesecake | Fine granules dissolve better |
| Brown Sugar | 1 cup | Pecan topping sweetness | Light brown preferred |
| Corn Syrup | 1 cup | Pecan pie consistency | Light corn syrup works best |
| Pecan Halves | 2 cups | Topping texture and flavor | Fresh pecans, not stale |
| Graham Crackers | 1.5 cups crumbs | Crust foundation | Finely ground for best texture |
| Butter | 1/2 cup melted | Crust binding | Unsalted, melted but not hot |
| Vanilla Extract | 2 tsp | Flavor enhancement | Pure vanilla, not artificial |
| Ground Cinnamon | 1 tsp | Warm spice | Fresh ground preferred |
| Ground Nutmeg | 1/2 tsp | Depth of flavor | Use sparingly |
| Ground Ginger | 1/2 tsp | Bright spice note | Fresh ground if possible |
| Salt | 1/2 tsp | Flavor balance | Fine sea salt recommended |
Step-by-Step Preparation Process
Preparing the Crust
I always start with the crust because it needs time to set properly. In a medium bowl, I combine the graham cracker crumbs with melted butter, a tablespoon of brown sugar, and a pinch of cinnamon. The mixture should hold together when pressed but not be overly wet. I press this firmly into the bottom of my 9-inch springform pan, making sure to create even coverage and slightly raised edges.
The key to a perfect crust is achieving the right moisture level. Too dry, and it won’t hold together; too wet, and it becomes soggy. I use the back of a measuring cup to press the mixture firmly and evenly. After pressing, I chill the crust for at least 30 minutes while preparing the filling.
Creating the Pumpkin Cheesecake Layer
The success of any cheesecake lies in proper mixing technique. I start by ensuring all my ingredients are at room temperature – this is crucial for achieving a smooth, lump-free texture. In my large mixing bowl, I beat the cream cheese until it’s completely smooth and fluffy, about 3-4 minutes on medium speed.
Gradually, I add the granulated sugar, beating until well combined. Next comes the pumpkin puree, which I incorporate slowly to prevent lumps. The spice blend – cinnamon, nutmeg, and ginger – gets mixed in at this stage, along with the vanilla extract and salt.
Finally, I add the eggs one at a time, beating just until incorporated after each addition. Overmixing at this stage can incorporate too much air, leading to cracks during baking. The finished mixture should be smooth, creamy, and free of lumps.
Assembling the Pecan Topping
The pecan topping requires careful attention to achieve the perfect consistency. In a separate bowl, I whisk together the corn syrup, brown sugar, melted butter, and the remaining eggs until smooth. The mixture should be glossy and well-combined without any streaks of egg.
I fold in the pecan halves, ensuring they’re evenly distributed throughout the mixture. Some bakers prefer to chop the pecans, but I love the visual appeal and texture of whole halves. The pecans should be fresh and crisp – stale nuts can ruin the entire dessert.
Baking Techniques and Temperature Control
| Baking Stage | Temperature | Time | Visual Cues |
|---|---|---|---|
| Initial Bake | 350°F | 15 minutes | Crust set, lightly golden |
| Cheesecake Layer | 325°F | 45 minutes | Center slightly jiggly |
| Pecan Topping | 350°F | 25-30 minutes | Golden brown, set edges |
| Cooling | Oven off, door ajar | 1 hour | Gradual temperature decrease |
The baking process requires patience and attention to detail. I preheat my oven to 350°F and pre-bake the crust for 15 minutes until it’s set and lightly golden. After removing it from the oven, I reduce the temperature to 325°F.
I pour the pumpkin cheesecake mixture over the crust, spreading it evenly with an offset spatula. The layer should be smooth and level. I bake this for 45 minutes, until the center is almost set but still slightly jiggly when gently shaken.
Here’s where timing becomes critical: I carefully spoon the pecan mixture over the partially baked cheesecake layer. The cheesecake needs to be firm enough to support the topping but not fully set. I increase the oven temperature back to 350°F and bake for an additional 25-30 minutes, until the pecan topping is golden brown and set around the edges.
Cooling and Storage Guidelines
Proper cooling is essential to prevent cracks and ensure the perfect texture. I turn off the oven and prop the door open slightly, allowing the cheesecake to cool gradually for about an hour. This prevents the dramatic temperature change that often causes cracks.
After the initial cooling period, I remove the cheesecake from the oven and let it cool completely at room temperature. This takes another 2-3 hours. Once cooled, I refrigerate the dessert for at least 4 hours, though overnight is preferred for the best texture and flavor development.
Serving Suggestions and Presentation
Plating Techniques
: Use a sharp knife dipped in warm water between cuts to achieve clean slices. Wipe the knife clean after each cut for professional-looking presentation.
Garnish Options
: Fresh whipped cream, a drizzle of caramel sauce, or a sprinkle of cinnamon can enhance the visual appeal without overwhelming the flavors.
Portion Sizes
: This rich dessert is best served in modest portions – 12-16 slices from a 9-inch pan is appropriate.
Temperature Serving
: Serve chilled but not ice-cold. Remove from refrigerator 15-20 minutes before serving for optimal texture.
Troubleshooting Common Issues
| Problem | Cause | Solution |
|---|---|---|
| Cracked Surface | Rapid temperature change | Gradual cooling, avoid overbaking |
| Soggy Crust | Wet ingredients | Pre-bake crust, proper butter ratio |
| Grainy Texture | Cold ingredients | Room temperature ingredients |
| Sunken Center | Overmixing, overbaking | Gentle mixing, proper timing |
| Pecan Topping Too Hard | Overbaked topping | Monitor closely, reduce time |
| Layers Separating | Inadequate base layer | Ensure cheesecake is properly set |
Nutritional Information and Dietary Considerations
This dessert is undeniably indulgent, but understanding its nutritional profile helps with portion planning. Each slice contains approximately 450-500 calories, with significant amounts of protein from the cream cheese and eggs, healthy fats from the pecans, and beneficial vitamins from the pumpkin.
For those with dietary restrictions, I’ve experimented with several modifications. A gluten-free version can be achieved by using gluten-free graham crackers for the crust. While dairy-free alternatives exist, they significantly alter the texture and flavor profile.
Storage and Make-Ahead Tips
One of the best aspects of this dessert is its make-ahead friendly nature. The cheesecake actually improves after 24 hours in the refrigerator, as the flavors meld and the texture firms up perfectly. I often make this dessert 2-3 days before serving for optimal results.
For longer storage, the cheesecake can be frozen for up to three months. I wrap it tightly in plastic wrap and aluminum foil, then thaw it overnight in the refrigerator before serving. The texture remains remarkably good after freezing.
Seasonal Variations and Adaptations
While perfect for fall, this dessert can be adapted for other seasons. During spring, I sometimes add a layer of fresh berries between the cheesecake and pecan topping. Summer versions might include a lighter spice blend or additional citrus zest for brightness.
Winter adaptations often feature darker spices like cardamom or allspice, creating a more complex flavor profile that pairs beautifully with holiday meals. The basic technique remains the same, but these small adjustments keep the dessert fresh and exciting throughout the year.
Professional Tips for Perfect Results
After making this dessert countless times, I’ve learned several professional techniques that ensure consistent success. First, I always use a kitchen scale for measuring ingredients – weight measurements are more accurate than volume, especially for flour and sugar.
Second, I invest in quality ingredients. The difference between fresh, high-quality pecans and stale ones is dramatic. Similarly, real vanilla extract and pure pumpkin puree make noticeable improvements in the final product.
Third, I maintain detailed notes about baking times and temperatures. Every oven behaves differently, and keeping track of what works in your specific kitchen leads to better results over time.
The Science Behind the Perfect Texture
Understanding the science behind this dessert helps achieve consistent results. The cream cheese provides the tangy flavor and smooth texture, while the eggs act as a binding agent that sets during baking. The corn syrup in the pecan topping prevents crystallization, creating that characteristic gooey texture.
The gradual cooling process prevents the proteins in the eggs from contracting too quickly, which would cause cracks. The overnight chilling allows the flavors to meld while the texture firms to the perfect consistency.
Final Thoughts and Personal Recommendations
This Pecan Pie Pumpkin Cheesecake has become my signature dessert, the one I’m asked to bring to every gathering. While it requires time and attention, the results are truly spectacular. The combination of flavors and textures creates a dessert that’s both familiar and surprising.
I encourage you to read through the entire recipe before beginning, gather all your ingredients, and allow plenty of time for the process. This isn’t a last-minute dessert, but it’s absolutely worth the effort. The compliments you’ll receive and the satisfaction of creating something truly special make every minute worthwhile.
The key to success lies in patience, quality ingredients, and attention to detail. Don’t rush the process, and don’t be afraid to make it your own with small adjustments to suit your taste preferences. After all, the best recipes are the ones that bring joy to both the baker and those lucky enough to enjoy the results.
Questions and Answers
Q: Can I make this dessert without a springform pan? A: While a springform pan is ideal for easy removal, you can use a regular 9-inch round cake pan. Line it with parchment paper with overhanging edges to help lift the cheesecake out. The presentation won’t be as clean, but the taste will be identical.
Q: How do I prevent cracks in my cheesecake? A: The most important factors are using room temperature ingredients, not overmixing, and cooling gradually. I also place a pan of hot water on the bottom rack of the oven during baking to create steam, which helps prevent cracks.
Q: Can I use fresh pumpkin instead of canned? A: Absolutely! Roast a sugar pumpkin, remove the seeds, and puree the flesh until smooth. Fresh pumpkin often has more water content, so you may need to strain it through cheesecloth to remove excess moisture.
Q: What’s the best way to store leftovers? A: Cover the cheesecake tightly with plastic wrap or store individual slices in airtight containers in the refrigerator. It will stay fresh for up to 5 days. For longer storage, freeze individual slices wrapped in plastic wrap and aluminum foil.
Q: Can I make mini versions of this dessert? A: Yes! Use a muffin tin lined with paper cups. Reduce the baking time to about 15-20 minutes for the cheesecake layer and 10-15 minutes for the pecan topping. Mini versions are perfect for parties and portion control.
Q: Why is my pecan topping too runny? A: This usually happens when the cheesecake layer isn’t set enough before adding the topping, or if the topping mixture has too much liquid. Ensure the cheesecake is properly baked before adding the pecan layer, and double-check your measurements.
Q: Can I substitute the corn syrup with something else? A: While corn syrup provides the best texture, you can use honey or maple syrup as alternatives. The flavor will be slightly different, and the texture may be less smooth, but the results are still delicious.
Q: How far in advance can I make this dessert? A: This cheesecake actually improves with time! You can make it up to 3 days ahead of serving. The flavors meld beautifully, and the texture becomes perfectly firm. Just add any garnishes right before serving.
Q: What should I do if my cheesecake cracks despite my best efforts? A: Don’t panic! Cracks are purely cosmetic and don’t affect the taste. You can cover them with the pecan topping, or if they’re in the finished dessert, a dollop of whipped cream or a drizzle of caramel sauce will hide them beautifully.
Q: Can I make this dessert dairy-free? A: While challenging, it’s possible using dairy-free cream cheese alternatives and plant-based butter. However, the texture and flavor will be different from the traditional version. I recommend testing with a small batch first to ensure you’re happy with the results.