When I first tasted authentic Peruvian grilled chicken in a small Lima restaurant, I knew my life had changed forever. The smoky, perfectly seasoned chicken paired with that incredible creamy green sauce created a flavor explosion that I couldn’t stop thinking about for weeks. That was five years ago, and since then, I’ve been perfecting my own version of this beloved Peruvian classic.
Pollo a la Brasa, as it’s known in Peru, isn’t just any grilled chicken – it’s a culinary masterpiece that combines ancient Incan cooking techniques with modern flavors. The secret lies in the unique marinade that penetrates every fiber of the meat and the signature green sauce that accompanies it. Today, I’m sharing everything I’ve learned about creating this restaurant-quality dish in your own backyard.
Understanding Pollo a la Brasa: More Than Just Grilled Chicken
Pollo a la Brasa: A Peruvian-style roasted chicken dish that originated in the 1950s, characterized by its distinctive marinade featuring aji amarillo, cumin, and garlic, traditionally cooked on a rotisserie.
Aji Amarillo: A bright yellow Peruvian chili pepper that provides moderate heat and a fruity, complex flavor profile essential to authentic Peruvian cuisine.
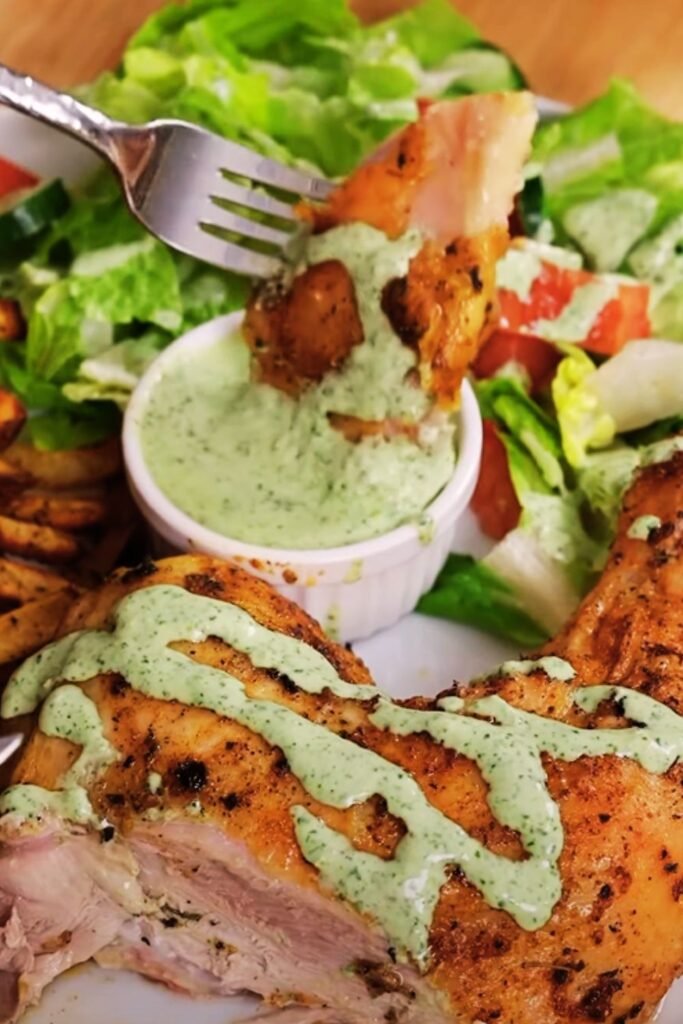
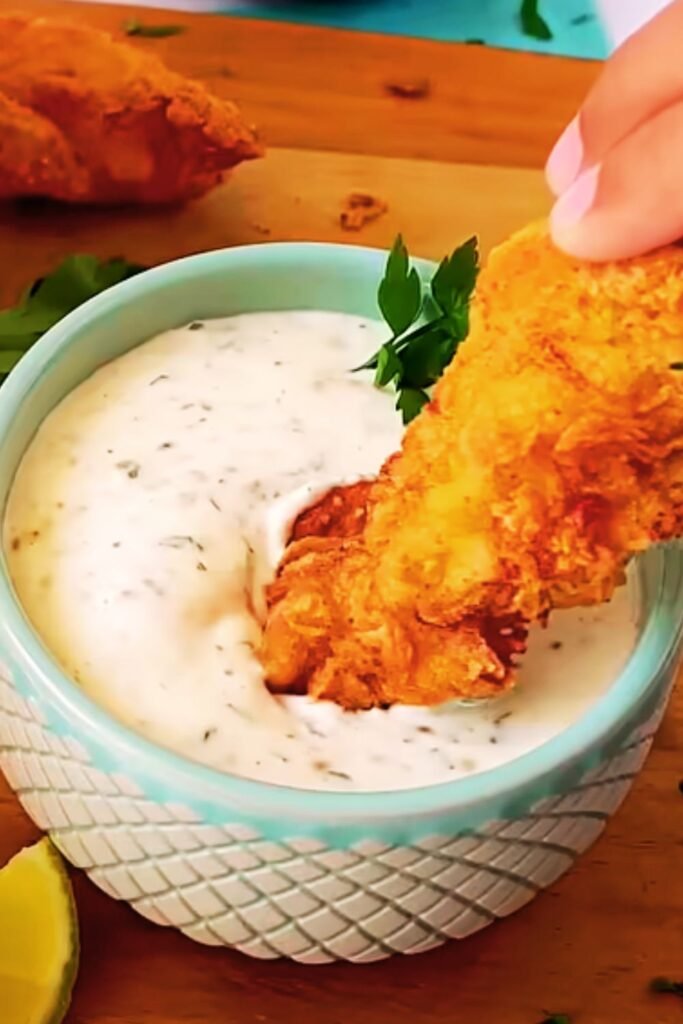
Aji Verde: The creamy green sauce served alongside pollo a la brasa, made primarily from cilantro, jalapeños, mayonnaise, and cheese.
Rotisserie Style: The traditional cooking method that ensures even cooking and maximum flavor retention through constant rotation over open flames.
This dish represents more than just a meal in Peruvian culture – it’s a social experience. Families gather around tables laden with this golden, crispy-skinned chicken, sharing stories while dipping each succulent bite into the vibrant green sauce. The preparation itself becomes a celebration of Peru’s rich culinary heritage.
The Perfect Marinade: Building Layers of Flavor
Creating an authentic marinade requires understanding the balance between heat, acidity, and aromatics. My version combines traditional Peruvian ingredients with techniques I’ve refined through countless experiments in my kitchen.
Essential Marinade Components
| Ingredient | Quantity | Purpose | Substitution Options |
|---|---|---|---|
| Aji Amarillo Paste | 3 tablespoons | Primary flavor base, mild heat | 2 tbsp paprika + 1 tsp cayenne |
| Soy Sauce | 1/4 cup | Umami depth, tenderizing | Tamari or coconut aminos |
| Fresh Garlic | 6 cloves, minced | Aromatic foundation | 2 tsp garlic powder |
| Ground Cumin | 2 teaspoons | Earthy warmth | 1 tsp ground coriander |
| White Vinegar | 2 tablespoons | Acid for tenderizing | Apple cider vinegar |
| Vegetable Oil | 1/4 cup | Moisture retention | Olive oil or avocado oil |
| Dark Beer | 1/2 cup | Depth and tenderizing | Chicken broth |
| Smoked Paprika | 1 tablespoon | Smoky color and flavor | Regular paprika |
The key to an exceptional marinade lies in the timing and technique. I always prepare my marinade at least 24 hours before cooking, allowing the flavors to meld and intensify. The aji amarillo paste serves as the soul of this marinade – its unique fruity heat cannot be replicated by regular chili peppers, though my suggested substitution works in a pinch.
Marinade Preparation Technique
I start by creating a paste with the minced garlic, aji amarillo, and a splash of the soy sauce. This creates a concentrated flavor base that distributes more evenly throughout the chicken. Then I gradually whisk in the remaining liquid ingredients, ensuring no lumps remain. The final marinade should have the consistency of a thin sauce and a vibrant orange-red color.
Selecting and Preparing Your Chicken
Not all chickens are created equal when it comes to grilling. I’ve experimented with various cuts and preparations, and my findings might surprise you.
Best Chicken Cuts for Grilling
| Cut Type | Cooking Time | Best For | Considerations |
|---|---|---|---|
| Whole Chicken (spatchcocked) | 45-60 minutes | Traditional presentation | Requires spatchcocking skills |
| Chicken Halves | 35-45 minutes | Even cooking, easier handling | May dry out faster |
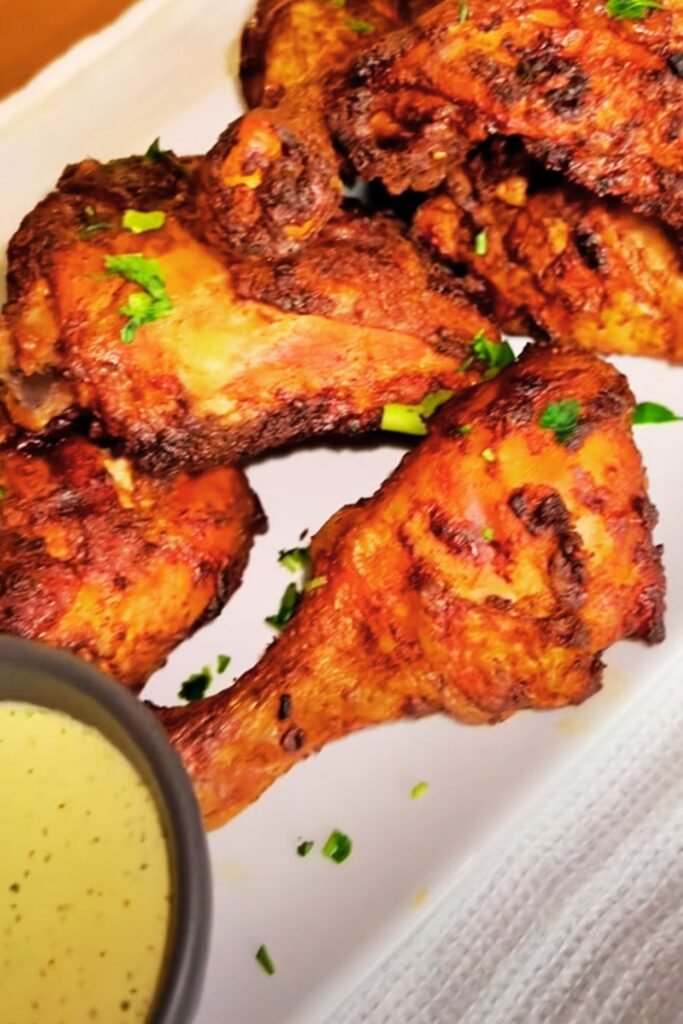
| Leg Quarters | 30-40 minutes | Budget-friendly, stays moist | Longer cooking time |
| Thighs and Drumsticks | 25-35 minutes | Beginner-friendly | Mix cooking times |
My preferred method involves spatchcocking a whole chicken – removing the backbone and flattening the bird. This technique ensures even cooking while maintaining the visual impact of a whole chicken presentation. The process might seem intimidating initially, but I’ve found it becomes second nature with practice.
The Art of Spatchcocking
Spatchcocking transforms your cooking game entirely. I place the chicken breast-side down and use sharp kitchen shears to cut along both sides of the backbone. Once removed, I flip the chicken and press firmly on the breastbone until I hear it crack and the chicken lies flat. This technique reduces cooking time by nearly half while ensuring uniform doneness.
Mastering the Creamy Green Sauce (Aji Verde)
The green sauce deserves equal attention to the chicken itself. This isn’t just a condiment – it’s an essential component that completes the dish. My recipe balances creamy richness with bright, herbaceous flavors and just enough heat to complement the chicken.
Aji Verde Ingredient Breakdown
| Ingredient | Quantity | Role | Flavor Profile |
|---|---|---|---|
| Fresh Cilantro | 2 cups, packed | Primary herb base | Bright, slightly citrusy |
| Jalapeño Peppers | 2-3 medium | Heat and freshness | Clean heat, vegetal notes |
| Mayonnaise | 1/2 cup | Creamy base | Rich, neutral binding |
| Queso Fresco | 1/4 cup, crumbled | Authentic tang | Mild, slightly salty |
| Garlic | 2 cloves | Aromatic punch | Sharp, pungent |
| Lime Juice | 2 tablespoons | Acid balance | Bright, citrusy |
| Salt | 1 teaspoon | Flavor enhancement | Mineral depth |
The secret to exceptional aji verde lies in the preparation order. I always start by processing the herbs and peppers first, creating a fine paste before adding the dairy components. This prevents the sauce from becoming too thin and ensures the herb flavors remain vibrant.
Green Sauce Preparation Tips
I’ve learned that the temperature of your ingredients matters significantly. Room temperature mayonnaise and cheese blend more smoothly than cold ingredients straight from the refrigerator. Additionally, I always taste and adjust the heat level gradually – you can add more jalapeño, but you can’t take it away.
Advanced Grilling Techniques
Grilling pollo a la brasa requires more than just throwing chicken on hot coals. I’ve developed a two-zone cooking method that ensures crispy skin while maintaining juicy meat throughout.
Two-Zone Grilling Setup
My preferred setup involves creating distinct temperature zones on the grill. I pile coals on one side for direct, high-heat cooking and leave the other side cooler for indirect cooking. This allows me to start the chicken over high heat to develop the skin, then move it to the cooler side to cook through gently.
Temperature and Timing Guide
| Cooking Phase | Temperature | Duration | Purpose |
|---|---|---|---|
| Initial Sear | 400-450°F | 5-7 minutes per side | Skin development |
| Indirect Cooking | 325-350°F | 20-30 minutes | Even cooking through |
| Final Crisping | 400°F | 3-5 minutes | Final skin crispness |
| Resting Period | Room temp | 10 minutes | Juice redistribution |
I always use a reliable meat thermometer to ensure safety and optimal texture. The internal temperature should reach 165°F in the thickest part of the thigh, but I’ve found that 170°F produces even better results without sacrificing moisture.
Troubleshooting Common Issues
Through years of perfecting this recipe, I’ve encountered and solved numerous challenges that home cooks face when attempting pollo a la brasa.
Dry Chicken Solutions
Dry chicken usually results from overcooking or insufficient marinating time. I combat this by brining the chicken for 2-4 hours before marinating, which helps the meat retain moisture during cooking. If your chicken tends to dry out, try reducing cooking temperature and extending cooking time.
Skin Not Crispy Enough
Achieving restaurant-quality crispy skin requires proper preparation and technique. I always pat the chicken completely dry before grilling and ensure my grill grates are clean and well-oiled. Starting with high heat is crucial for initial skin development.
Uneven Cooking
Uneven cooking often stems from inconsistent grill temperatures or improper chicken preparation. I’ve found that using a grill thermometer and maintaining consistent heat zones eliminates this problem. Additionally, spatchcocking ensures more even cooking than leaving the chicken whole.
Serving Suggestions and Accompaniments
Authentic Peruvian presentation elevates this dish from simple grilled chicken to a complete cultural experience. I’ve researched traditional accompaniments and adapted them for home cooking.
Traditional Side Dishes
Papa a la Huancaína: Sliced boiled potatoes topped with a creamy yellow sauce made from aji amarillo, cheese, and crackers.
Ensalada Criolla: A simple salad of thinly sliced red onions and cilantro dressed with lime juice and salt.
Yuca Frita: Fried cassava root that provides a starchy, satisfying complement to the rich chicken.
Canary Beans: Large, creamy beans that are a staple in Peruvian cuisine, often served simply seasoned.
My Recommended Serving Combinations
I typically serve the chicken family-style on a large platter surrounded by small bowls of aji verde. The accompaniments I choose depend on the occasion and season, but I always include at least one starchy side and a fresh element to balance the richness of the chicken.
Nutritional Benefits and Considerations
This dish offers significant nutritional value when prepared thoughtfully. The chicken provides high-quality protein, while the green sauce contributes beneficial herbs and healthy fats.
Nutritional Breakdown (Per Serving)
| Component | Calories | Protein | Carbs | Fat | Key Nutrients |
|---|---|---|---|---|---|
| Grilled Chicken (4 oz) | 285 | 35g | 0g | 15g | B vitamins, selenium |
| Aji Verde (2 tbsp) | 95 | 1g | 2g | 10g | Vitamin C, healthy fats |
| Complete Serving | 380 | 36g | 2g | 25g | Complete amino acids |
The marinade adds minimal calories while significantly boosting flavor and providing antioxidants from the spices and herbs. The green sauce, while calorie-dense, offers beneficial compounds from cilantro and peppers.
Storage and Meal Prep Strategies
I’ve developed efficient methods for preparing this dish ahead of time, making it perfect for busy weeknight dinners or entertaining large groups.
Make-Ahead Components
The marinade can be prepared up to one week in advance and stored in the refrigerator. I often double the batch and freeze half for future use. The green sauce keeps well for 3-4 days refrigerated and actually improves in flavor as the ingredients meld.
Leftover Transformation Ideas
Leftover pollo a la brasa becomes the foundation for numerous other dishes. I use it in sandwiches, salads, grain bowls, and even as a pizza topping. The flavors are robust enough to stand up to additional ingredients while remaining the star of the dish.
Regional Variations and Adaptations
Peru’s diverse geography has created regional variations of this beloved dish. Understanding these differences helps appreciate the complexity of Peruvian cuisine.
Coastal vs. Highland Preparations
Coastal versions often incorporate more seafood-influenced flavors, while highland variations might include potatoes directly in the cooking process. I’ve experimented with both approaches and found elements from each that enhance my base recipe.
Modern Fusion Adaptations
Contemporary Peruvian-fusion restaurants have created interesting variations that maintain the dish’s essence while incorporating global influences. I’ve tried versions with Asian-inspired marinades and Mediterranean herb combinations, though I always return to the traditional preparation as my favorite.
Equipment Recommendations
The right equipment makes a significant difference in achieving professional results. I’ve tested various grills and tools to identify what works best for home cooks.
Essential Grilling Equipment
| Item | Purpose | Budget Option | Premium Choice |
|---|---|---|---|
| Grill | Primary cooking surface | Kettle charcoal grill | Gas grill with multiple zones |
| Thermometer | Temperature monitoring | Instant-read digital | Wireless probe thermometer |
| Tongs | Chicken handling | Standard metal tongs | Locking, long-handled tongs |
| Basting Brush | Marinade application | Silicone brush | Natural bristle brush |
I strongly recommend investing in a quality instant-read thermometer. This single tool has improved my cooking success rate more than any other equipment purchase.
Frequently Asked Questions
Q: Can I make this recipe without aji amarillo paste?
While aji amarillo provides the authentic flavor, I understand it’s not always available. My preferred substitute combines 2 tablespoons of sweet paprika with 1 teaspoon of cayenne pepper and a pinch of turmeric for color. The flavor won’t be identical, but it creates a delicious variation.
Q: How long should I marinate the chicken?
I recommend a minimum of 4 hours, but 24 hours produces optimal results. I’ve experimented with longer marinating times and found that beyond 48 hours, the texture begins to change due to the acid in the marinade.
Q: Can I use a gas grill instead of charcoal?
Absolutely! While charcoal provides a slightly smokier flavor, gas grills offer better temperature control. I use wood chips in a smoker box to add smokiness when using gas grills.
Q: Is the green sauce spicy?
The heat level is moderate and adjustable. I typically use 2 jalapeños for a mild-medium heat that most people enjoy. You can reduce to 1 pepper or remove the seeds for less heat, or add serrano peppers for more intensity.
Q: Can I bake this chicken instead of grilling?
Yes, though the flavor will differ slightly. I bake at 425°F for about 45 minutes, starting skin-side down for the first 20 minutes, then flipping to crisp the skin. The results are delicious, though less smoky than grilled versions.
Q: How do I know when the chicken is done?
I always use a meat thermometer inserted into the thickest part of the thigh. The internal temperature should reach 165°F for safety, though I prefer 170°F for optimal texture. The juices should run clear, and the skin should be golden brown.
Q: Can I make the green sauce dairy-free?
I’ve successfully made dairy-free versions using vegan mayonnaise and nutritional yeast in place of the cheese. The flavor changes slightly, but it remains delicious and maintains the creamy texture.
Q: What’s the best way to reheat leftover chicken?
I reheat in a 350°F oven for 10-15 minutes to maintain the skin’s crispiness. Microwaving works for quick reheating but will soften the skin. For best results, I sometimes finish reheated chicken under the broiler for 2-3 minutes.
This Peruvian grilled chicken with creamy green sauce represents more than just a recipe – it’s a gateway to understanding the rich culinary traditions of Peru. The combination of smoky, perfectly seasoned chicken with the bright, creamy aji verde creates a dining experience that transforms ordinary meals into extraordinary memories. Whether you’re cooking for family dinner or entertaining friends, this dish delivers restaurant-quality results that will have everyone asking for the recipe.
The beauty of pollo a la brasa lies in its adaptability. While I’ve shared the traditional preparation that I’ve perfected over years of practice, don’t hesitate to make it your own. Adjust the spice levels, experiment with different herbs in the green sauce, or try various side dish combinations. The fundamental techniques I’ve outlined will ensure success regardless of your personal variations.
Remember that mastering this dish takes practice. My first attempt didn’t match the restaurant quality I remembered from Lima, but each iteration brought me closer to that perfect balance of flavors and textures. Be patient with yourself, pay attention to the details I’ve shared, and most importantly, enjoy the process of creating this incredible dish that brings the vibrant flavors of Peru to your own table.