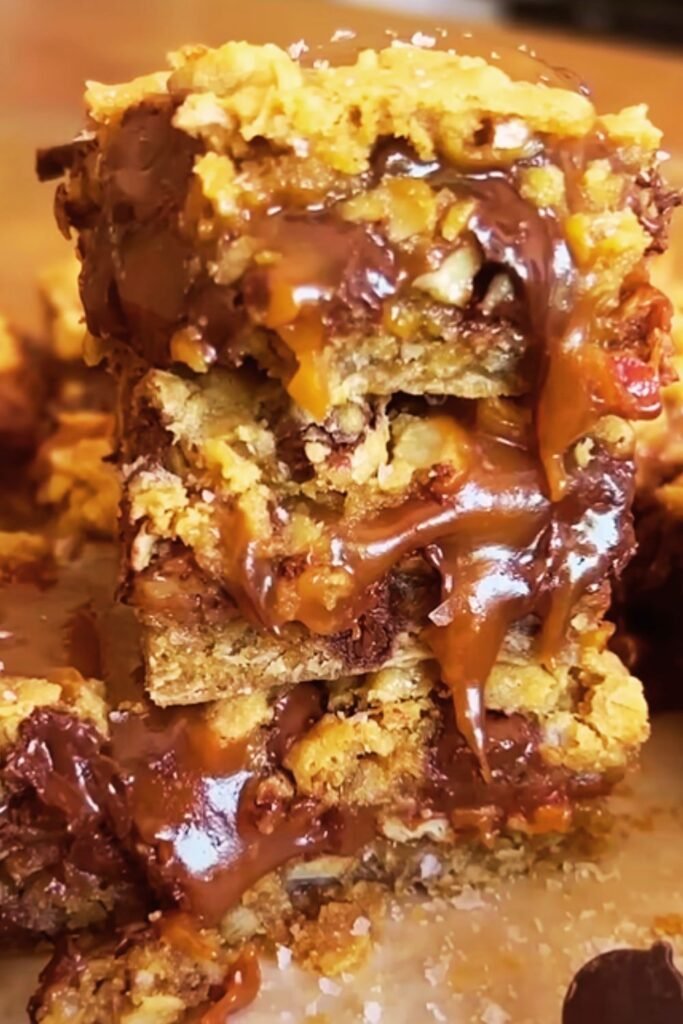
There’s something magical about the combination of buttery sugar cookies, rich chocolate, and that perfect balance of sweet and salty caramel. I’ve been perfecting this recipe for salted caramel chocolate sugar cookie bars for years, and let me tell you – these bars are absolutely irresistible. They’re the kind of treat that disappears from the counter before you can properly photograph them for your recipe collection.
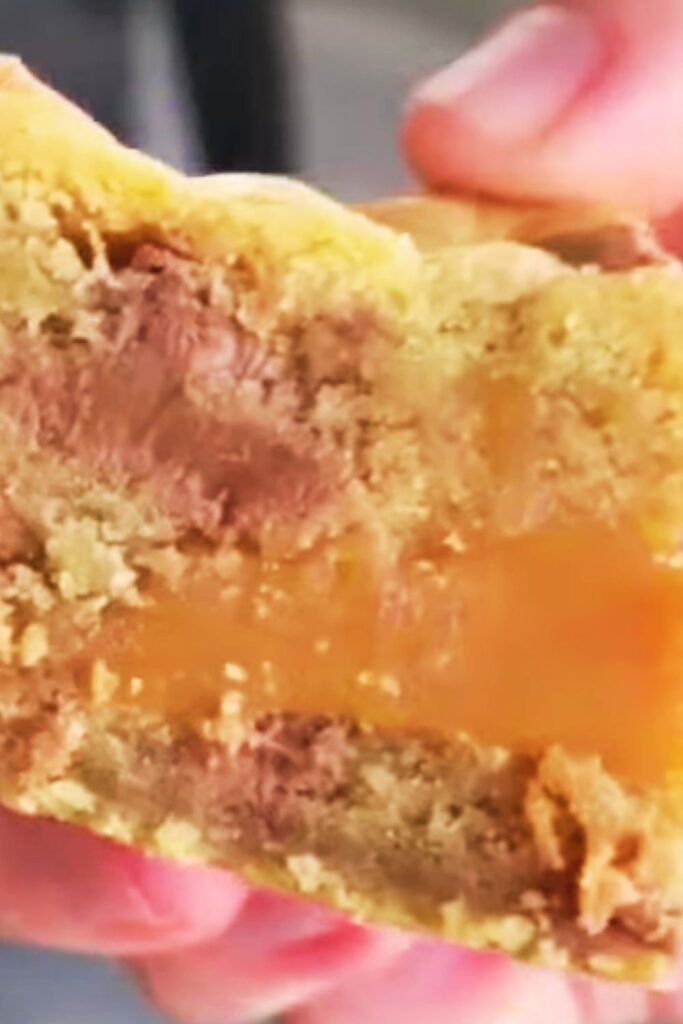
What makes these bars so special is the layered approach to flavor and texture. The base is a classic sugar cookie dough that bakes up tender and slightly chewy, providing the perfect foundation. Then comes a generous layer of homemade salted caramel that adds that sophisticated sweet-salty complexity we all crave. Finally, a blanket of melted chocolate seals the deal, creating a dessert that’s both elegant enough for entertaining and comforting enough for a quiet evening at home.
I’ve found that these bars strike the perfect balance between impressive and approachable. You don’t need any special equipment or professional pastry skills – just a willingness to layer flavors thoughtfully and a bit of patience while the caramel sets.
Understanding the Components
Sugar Cookie Base : A classic sugar cookie dough serves as our foundation, made with butter, sugar, eggs, and flour. The key is achieving the right texture – firm enough to support the toppings but tender enough to bite through easily.
Salted Caramel Layer : This is where the magic happens. Homemade caramel provides depth and complexity that store-bought versions simply can’t match. The addition of sea salt enhances both the caramel and chocolate flavors.
Chocolate Topping : Semi-sweet chocolate chips melted and spread over the caramel create a beautiful finish while adding rich cocoa notes that complement the butterscotch flavors below.
Flaky Sea Salt : The final sprinkle of coarse sea salt isn’t just garnish – it’s an essential flavor component that elevates every other element in these bars.
Essential Ingredients and Quality Considerations
The success of these bars relies heavily on ingredient quality. I’ve learned through trial and error that certain choices make a significant difference in the final result.
For the butter, I always use unsalted European-style butter when possible. The higher fat content creates a richer cookie base, and the unsalted variety gives me complete control over the salt levels throughout the recipe. Room temperature butter is crucial – it should give slightly when pressed but not be so soft that it’s melting.
When it comes to sugar, I use a combination of granulated and brown sugar in the cookie base. The granulated sugar provides structure and sweetness, while the brown sugar adds moisture and a subtle molasses flavor that plays beautifully with the caramel.
For the caramel component, heavy cream is non-negotiable. Lower-fat alternatives will not provide the rich, smooth texture we’re after. Similarly, real vanilla extract makes a noticeable difference over imitation varieties.
The chocolate selection deserves special attention. I prefer semi-sweet chocolate chips with a cocoa content around 60%. This provides enough chocolate intensity to stand up to the sweet caramel without overwhelming the delicate cookie base.
| Ingredient Category | Recommended Type | Why It Matters | Substitution Notes |
|---|---|---|---|
| Butter | Unsalted European-style | Higher fat content, better flavor control | Regular unsalted butter works, reduce salt slightly |
| Sugar Base | Granulated + Light Brown | Structure + moisture balance | Can use all granulated, but texture will be firmer |
| Heavy Cream | 35% fat minimum | Proper caramel consistency | Half-and-half will work but caramel will be thinner |
| Chocolate | Semi-sweet chips (60% cocoa) | Balanced sweetness level | Dark chocolate works for more intense flavor |
| Salt | Flaky sea salt | Texture and clean flavor | Table salt works but use half the amount |
| Vanilla | Pure extract | Depth of flavor | Imitation works but flavor will be less complex |
Step-by-Step Preparation Method
Preparing the Cookie Base
I start by preheating my oven to 350°F and lining a 9×13 inch baking pan with parchment paper, leaving some overhang for easy removal later. This step is crucial – don’t skip the parchment paper or you’ll have a difficult time getting clean bars.
In a large mixing bowl, I cream together 1 cup of softened butter with ¾ cup granulated sugar and ¼ cup packed light brown sugar. This process should take about 3-4 minutes with an electric mixer on medium speed. The mixture should be light and fluffy, with the sugars fully incorporated.
Next, I add one large egg and 2 teaspoons of vanilla extract, mixing until just combined. Over-mixing at this stage can lead to tough cookies, so I stop as soon as everything comes together.
In a separate bowl, I whisk together 2¼ cups all-purpose flour, 1 teaspoon baking powder, and ½ teaspoon salt. I add this dry mixture to the wet ingredients gradually, mixing on low speed until a soft dough forms.
The dough should be slightly sticky but manageable. I press it evenly into my prepared pan, using my fingers to ensure consistent thickness. A light dusting of flour on my hands prevents sticking.
Creating the Perfect Caramel
The caramel component requires attention but isn’t difficult once you understand the process. In a heavy-bottomed saucepan, I combine 1 cup granulated sugar with ¼ cup water over medium heat. I don’t stir at this point – just swirl the pan occasionally to ensure even cooking.
The mixture will bubble and gradually turn amber. This takes about 8-10 minutes, and the color change happens quickly toward the end, so I stay close to the stove. Once I achieve a deep amber color, I immediately remove the pan from heat.
Working quickly but carefully, I add ½ cup heavy cream. The mixture will bubble vigorously – this is normal. I whisk constantly until smooth, then add 3 tablespoons butter, 1 teaspoon vanilla, and ¾ teaspoon flaky sea salt. The caramel should be smooth and pourable but not too thin.
Assembly and Baking Process
With my cookie base prebaked for 15 minutes until just set but not browned, I remove it from the oven and immediately pour the warm caramel over the surface. Using an offset spatula, I spread the caramel evenly to the edges.
The bars return to the oven for another 12-15 minutes, just until the caramel is bubbling around the edges. Over-baking at this stage will make the caramel too hard once cooled.
While the bars are in their final baking stage, I melt 1½ cups semi-sweet chocolate chips with 2 tablespoons butter in the microwave, stirring every 30 seconds until smooth. This creates a glossy, spreadable chocolate layer.
Timing and Temperature Guidelines
| Stage | Temperature | Time | Visual Cues |
|---|---|---|---|
| Cookie Base | 350°F | 15 minutes | Set but not browned |
| Caramel Cooking | Medium heat | 8-10 minutes | Deep amber color |
| Final Baking | 350°F | 12-15 minutes | Caramel bubbling at edges |
| Chocolate Melting | 50% power | 2-3 minutes total | Smooth and glossy |
| Cooling Time | Room temp | 2-3 hours | Caramel firm, chocolate set |
| Refrigeration | 40°F | 1 hour minimum | Clean cuts possible |
Finishing Touches and Presentation
Once the bars come out of the oven for the final time, I work quickly to spread the melted chocolate over the hot caramel. The residual heat helps the chocolate spread smoothly and creates a beautiful, even layer.
While the chocolate is still soft, I sprinkle additional flaky sea salt over the surface. This final touch isn’t just for appearance – it provides textural contrast and intensifies all the flavors in each bite.

The cooling process requires patience. I let the bars cool completely at room temperature for at least 2 hours, then refrigerate for another hour before cutting. This ensures clean cuts and prevents the layers from sliding apart.
Storage and Serving Recommendations
These bars keep beautifully when stored properly. I cut them into squares and store in an airtight container at room temperature for up to 5 days. For longer storage, they freeze well for up to 3 months wrapped individually in plastic wrap.
When serving, I like to let refrigerated bars come to room temperature for about 15 minutes. This softens the caramel slightly and brings out the full flavor profile.
For entertaining, these bars can be cut into smaller bite-sized pieces and served on a platter. They pair wonderfully with coffee, hot chocolate, or cold milk. The rich flavors also complement vanilla ice cream beautifully for a more elaborate dessert presentation.
Troubleshooting Common Issues
Through my experience making these bars countless times, I’ve encountered and solved several common problems that home bakers face.
Caramel Issues : If your caramel crystallizes during cooking, add a tablespoon of corn syrup to the sugar and water mixture at the beginning. If the caramel becomes too thick, warm it gently and add a tablespoon of cream.
Cookie Base Problems : An overly crumbly base usually indicates too much flour or insufficient mixing of wet ingredients. A soggy base suggests under-baking or too much moisture in the dough.
Chocolate Layer Troubles : If the chocolate seizes while melting, add a teaspoon of coconut oil or butter to restore smoothness. Overheated chocolate will appear grainy and dull rather than glossy.
Nutritional Information and Dietary Adaptations
| Nutrient | Per Bar (12 servings) | Daily Value % |
|---|---|---|
| Calories | 385 | 19% |
| Total Fat | 18g | 23% |
| Saturated Fat | 11g | 55% |
| Cholesterol | 65mg | 22% |
| Sodium | 220mg | 10% |
| Total Carbs | 56g | 20% |
| Dietary Fiber | 2g | 7% |
| Sugars | 42g | – |
| Protein | 4g | 8% |
For those with dietary restrictions, several modifications are possible. Gluten-free flour blends work well in the cookie base, though the texture will be slightly different. For dairy-free versions, coconut cream can substitute for heavy cream in the caramel, and dairy-free chocolate chips are widely available.
Advanced Variations and Flavor Profiles
Once you’ve mastered the basic recipe, there’s room for creativity. I’ve developed several variations that showcase different flavor profiles while maintaining the essential character of these bars.
Espresso Enhancement : Adding 1 tablespoon of instant espresso powder to the chocolate layer creates a sophisticated mocha variation that’s perfect for coffee lovers.
Bourbon Twist : A tablespoon of good bourbon added to the warm caramel provides depth and complexity for adult gatherings.
Nutty Additions : Chopped toasted pecans or almonds can be sprinkled over the caramel before adding the chocolate layer.
Seasonal Adaptations : During fall, a pinch of cinnamon and nutmeg in the cookie base creates warmth, while a touch of orange zest in the chocolate layer brightens winter versions.
Professional Tips for Success
My years of making these bars have taught me several professional techniques that ensure consistent results every time.
Temperature control is crucial throughout the process. I use an instant-read thermometer to ensure my caramel reaches exactly 240°F before removing from heat. This guarantees the proper consistency every time.
When pressing the cookie dough into the pan, I use a piece of plastic wrap to prevent sticking and achieve an even surface. This technique creates a professional-looking base that bakes uniformly.
For the cleanest cuts, I dip my knife in warm water and wipe it clean between each cut. This prevents the caramel from sticking and creates sharp, bakery-quality edges.
Questions and Answers
Can I make these bars ahead of time for a party? Absolutely! These bars actually improve after a day or two as the flavors meld together. I often make them two days before serving, storing them covered at room temperature. For longer advance preparation, they freeze beautifully for up to three months.
What’s the best way to cut clean squares? The key is proper chilling and the right tools. Refrigerate the bars for at least an hour after they’re completely cool, then use a sharp knife dipped in warm water between cuts. Wipe the blade clean after each cut to prevent caramel buildup.
Can I use store-bought caramel instead of making my own? While homemade caramel provides superior flavor and texture, you can substitute with high-quality store-bought caramel sauce in a pinch. You’ll need about 1 cup, and I recommend warming it slightly for easier spreading. The flavor won’t be quite as complex, but the bars will still be delicious.
How do I prevent the chocolate from cracking when I cut the bars? Temperature is key here. Let refrigerated bars sit at room temperature for 10-15 minutes before cutting. This softens the chocolate slightly while keeping the caramel firm enough for clean cuts. Also, make sure your knife is clean and sharp.
What type of sea salt works best for the topping? I prefer flaky sea salts like Maldon or fleur de sel for their clean flavor and attractive appearance. The flakes provide nice textural contrast and don’t dissolve immediately like fine salt would. If you only have table salt, use about half the amount and sprinkle very lightly.
Can I double this recipe for a larger crowd? Yes, but you’ll need to use a half-sheet pan (18×13 inches) and adjust baking times slightly. The cookie base may need an extra 3-5 minutes, and the final baking with caramel might need an additional 5 minutes. Watch for the visual cues rather than relying solely on timing.
Why does my caramel sometimes turn out grainy? Grainy caramel usually results from crystallization during cooking. To prevent this, avoid stirring the sugar mixture once it starts cooking – just swirl the pan occasionally. Make sure your pan and utensils are completely clean, as even tiny particles can cause crystallization.
How can I tell when the caramel is the right color? You’re looking for a deep amber color that resembles dark honey or maple syrup. It should be noticeably darker than light corn syrup but not so dark that it’s approaching burnt. The color change accelerates quickly toward the end, so watch carefully during the last few minutes.
These salted caramel chocolate sugar cookie bars represent everything I love about baking – the combination of simple techniques to create something extraordinary, the balance of flavors that keeps you coming back for more, and the joy of sharing something homemade with people you care about. The recipe might seem involved at first glance, but each component is straightforward when broken down into steps.
The beauty of these bars lies not just in their incredible taste, but in their versatility and reliability. They’re elegant enough for dinner parties yet comforting enough for family gatherings. They travel well, store beautifully, and never fail to impress. Most importantly, they’re the kind of treat that creates memories – I can’t count how many times someone has asked me for this recipe after trying just one bite.
Whether you’re looking to expand your baking repertoire, need a show-stopping dessert for entertaining, or simply want to treat yourself to something special, these salted caramel chocolate sugar cookie bars deliver on every level. Take your time with each step, use quality ingredients, and prepare to be amazed by what you can create in your own kitchen.