There’s something absolutely magical about the aroma of fresh garlic naan wafting through my kitchen. I still remember the first time I attempted making naan at home – what started as a craving for restaurant-quality Indian bread turned into a passionate journey of perfecting this beloved flatbread. Today, I’m sharing my foolproof small batch garlic naan recipe that delivers restaurant-quality results without the need to feed an army.
Making naan at home might seem intimidating, but I promise you it’s far more achievable than you think. This small batch recipe yields just four pieces of heavenly, pillowy naan – perfect for a cozy dinner for two or when you’re simply craving that authentic Indian bread experience without leftovers lingering in your kitchen.
What Makes This Small Batch Recipe Special
Unlike traditional naan recipes that often yield 8-12 pieces, my small batch approach focuses on quality over quantity. I’ve spent countless evenings tweaking proportions, testing different techniques, and fine-tuning every detail to create a recipe that’s both manageable for home cooks and absolutely delicious.
The beauty of small batch cooking lies in its precision. When you’re working with smaller quantities, every ingredient matters more, and you have better control over the final product. Plus, there’s something deeply satisfying about making just enough for your immediate needs – no waste, no storage concerns, just fresh, warm naan when you want it.
Understanding Naan: The Foundation of Great Indian Cuisine
Naan: A leavened flatbread traditionally baked in a tandoor oven, characterized by its soft, chewy texture and slightly charred exterior.
Tandoor: A cylindrical clay oven that reaches extremely high temperatures (900-1000°F), giving naan its distinctive texture and flavor.
Leavening agents: Ingredients like yeast, baking powder, or yogurt that help the dough rise and create the characteristic pillowy texture.
Ghee: Clarified butter that adds richness and authentic flavor to Indian breads.
The origins of naan trace back to the Mughal era in India, where it was considered a delicacy served in royal courts. Unlike roti or chapati, which are unleavened, naan’s leavened nature creates those beautiful air pockets and tender crumb that make it perfect for scooping up curries and dal.
Essential Ingredients for Perfect Small Batch Garlic Naan
My small batch garlic naan relies on simple, accessible ingredients that you likely already have in your pantry. Here’s what makes each component crucial:
All-purpose flour forms the foundation of our naan. I prefer using unbleached all-purpose flour for its protein content, which provides the right balance of structure and tenderness.
Greek yogurt serves multiple purposes in this recipe. It acts as a natural tenderizer, adds subtle tanginess, and helps create that characteristic soft texture. The acidity in yogurt also activates the baking powder, contributing to the leavening process.
Baking powder is my secret weapon for achieving bakery-style lift without the long fermentation time that yeast requires. This makes the recipe perfect for those spontaneous naan cravings.
Fresh garlic is absolutely non-negotiable. I always use fresh cloves, minced finely, because the flavor difference between fresh and pre-minced garlic is like night and day.
Ghee or butter provides richness and authentic flavor. While ghee is traditional, high-quality butter works beautifully too.
Detailed Ingredient Breakdown and Measurements
| Ingredient | Quantity | Purpose | Substitution Options |
|---|---|---|---|
| All-purpose flour | 1 cup (120g) | Structure and texture | Bread flour (reduce by 2 tbsp) |
| Greek yogurt | 1/4 cup (60ml) | Tenderness and flavor | Regular yogurt, sour cream |
| Baking powder | 1/2 teaspoon | Leavening agent | 1/4 tsp baking soda + 1/4 tsp cream of tartar |
| Salt | 1/2 teaspoon | Flavor enhancement | Sea salt, kosher salt |
| Sugar | 1/2 teaspoon | Yeast food and browning | Honey (reduce liquid slightly) |
| Warm water | 2-3 tablespoons | Dough hydration | Warm milk for richer flavor |
| Fresh garlic | 3-4 cloves | Main flavoring | Garlic powder (1 tsp) |
| Ghee or butter | 2 tablespoons (melted) | Richness and brushing | Olive oil, coconut oil |
| Fresh cilantro | 2 tablespoons (chopped) | Garnish and freshness | Parsley, mint |
The Art of Making Perfect Naan Dough
Creating the perfect naan dough is where the magic begins. I’ve learned through trial and error that the key lies in achieving the right consistency – not too wet, not too dry, but perfectly pliable.
Start by combining your dry ingredients in a medium bowl. I always sift my flour to ensure there are no lumps and to incorporate air, which contributes to a lighter final product. The salt and baking powder should be evenly distributed throughout the flour.
In a separate bowl, whisk together the Greek yogurt, melted ghee, and sugar until smooth. The yogurt should be at room temperature to prevent shocking the mixture. If your yogurt is cold from the refrigerator, let it sit out for about 15 minutes before using.
Create a well in the center of your flour mixture and pour in the yogurt mixture. Using a fork, gradually incorporate the flour into the wet ingredients. This is where patience pays off – don’t rush this process. As the mixture comes together, you’ll need to add warm water gradually, one tablespoon at a time.
The dough is ready when it pulls away from the sides of the bowl and feels slightly sticky but manageable. I’ve found that slightly sticky dough yields more tender naan than dough that’s too dry.
Kneading Technique for Tender Naan
Turn your dough onto a lightly floured surface and begin kneading. Unlike bread dough, naan dough doesn’t require extensive kneading. I knead for about 3-4 minutes until the dough becomes smooth and elastic.
The key is to use the heel of your hand to push the dough away from you, then fold it back over itself. Give it a quarter turn and repeat. This develops the gluten just enough to create structure without making the naan tough.
You’ll know the dough is ready when it springs back lightly when poked with your finger. Place it in a lightly oiled bowl, cover with a damp cloth, and let it rest for at least 30 minutes. This resting period allows the gluten to relax and makes rolling much easier.
Preparing the Perfect Garlic Topping
While your dough rests, prepare the garlic mixture that will transform your naan from good to extraordinary. I mince my garlic very finely – almost to a paste-like consistency. This ensures even distribution and prevents any harsh, raw garlic bites.
Combine the minced garlic with softened butter or ghee. The mixture should be spreadable but not liquid. Add a pinch of salt to enhance the garlic flavor and finely chopped fresh cilantro for that authentic restaurant touch.
Some home cooks prefer to cook the garlic briefly in the butter to mellow its intensity, but I love the sharp, pungent kick of raw garlic. Choose based on your preference, but remember that the garlic will cook slightly when the naan hits the hot pan.
Rolling and Shaping Techniques
After the dough has rested, divide it into four equal portions. I like to weigh each piece to ensure uniformity – each portion should be about 60-65 grams. Roll each piece into a smooth ball and cover with a damp towel to prevent drying out.
Working with one ball at a time, roll it out on a lightly floured surface into an oval or teardrop shape, about 6-7 inches long and 4-5 inches wide. The traditional naan shape is slightly irregular – don’t worry about perfect symmetry. In fact, those slight imperfections give homemade naan its authentic charm.
The thickness should be about 1/4 inch. Too thin, and your naan will be crispy rather than soft and pillowy. Too thick, and the center won’t cook through properly before the outside burns.
Cooking Methods: Stovetop Perfection
Since most home kitchens don’t have a tandoor oven, I’ve perfected a stovetop method that delivers remarkably similar results. You’ll need a heavy-bottomed skillet or cast-iron pan – the heavier, the better for even heat distribution.
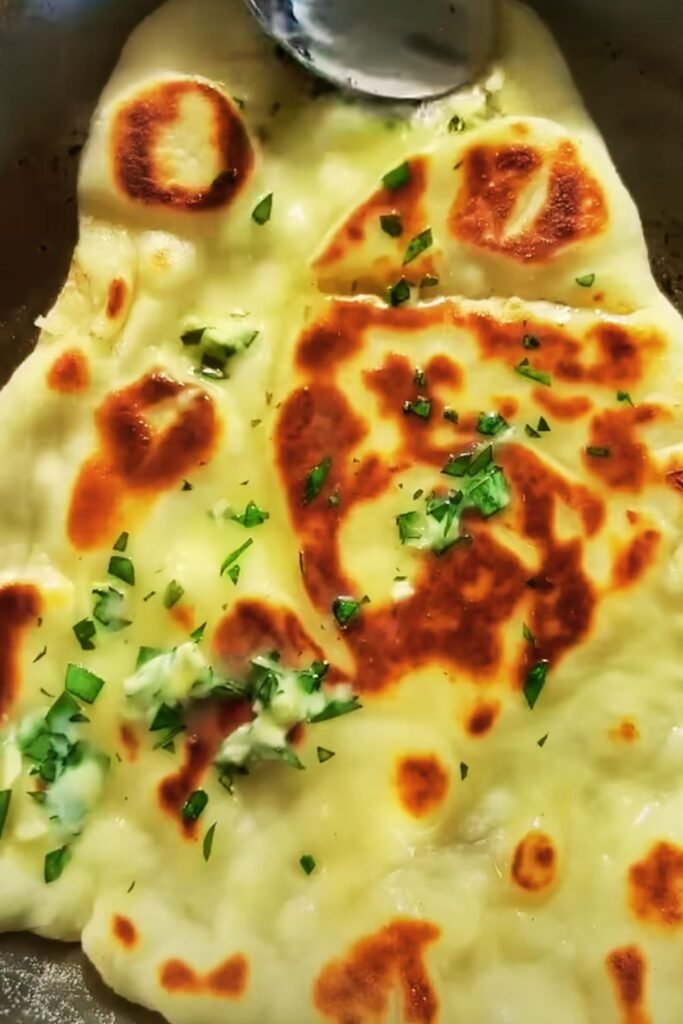
Heat your pan over medium-high heat. You want it hot but not smoking. A properly heated pan is crucial for achieving those characteristic charred spots that give naan its authentic appearance and flavor.
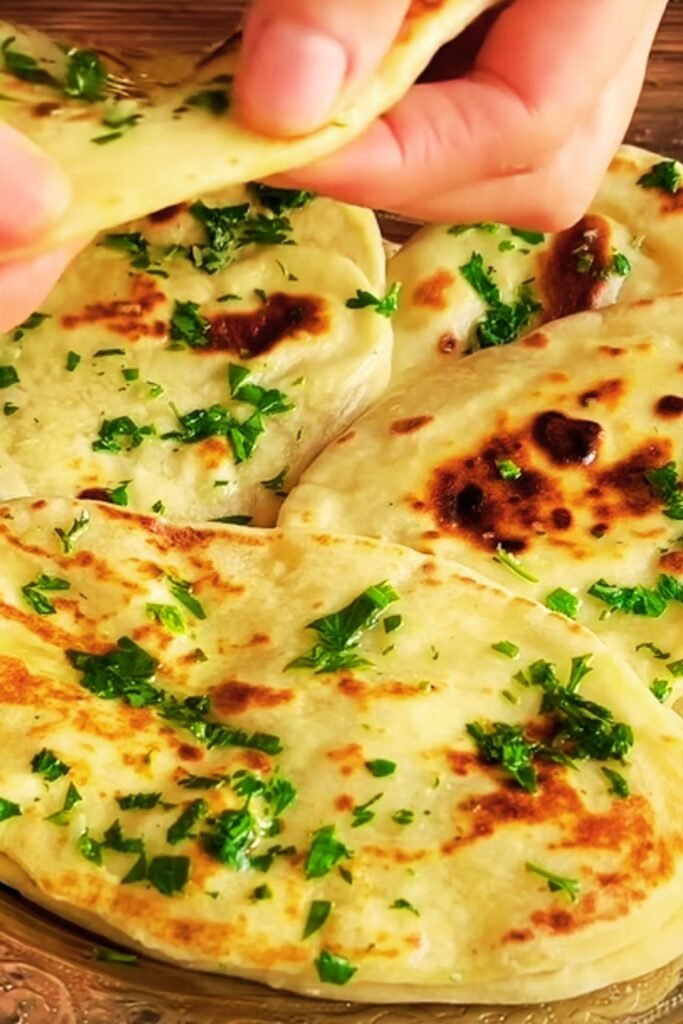
Place your rolled naan in the dry pan (no oil needed). Within 30-60 seconds, you should see bubbles forming on the surface. This is exactly what you want – those bubbles will become the beautiful charred spots that make restaurant-style naan so appealing.
Cook for about 1-2 minutes on the first side until you see those golden-brown spots forming. Flip carefully and cook for another 1-2 minutes on the second side. The naan should puff up beautifully and develop a lovely golden color with darker spots.
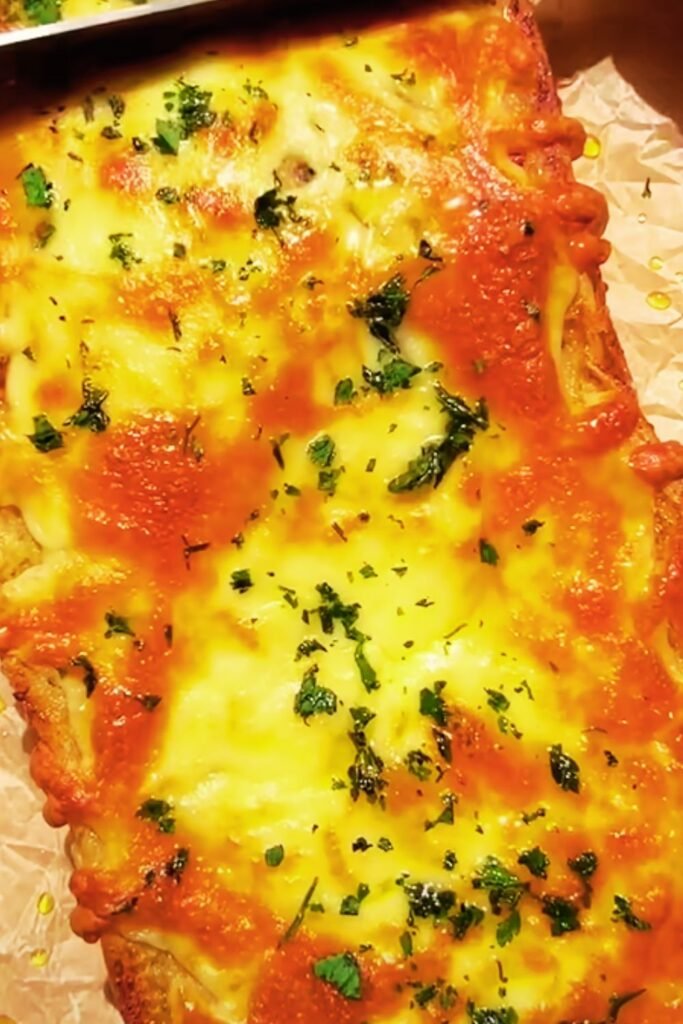
The Garlic Butter Finish
Immediately after removing each naan from the pan, brush it generously with your prepared garlic butter mixture while it’s still hot. The heat will help the flavors meld and create that glossy, appetizing finish that makes your mouth water.
Don’t be shy with the garlic butter – this is what transforms plain naan into the garlic-infused delight we’re after. Make sure to get the mixture into all the nooks and crannies of the naan’s surface.
Sprinkle with a bit more fresh cilantro and a light dusting of coarse salt if desired. The contrast between the warm bread and the fresh herbs creates a beautiful flavor profile that complements virtually any Indian dish.
Nutritional Information and Health Considerations
| Nutrient | Per Naan (1 piece) | Daily Value % |
|---|---|---|
| Calories | 185 | 9% |
| Total Fat | 6g | 8% |
| Saturated Fat | 3.5g | 18% |
| Cholesterol | 15mg | 5% |
| Sodium | 295mg | 13% |
| Total Carbohydrates | 28g | 10% |
| Dietary Fiber | 1g | 4% |
| Sugars | 2g | – |
| Protein | 5g | 10% |
| Calcium | 45mg | 3% |
| Iron | 1.8mg | 10% |
While naan is undoubtedly an indulgent bread, it does offer some nutritional benefits. The yogurt provides probiotics and protein, while the garlic offers antimicrobial properties and potential cardiovascular benefits. As with all delicious foods, moderation is key.
Troubleshooting Common Naan Problems
Over the years, I’ve encountered virtually every naan-making mishap imaginable. Here are solutions to the most common issues:
Dense, heavy naan: Usually caused by overworking the dough or using expired baking powder. Check your baking powder’s freshness by adding a bit to hot water – it should bubble vigorously.
Naan that won’t puff: Your pan isn’t hot enough, or you’ve rolled the dough too thin. Make sure your pan is properly preheated and maintain consistent thickness when rolling.
Burnt exterior, raw interior: Your heat is too high. Reduce to medium heat and cook a bit longer. Patience yields better results than high heat.
Tough, chewy texture: Overkneading is the culprit. Remember, naan dough needs only gentle kneading to come together.
Garlic burning: If your garlic pieces are browning too quickly, mix them into the butter off the heat and apply after cooking rather than before.
Storage and Reheating Guidelines
Fresh naan is always best, but properly stored naan can maintain its quality for several days. Wrap cooled naan in aluminum foil or place in an airtight container. They’ll keep at room temperature for up to 2 days or in the refrigerator for up to a week.
For longer storage, freeze wrapped naan for up to 3 months. To reheat, wrap in damp paper towels and microwave for 15-20 seconds, or warm in a 350°F oven for 3-4 minutes. A quick pass under the broiler can restore some of that freshly baked texture.
Serving Suggestions and Pairing Ideas
Garlic naan is incredibly versatile and pairs beautifully with a wide range of dishes. Obviously, it’s perfect alongside traditional Indian curries like butter chicken, dal makhani, or palak paneer. The bread’s mild sweetness and garlic flavor complement spicy dishes perfectly.
But don’t limit yourself to Indian cuisine. I love using garlic naan as a base for creative flatbread pizzas, or serving it alongside Mediterranean dips like hummus or baba ganoush. It also makes an excellent side for hearty soups and stews.
For a simple appetizer, cut the naan into triangles and serve with a selection of chutneys or yogurt-based dips. The combination of textures and flavors creates a memorable start to any meal.
Advanced Techniques and Variations
Once you’ve mastered the basic recipe, there are countless ways to customize your garlic naan. Try adding different herbs like fresh mint or dill to the garlic butter. A sprinkle of nigella seeds or sesame seeds before cooking adds interesting texture and flavor.
For a richer naan, replace some of the water with milk or even cream. This creates an incredibly tender, almost brioche-like texture that’s absolutely divine.
Cheese lovers can add a sprinkle of grated Parmesan or mozzarella to the garlic butter for a fusion twist that’s surprisingly delicious.
The Science Behind Perfect Naan
Understanding the science behind naan making can help you troubleshoot issues and achieve consistent results. The yogurt’s acidity reacts with the baking powder to create lift, while also tenderizing the gluten proteins in the flour.
The high heat of the pan creates steam within the dough, causing it to puff and creating those characteristic air pockets. The Maillard reaction – the browning of proteins and sugars – creates the complex flavors and appealing golden color we associate with great naan.
Questions and Answers
Q: Can I make this naan dough ahead of time?
Yes, absolutely! The dough actually improves with time. You can make it up to 24 hours ahead and store it covered in the refrigerator. Just bring it to room temperature before rolling and cooking. The extended resting time allows the flavors to develop and makes the dough even easier to work with.
Q: What if I don’t have Greek yogurt?
Regular yogurt works perfectly fine, though you might want to strain it for 15-20 minutes to remove excess moisture. Sour cream is another excellent substitute that provides similar tanginess and tenderness. Even buttermilk can work, though you may need to adjust the flour quantity slightly.
Q: Can I make naan without a heavy-bottomed pan?
While a heavy pan gives the best results, you can use what you have. A regular skillet will work, but you’ll need to pay closer attention to prevent burning. The key is maintaining consistent medium heat and being ready to adjust as needed.
Q: How do I know when my pan is the right temperature?
Sprinkle a few drops of water onto the pan. They should sizzle and evaporate within 2-3 seconds. If they sit there, the pan isn’t hot enough. If they dance and evaporate immediately, it might be too hot.
Q: Can I freeze the raw dough?
Yes! Divide the dough into portions, wrap each tightly in plastic wrap, and freeze for up to 3 months. Thaw overnight in the refrigerator, then bring to room temperature before rolling and cooking.
Q: My naan isn’t getting those beautiful charred spots. What am I doing wrong?
The pan likely isn’t hot enough, or you’re moving the naan too soon. Let it sit undisturbed for at least 60-90 seconds on the first side. Those bubbles that form need time to set and brown properly.
Q: Can I make this recipe vegan?
Absolutely! Replace the yogurt with coconut yogurt or a mixture of non-dairy milk and lemon juice. Use vegan butter or olive oil instead of ghee. The texture will be slightly different but still delicious.
Q: What’s the best way to reheat leftover naan?
For the best texture, wrap the naan in a slightly damp paper towel and microwave for 15-20 seconds. Alternatively, heat a pan over medium heat and warm each piece for about 30 seconds per side. This restores some of the original texture better than oven reheating.
Q: Can I double this recipe?
Of course! This recipe scales beautifully. Just be aware that you’ll have more naan to cook, so plan accordingly. You might want to keep the cooked naan warm in a 200°F oven while you finish cooking the rest.
Q: Why is my dough too sticky to work with?
Different flours absorb liquid differently, and humidity can affect your dough. Add flour gradually, one tablespoon at a time, until the dough is manageable. Remember, slightly sticky dough makes more tender naan than dry dough.
This small batch garlic naan recipe has become a cornerstone of my home cooking repertoire. There’s something deeply satisfying about creating restaurant-quality bread in your own kitchen, and the aroma alone is worth the effort. Whether you’re making it to accompany a elaborate Indian feast or simply want fresh bread for dinner, this recipe delivers consistent, delicious results every time.
The beauty of mastering this small batch approach is that you’ll never be overwhelmed with leftovers, and you can easily adjust the recipe to suit your needs. Once you experience the joy of fresh, homemade garlic naan, you’ll find yourself making it regularly. It’s one of those recipes that transforms an ordinary meal into something special, and I hope it brings as much joy to your kitchen as it has to mine.