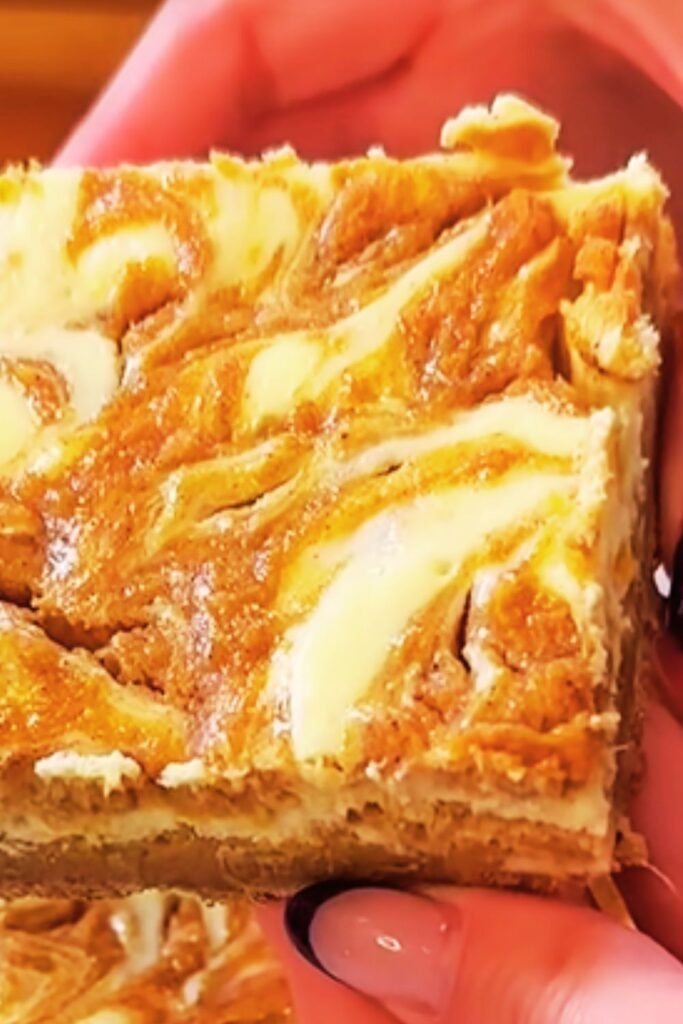
I’ve been experimenting with sweet potato desserts for years, and these Sweet Potato Cheesecake Bars have become my absolute favorite fall treat. There’s something magical about combining the earthy sweetness of roasted sweet potatoes with the rich, creamy texture of cheesecake that just screams comfort food perfection.
When I first attempted this recipe, I was skeptical about whether the sweet potato would overpower the delicate cheesecake flavor. Boy, was I wrong! The sweet potato adds a subtle warmth and natural sweetness that complements the tangy cream cheese beautifully. These bars have become my go-to dessert for autumn gatherings, and I can’t count how many times guests have asked me for the recipe.
Understanding Sweet Potato Cheesecake Bars
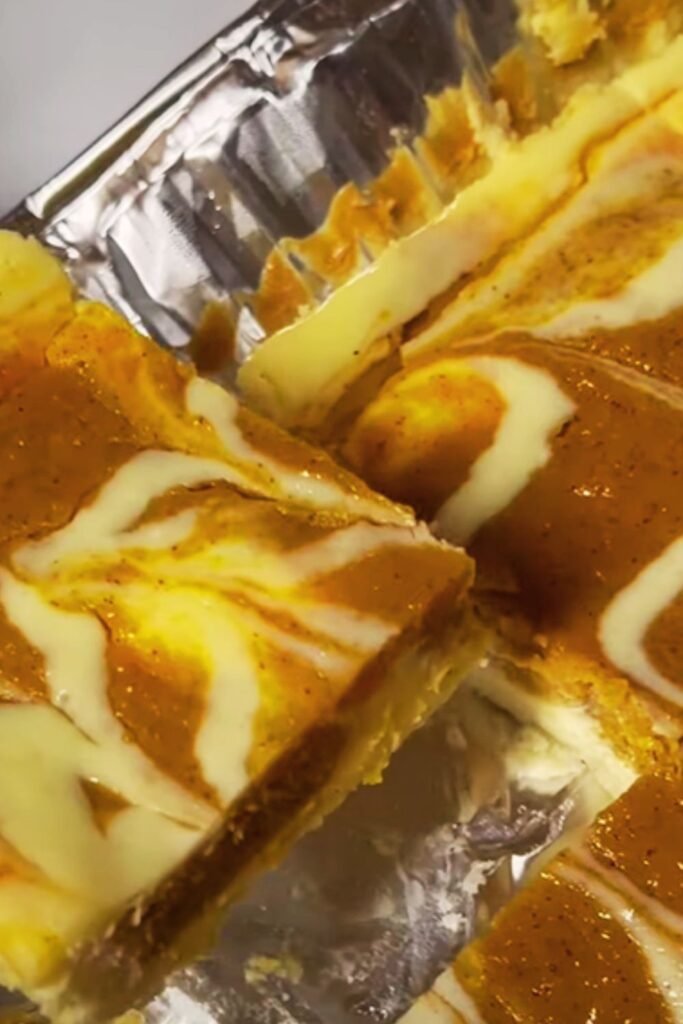
Sweet Potato Cheesecake Bars: A layered dessert combining a graham cracker crust, creamy sweet potato-infused cheesecake filling, and optional toppings, baked in a rectangular pan for easy serving.
Roasted Sweet Potatoes: The key ingredient that provides natural sweetness, moisture, and a vibrant orange color to the cheesecake layer.
Cream Cheese Base: The foundation of any great cheesecake, providing the signature tangy flavor and luxurious texture.
Graham Cracker Crust: A classic cheesecake base made from crushed graham crackers, butter, and sugar, providing textural contrast.
What makes these bars special is their perfect balance of flavors and textures. The sweet potato doesn’t just add flavor – it contributes natural moisture and creates an incredibly smooth, velvety filling that’s less dense than traditional cheesecake. I’ve found that roasting the sweet potatoes beforehand intensifies their natural sweetness and removes excess moisture, preventing the bars from becoming soggy.
Essential Ingredients Breakdown
| Ingredient | Quantity | Purpose | Substitution Options |
|---|---|---|---|
| Sweet Potatoes | 2 large (about 1.5 lbs) | Primary flavor and moisture | Butternut squash, pumpkin puree |
| Cream Cheese | 24 oz (3 packages) | Cheesecake base | Neufchatel cheese, mascarpone |
| Graham Crackers | 1.5 cups crushed | Crust foundation | Vanilla wafers, digestive biscuits |
| Eggs | 3 large | Binding and structure | Egg replacer, flax eggs |
| Sugar | 3/4 cup | Sweetness | Maple syrup, honey, coconut sugar |
| Butter | 1/3 cup melted | Crust binding | Coconut oil, vegan butter |
| Vanilla Extract | 2 teaspoons | Flavor enhancement | Almond extract, rum extract |
| Cinnamon | 1 teaspoon | Warm spice | Pumpkin pie spice, allspice |
| Nutmeg | 1/2 teaspoon | Subtle warmth | Ginger, cardamom |
| Salt | 1/4 teaspoon | Flavor balance | Sea salt, kosher salt |
The quality of your sweet potatoes makes a tremendous difference in the final product. I always choose firm, unblemished sweet potatoes with smooth skin. The varieties I prefer are Beauregard or Centennial – they’re naturally sweet and have the perfect texture for baking.
Step-by-Step Preparation Method
Preparing the Sweet Potatoes
My method for preparing sweet potatoes has evolved over countless batches. I start by preheating my oven to 400°F and piercing each sweet potato several times with a fork. I wrap them individually in aluminum foil and roast for 45-60 minutes until they’re fork-tender.
The key is letting them cool completely before peeling. I’ve learned that trying to rush this step leads to lumpy filling. Once cooled, I scoop out the flesh and mash it until completely smooth. For ultra-smooth results, I sometimes pass it through a fine-mesh sieve.
Creating the Perfect Crust
I crush my graham crackers by hand in a sealed plastic bag with a rolling pin – this gives me better control over the texture than a food processor. I want some slightly larger pieces for texture variation. In a medium bowl, I combine the crushed crackers with melted butter and a tablespoon of sugar.
The mixture should hold together when pressed but not be soggy. I press this firmly into the bottom of a parchment-lined 9×13 inch baking pan, using the bottom of a measuring cup to ensure even distribution. I bake this crust for 8-10 minutes until it’s lightly golden.
Crafting the Cheesecake Filling
Room temperature cream cheese is non-negotiable for smooth filling. I leave my cream cheese out for at least 2 hours before baking. In my stand mixer, I beat the cream cheese on medium speed until it’s completely smooth and fluffy – about 3-4 minutes.
I gradually add the sugar, beating well after each addition. The eggs go in one at a time, and I make sure each is fully incorporated before adding the next. Overbeating at this stage can incorporate too much air, leading to cracks.
Next comes the star ingredient – my prepared sweet potato puree. I add it along with the vanilla, cinnamon, nutmeg, and salt. I beat just until combined, scraping down the sides of the bowl as needed.
Baking Technique
I pour the filling over my pre-baked crust and smooth the top with an offset spatula. Here’s where my technique differs from many recipes: I bake at 325°F instead of the typical 350°F. This lower temperature prevents the top from browning too quickly and helps prevent cracks.
I bake for 35-40 minutes until the center is almost set but still slightly jiggly. The edges should be set and lightly golden. I turn off the oven and crack the door open, letting the bars cool gradually in the oven for 30 minutes. This prevents sudden temperature changes that cause cracking.
Nutritional Analysis
| Nutrient | Per Serving (1/16 of recipe) | % Daily Value |
|---|---|---|
| Calories | 285 | 14% |
| Total Fat | 18g | 23% |
| Saturated Fat | 11g | 55% |
| Cholesterol | 95mg | 32% |
| Sodium | 220mg | 10% |
| Total Carbohydrates | 28g | 10% |
| Dietary Fiber | 2g | 7% |
| Sugars | 22g | – |
| Protein | 6g | 12% |
| Vitamin A | 8,400 IU | 168% |
| Vitamin C | 12mg | 13% |
| Calcium | 85mg | 8% |
| Iron | 1.2mg | 7% |
Sweet potatoes are nutritional powerhouses, packed with beta-carotene, fiber, and potassium. While these bars are definitely a dessert, they offer more nutritional value than many traditional cheesecake recipes.
Flavor Variations and Adaptations
Spice Blend Variations
I’ve experimented with different spice combinations over the years. My “Warm Autumn” blend includes cinnamon, nutmeg, ginger, and a pinch of cardamom. For a “Maple Pecan” variation, I reduce the sugar slightly and add maple extract with chopped pecans folded into the filling.
Crust Alternatives
Graham crackers aren’t your only option. I’ve made incredible versions using gingersnap cookies, vanilla wafers, and even crushed pretzels for a sweet-salty combination. For gluten-free versions, I use gluten-free graham crackers or almond flour mixed with coconut and a touch of honey.
Dietary Modifications
For dairy-free versions, I substitute the cream cheese with cashew cream cheese or a high-quality vegan alternative. The texture isn’t identical, but it’s still delicious. For lower-sugar options, I use sugar substitutes like erythritol or stevia, though I adjust the quantities since they’re sweeter than regular sugar.
Troubleshooting Common Issues
| Problem | Cause | Solution |
|---|---|---|
| Cracked surface | Overbaking or rapid cooling | Bake at lower temperature, cool gradually |
| Soggy crust | Wet sweet potatoes | Ensure potatoes are well-drained |
| Lumpy texture | Cold cream cheese | Bring all ingredients to room temperature |
| Bars too soft | Underbaking | Extend baking time 5-10 minutes |
| Overly sweet | Too much sugar | Reduce sugar by 2-3 tablespoons |
| Bland flavor | Insufficient spices | Increase cinnamon and add vanilla |
I’ve made every mistake possible with these bars, and each failure taught me something valuable. The most important lesson? Patience is key. Rushing any step – from roasting the sweet potatoes to cooling the finished bars – leads to disappointing results.
Storage and Serving Recommendations
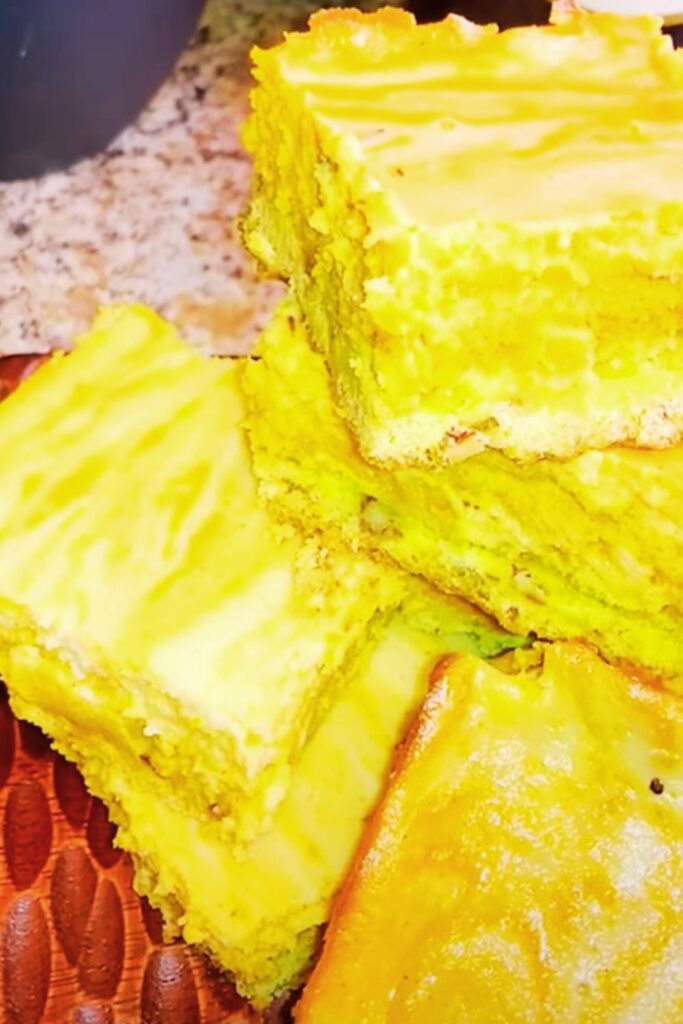
These bars improve with time. I always make them a day ahead, allowing the flavors to meld and the texture to set perfectly. I store them covered in the refrigerator for up to 5 days. For longer storage, I wrap individual portions in plastic wrap and freeze them for up to 3 months.
When serving, I let them come to room temperature for about 15 minutes – this brings out the best flavor and texture. I like to cut them into 16 squares for standard servings, but I sometimes cut them smaller for parties or larger for more indulgent portions.
Creative Serving Ideas
I’ve served these bars in various ways depending on the occasion:
- Elegant dinner parties: Topped with a dollop of whipped cream and a sprinkle of cinnamon
- Casual gatherings: Drizzled with caramel sauce and chopped pecans
- Holiday celebrations: Garnished with candied ginger and a dusting of powdered sugar
- Afternoon tea: Cut into petite squares and served alongside coffee or spiced tea
Advanced Techniques for Perfect Results
Temperature Control
I use an oven thermometer to ensure accuracy – many home ovens run hot or cold. The ideal internal temperature for the finished bars is 150°F in the center. I check this with an instant-read thermometer inserted into the middle of the pan.
Texture Optimization
For the silkiest possible texture, I strain my sweet potato puree through a fine-mesh sieve. This removes any fibrous bits and creates an incredibly smooth filling. I also warm the cream cheese slightly in the microwave (10-15 seconds) if it’s not quite soft enough – this prevents lumps without making it too warm.
Professional Finishing
I’ve learned several tricks from professional bakers. First, I run a knife around the edges of the pan while the bars are still warm to prevent cracking as they cool. Second, I place a pan of hot water on the oven’s bottom rack during baking to create steam, which helps prevent the surface from drying out.
Seasonal Adaptations
While these bars are perfect for fall, I’ve adapted them for other seasons. In winter, I add crystallized ginger and a touch of molasses. Spring versions might include lemon zest and fresh berries on top. Summer adaptations could feature coconut flakes and lime zest for a tropical twist.
Pairing Suggestions
These bars pair beautifully with various beverages and accompaniments:
- Hot beverages: Spiced chai, cinnamon coffee, or vanilla tea
- Cold beverages: Iced coffee, cold brew, or sparkling apple cider
- Complementary flavors: Vanilla ice cream, caramel sauce, or toasted nuts
- Fruit accompaniments: Fresh berries, sliced apples, or pear compote
Q&A Section
Q: Can I make these bars ahead of time for a party? A: Absolutely! I actually recommend making them at least 24 hours ahead. They taste better after the flavors have had time to meld, and they’re much easier to cut cleanly when they’ve been chilled overnight.
Q: What’s the best way to get smooth sweet potato puree? A: I roast whole sweet potatoes until they’re very tender, then let them cool completely before scooping out the flesh. For the smoothest results, I pass the mashed sweet potato through a fine-mesh sieve or use a food processor.
Q: Why do my cheesecake bars crack on top? A: Cracking usually happens from overbaking or cooling too quickly. I bake at 325°F instead of higher temperatures, and I let them cool gradually in the oven with the door cracked open for 30 minutes before removing them.
Q: Can I freeze these bars? A: Yes! I wrap individual portions in plastic wrap and freeze them for up to 3 months. They thaw perfectly in the refrigerator overnight, and the texture remains excellent.
Q: How do I know when the bars are done baking? A: The edges should be set and lightly golden, while the center should still be slightly jiggly. It will continue cooking from residual heat as it cools. An instant-read thermometer should read 150°F in the center.
Q: Can I use canned sweet potato puree instead of fresh? A: While fresh roasted sweet potatoes give the best flavor, you can use canned puree in a pinch. Make sure it’s pure sweet potato puree, not sweet potato pie filling, and drain any excess liquid.
Q: What’s the difference between sweet potato and pumpkin in this recipe? A: Sweet potatoes tend to be naturally sweeter and have a denser texture than pumpkin. If you substitute pumpkin puree, you might want to add an extra tablespoon of sugar and reduce the liquid slightly.
Q: How should I store leftover bars? A: I cover them tightly and store them in the refrigerator for up to 5 days. They actually improve in flavor after the first day, so don’t worry about making them ahead of time.
Q: Can I make these gluten-free? A: Yes! I substitute the graham crackers with gluten-free graham crackers or make a crust from almond flour mixed with melted butter and a touch of honey. The filling is naturally gluten-free.
Q: What size pan should I use? A: I use a 9×13 inch rectangular pan, which gives me the perfect thickness for these bars. A smaller pan will result in thicker bars that need longer baking time, while a larger pan will create thinner bars that bake more quickly.
These Sweet Potato Cheesecake Bars have become more than just a recipe in my kitchen – they’re a celebration of autumn flavors and a testament to how simple ingredients can create something truly special. Every time I make them, I’m reminded of why I fell in love with baking in the first place. The combination of creamy texture, warm spices, and natural sweetness creates a dessert that’s both comforting and sophisticated.
Whether you’re making them for a special occasion or just because you’re craving something delicious, these bars deliver every time. They’re forgiving enough for beginners but offer plenty of opportunities for experienced bakers to add their own creative touches. I hope they bring as much joy to your kitchen as they have to mine.