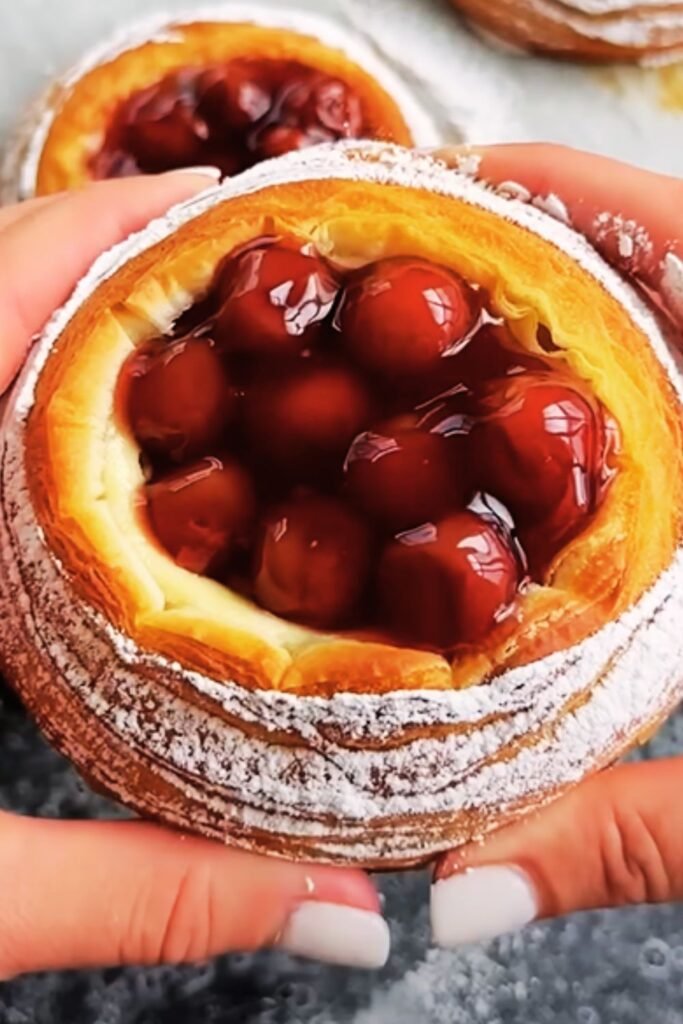
There’s something magical about biting into a freshly baked cherry cheese danish – that perfect harmony of buttery pastry, tangy cream cheese, and sweet-tart cherry filling. I’ve spent years perfecting this recipe, and today I’m thrilled to share my ultimate homemade version with you. Whether you’re hosting a special brunch or simply craving something indulgent for your morning coffee, these danishes will transform your breakfast table into a bakery-worthy experience.
The Delicious History Behind Danish Pastries
Before diving into the recipe, I love reflecting on the rich history of this beloved pastry. Despite the name, Danish pastries actually originated in Vienna, Austria! The technique was brought to Denmark by Austrian bakers in the 1800s, where Danish bakers added their own twists to create what we now know as “danish” pastry.
What makes danish pastry special is the lamination process – creating dozens of alternating layers of butter and dough through repeated folding and rolling. This technique creates that signature flaky texture we all adore. The cream cheese filling is an American adaptation, making cherry cheese danish a wonderful fusion of European tradition and American innovation.
Why Make Cherry Cheese Danish From Scratch?
I’ll be honest – making danish pastry from scratch requires some time and patience. So why bother when you could buy them? Having tested countless store-bought versions against homemade, I can confidently say the difference is remarkable:
- Unmatched freshness: Nothing compares to a danish straight from your oven
- Superior flavor complexity: You can taste every buttery layer and nuance
- Customizable sweetness: Control the sugar levels to your preference
- Pride of accomplishment: There’s genuine joy in creating something so delicious
- Impressive treat: Watch your family and friends marvel at your baking skills
Plus, once you master the basic dough, you’ll have the foundation for countless pastry variations!
Cherry Cheese Danish: Ingredient Breakdown
Let’s explore each component of our cherry cheese danish and why each ingredient matters:
Danish Dough Ingredients
| Ingredient | Amount | Function | Notes |
|---|---|---|---|
| All-purpose flour | 4 cups (500g) | Structure | Use unbleached for best flavor |
| Active dry yeast | 2¼ tsp (7g) | Leavening | Can substitute instant yeast (use 25% less) |
| Granulated sugar | ¼ cup (50g) | Flavor, food for yeast | Helps with browning |
| Salt | 1 tsp (5g) | Flavor enhancer | Controls yeast activity |
| Unsalted butter (cold) | 1½ cups (340g) | Lamination | European-style preferred for higher fat content |
| Milk | 1 cup (240ml) | Hydration | Whole milk creates richest results |
| Eggs | 2 large | Structure, richness | Room temperature for best incorporation |
| Vanilla extract | 2 tsp | Flavor | Use pure, not imitation |
Cream Cheese Filling Ingredients
| Ingredient | Amount | Function | Notes |
|---|---|---|---|
| Cream cheese | 16 oz (450g) | Base | Full-fat, room temperature |
| Granulated sugar | ½ cup (100g) | Sweetener | Adjust to taste |
| Egg yolk | 1 large | Richness, binding | Saves whites for egg wash |
| Vanilla extract | 1 tsp | Flavor | Enhances cream cheese |
| Lemon zest | 1 tsp | Brightness | Optional but recommended |
| Salt | Pinch | Flavor balance | Enhances sweetness |
Cherry Filling Ingredients
| Ingredient | Amount | Function | Notes |
|---|---|---|---|
| Fresh cherries | 3 cups (450g) | Main flavor | Sweet cherries preferred |
| Granulated sugar | ⅓ cup (65g) | Sweetener | Adjust based on cherry sweetness |
| Cornstarch | 2 tbsp | Thickener | Creates proper consistency |
| Lemon juice | 1 tbsp | Brightness, pectin activator | Balances sweetness |
| Almond extract | ¼ tsp | Flavor enhancer | Optional but complements cherries beautifully |
Finishing Touches
| Ingredient | Amount | Function | Notes |
|---|---|---|---|
| Egg wash | 1 egg + 1 tbsp water | Shine, browning | Creates that professional bakery look |
| Sliced almonds | ¼ cup | Texture, decoration | Toast lightly for enhanced flavor |
| Powdered sugar | For dusting | Visual appeal, sweetness | Apply just before serving |
| Vanilla glaze | Optional | Sweetness, decoration | Simple mix of powdered sugar and milk |
Essential Equipment
To ensure success with this recipe, I recommend having these tools on hand:
- Rolling pin: Preferably a heavy, straight one for even pressure
- Pastry brush: For applying egg wash
- Baking sheets: Insulated ones prevent bottom burning
- Parchment paper: Prevents sticking and eases cleanup
- Ruler: For precise measurements when cutting dough
- Bench scraper: Helpful for handling dough and cleanup
- Cherry pitter: Optional but saves significant time
- Pastry cutter/blender: For incorporating butter into dough
The Step-by-Step Process
Making the Danish Dough
- Prepare the yeast mixture: In a small saucepan, warm the milk to about 110°F (43°C) – just warm to the touch. Remove from heat, stir in 1 tablespoon of the sugar and sprinkle the yeast over top. Let stand for about 5-10 minutes until foamy.
- Mix the dough base: In a large bowl, whisk together the remaining flour, sugar, and salt. In a separate bowl, beat the eggs with the vanilla extract.
- Combine wet and dry ingredients: Make a well in the center of the flour mixture. Pour in the yeast mixture and egg mixture. Stir with a wooden spoon until a shaggy dough forms.
- Knead the dough: Turn the dough onto a lightly floured surface and knead for about 5 minutes until smooth and elastic. The dough should be soft but not sticky.
- First rest: Shape the dough into a rectangle, wrap in plastic wrap, and refrigerate for 30 minutes.
- Prepare the butter block: While the dough chills, place the cold butter between two pieces of parchment paper. Using a rolling pin, pound and roll the butter into an 8×12-inch (20×30 cm) rectangle. Return to the refrigerator to keep cold.
- First lamination: Roll the chilled dough into a rectangle approximately 12×20 inches (30×50 cm). Place the butter block on one half of the dough, leaving a 1-inch border. Fold the other half of the dough over the butter and seal the edges by pinching them together.
- Create the layers: Roll the dough into a rectangle approximately 12×24 inches (30×60 cm). Fold the dough like a letter: fold the bottom third up, then the top third down over it. This completes the first “turn.”
- Rest and repeat: Wrap the dough and refrigerate for 30 minutes. Repeat the rolling and folding process two more times, chilling the dough for 30 minutes between each turn. After the final turn, refrigerate the dough for at least 4 hours or overnight.
Preparing the Fillings
Cream Cheese Filling
- In a medium bowl, beat the cream cheese until smooth and creamy.
- Add the sugar and beat until well incorporated and slightly fluffy.
- Mix in the egg yolk, vanilla extract, lemon zest, and salt until just combined.
- Refrigerate until ready to use.
Cherry Filling
- If using fresh cherries, pit them and cut in half. If using frozen, thaw completely and drain excess liquid.
- In a medium saucepan, combine the cherries, sugar, cornstarch, and lemon juice.
- Cook over medium heat, stirring constantly, until the mixture thickens and begins to bubble, about 5-7 minutes.
- Remove from heat and stir in the almond extract.
- Allow to cool completely before using.
Shaping and Baking the Danishes
- Prepare baking sheets: Line two baking sheets with parchment paper.
- Roll out the dough: On a lightly floured surface, roll the chilled dough into a large rectangle about ¼-inch thick. Cut into 4×4-inch squares.
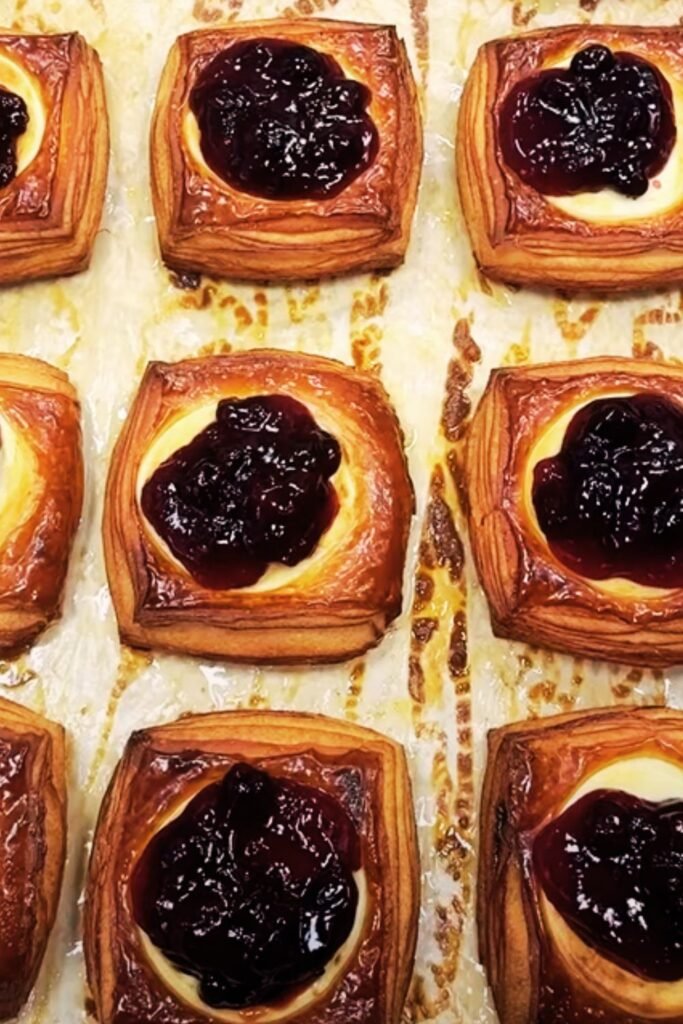
- Shape the danishes: For each square, fold in each corner toward the center, pressing firmly in the middle to create a diamond shape with the corners folded in, leaving the center open for filling.
- Add the fillings: Place about 1 tablespoon of cream cheese filling in the center of each danish, then top with 1 tablespoon of cherry filling.
- Second rise: Place the shaped danishes on the prepared baking sheets, leaving about 2 inches between each. Cover loosely with plastic wrap and let rise in a warm place for about 45 minutes, until puffy.
- Preheat the oven: During the last 15 minutes of rising, preheat your oven to 375°F (190°C).
- Apply egg wash: Beat together 1 egg and 1 tablespoon of water. Gently brush the exposed dough of each danish with the egg wash. Sprinkle with sliced almonds if desired.
- Bake: Bake for 15-18 minutes, rotating the pans halfway through, until the danishes are golden brown.
- Cool: Allow the danishes to cool on the baking sheets for 5 minutes, then transfer to a wire rack to cool completely.
- Finish: Once cooled, dust with powdered sugar or drizzle with vanilla glaze if desired.
Troubleshooting Common Issues
| Problem | Possible Cause | Solution |
|---|---|---|
| Butter leaking out during baking | Dough or butter too warm | Ensure dough stays cold throughout the process; refrigerate if it becomes soft |
| Danishes not rising properly | Yeast inactive or overproofed | Check yeast freshness; follow rising times carefully |
| Dough tears when rolling | Too cold or gluten development | Let dough rest at room temperature briefly; avoid overworking |
| Filling leaks/spreads too much | Too much filling or improper shaping | Use recommended amounts; ensure proper sealing of corners |
| Bottom of danishes too dark | Oven too hot or pan too dark | Use light-colored pans; add an extra baking sheet underneath |
| Danishes too dense | Insufficient lamination or rising | Follow folding technique precisely; allow proper rising time |
Make-Ahead and Storage Tips
One of the beauties of this recipe is its flexibility for busy schedules:
- Dough preparation: The danish dough can be made up to 3 days in advance and stored in the refrigerator, or frozen for up to 1 month.
- Assembled (unbaked) danishes: Can be refrigerated overnight, covered loosely with plastic wrap. Let stand at room temperature for 30 minutes before baking.
- Fillings: Both cream cheese and cherry fillings can be made up to 3 days ahead and refrigerated separately.
- Baked danishes: Best enjoyed fresh, but will keep at room temperature in an airtight container for 2 days. Reheat briefly in a 300°F (150°C) oven for 5 minutes to refresh.
- Freezing: Baked danishes freeze beautifully for up to 2 months. Thaw overnight in the refrigerator and warm in the oven before serving.
Serving Suggestions
I love serving these cherry cheese danishes with:
- Fresh coffee or espresso
- Hot chocolate for the kids
- A selection of fresh seasonal fruits
- Plain Greek yogurt for a tangy contrast
- Orange juice with a splash of prosecco for special brunches

Variations to Try
Once you’ve mastered the basic recipe, consider these delicious variations:
- Mixed Berry: Replace cherries with a mixture of strawberries, blueberries, and raspberries
- Apricot Almond: Use apricot preserves and add almond paste to the cream cheese filling
- Lemon Curd: Substitute lemon curd for the cherry filling and add extra lemon zest to the cream cheese
- Chocolate Hazelnut: Add a swirl of chocolate hazelnut spread to the cream cheese filling
- Savory Option: Skip the sweet fillings and try ham, cheese, and mustard for a savory twist
Nutritional Information
| Nutrient | Amount per Danish |
|---|---|
| Calories | 320 |
| Total Fat | 21g |
| Saturated Fat | 13g |
| Trans Fat | 0g |
| Cholesterol | 75mg |
| Sodium | 220mg |
| Total Carbohydrates | 29g |
| Dietary Fiber | 1g |
| Sugars | 12g |
| Protein | 5g |
Note: Nutritional values are approximate and will vary based on exact ingredients and portions.
Cherry Cheese Danish Q&A Section
Q: Can I use canned cherry pie filling instead of making my own?
While homemade filling offers superior flavor and texture, you can absolutely use canned cherry pie filling as a time-saving alternative. Look for a high-quality brand with visible cherry pieces and minimal artificial ingredients. If using canned filling, drain excess liquid and still consider adding that touch of almond extract to elevate the flavor.
Q: I don’t have time to make laminated dough from scratch. Are there any shortcuts?
Yes! For a quick version, you can use store-bought puff pastry or croissant dough sheets. While you won’t get exactly the same texture, they make a delicious substitute. Another option is purchasing frozen danish dough from specialty baking supply stores. Just follow the package instructions for thawing before shaping and filling.
Q: My cream cheese filling seems runny. What did I do wrong?
Runny cream cheese filling usually happens when the cream cheese is over-beaten or too warm. Make sure your cream cheese is just slightly softened, not room temperature. Beat it until just smooth, then gently incorporate the other ingredients. If it’s already runny, refrigerate the filling for 30-60 minutes to firm up before using.
Q: How do I know when my danish pastry is properly proofed before baking?
Properly proofed danish pastry should look visibly puffy but not doubled in size. When you gently press a finger into the edge of the dough, it should slowly spring back but leave a slight indentation. If it springs back completely, it needs more time. If it doesn’t spring back at all, it’s overproofed (but still bake it – it will taste good!)
Q: My cherries are very tart. Should I add more sugar to the filling?
Trust your taste buds here! If your cherries are particularly tart, gradually add more sugar, tasting as you go. I’d suggest starting with an additional 2 tablespoons and adjusting from there. Remember that the cream cheese filling and pastry provide sweetness too, so a little tartness in the cherry filling creates a nice balance.
Q: Can this recipe be made gluten-free?
Creating gluten-free laminated dough is challenging but possible. Use a high-quality cup-for-cup gluten-free flour blend that contains xanthan gum. The texture won’t be identical to traditional danish, but can still be delicious. For best results, reduce the amount of butter slightly (by about 15%) and be extra gentle when handling the dough as it will be more fragile.
Q: My danishes didn’t get as flaky as I hoped. What might have gone wrong?
Several factors affect flakiness in danish pastry:
- Butter temperature – must remain cold throughout lamination
- Sufficient rest periods between folds – allows gluten to relax
- Even rolling technique – creates consistent layers
- Proper oven temperature – needs to be hot enough to create steam
The most common issue is butter that’s too warm, which causes it to incorporate into the dough rather than creating distinct layers. Next time, be vigilant about keeping everything cold!
Q: How do I prevent my filling from bubbling over during baking?
To prevent filling overflow, create a deeper well in your danish by pressing the center more firmly when shaping. Also, make sure not to overfill – 1 tablespoon each of cheese and cherry filling is plenty. Finally, ensure your cherry filling is properly thickened with cornstarch before using it.
Final Thoughts
Creating cherry cheese danishes from scratch may seem intimidating at first, but I promise the process becomes easier and more enjoyable with practice. There’s something deeply satisfying about mastering laminated dough, and the rewards are undeniably delicious.
What I love most about these danishes is how they bring people together. Whether served at a holiday breakfast, weekend brunch, or special celebration, homemade pastries communicate care and love in a way few other foods can. The hands that craft these delicate layers do more than follow a recipe—they continue a centuries-old tradition of baking artistry.
So roll up your sleeves, embrace the process, and prepare to delight in the buttery, flaky, cherry-filled results. Your kitchen will smell like a European bakery, and your family and friends will be thoroughly impressed. Most importantly, you’ll have mastered a skill that brings joy to both the baker and those lucky enough to sample the fruits of your labor.
Happy baking!