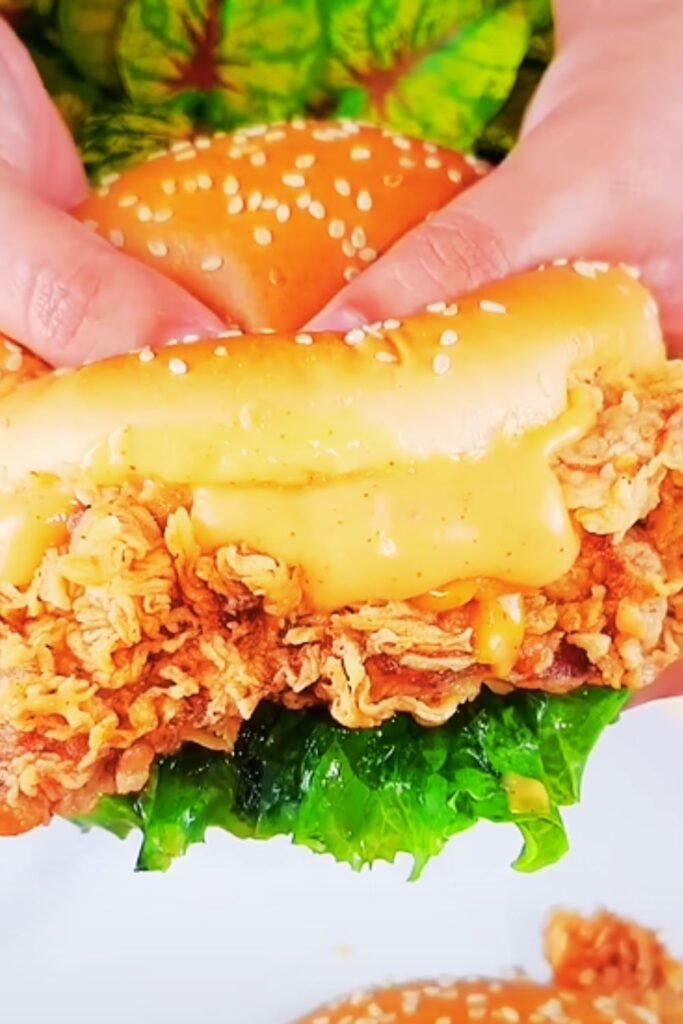
Nothing beats the satisfaction of biting into a perfectly crispy chicken burger that you’ve made from scratch. After years of experimenting in my kitchen, I’ve finally mastered the art of creating restaurant-quality crispy chicken burgers at home. Today, I’m sharing my foolproof recipe that delivers that coveted golden crunch with every single bite.
The secret isn’t just in one technique—it’s in understanding how multiple elements work together. From the initial brine to the final assembly, each step builds upon the last to create something truly spectacular. I’ve made countless mistakes along the way, and I’m here to help you avoid them while achieving crispy chicken burger perfection.
Understanding the Foundation: Key Components
Brining : The process of soaking chicken in a saltwater solution to enhance moisture retention and flavor penetration
Double Breading : A technique involving two separate coating applications to maximize crispiness and texture
Oil Temperature Control : Maintaining precise frying temperatures between 325-375°F for optimal cooking results
Resting Period : Allowing coated chicken to rest before frying, which helps the coating adhere properly
Essential Ingredients and Their Roles
For the Chicken and Brine
| Ingredient | Quantity | Purpose | Quality Tips |
|---|---|---|---|
| Chicken Breasts | 4 large pieces (6-8 oz each) | Main protein base | Choose uniform thickness for even cooking |
| Kosher Salt | 1/4 cup | Moisture retention and flavor | Use coarse salt for better dissolution |
| Brown Sugar | 2 tablespoons | Balances saltiness, aids browning | Dark brown sugar adds deeper flavor |
| Water | 4 cups | Brine base | Use filtered water for best results |
| Garlic Powder | 1 tablespoon | Flavor enhancement | Fresh garlic can burn during frying |
| Onion Powder | 1 tablespoon | Aromatic depth | Powder distributes more evenly than fresh |
For the Coating System
| Ingredient | Quantity | Function | Pro Tips |
|---|---|---|---|
| All-Purpose Flour | 2 cups | Base coating layer | Sift for smoother texture |
| Cornstarch | 1/2 cup | Extra crispiness factor | Creates lighter, crunchier coating |
| Buttermilk | 2 cups | Tenderizing and adherence | Room temperature works best |
| Eggs | 2 large | Binding agent | Beat thoroughly for smooth mixture |
| Paprika | 2 tablespoons | Color and mild heat | Smoked paprika adds complexity |
| Cayenne Pepper | 1 teaspoon | Heat level control | Adjust to personal preference |
| Black Pepper | 1 tablespoon | Classic seasoning | Freshly ground preferred |
| Garlic Powder | 2 teaspoons | Flavor consistency | Complements the brine seasoning |
My Step-by-Step Crispy Chicken Process
Phase 1: Preparation and Brining
I always start my crispy chicken burger journey the night before. The brining process is absolutely crucial—I learned this lesson after serving countless dry chicken burgers to disappointed family members.
Preparing the Chicken:
- Pound each chicken breast to an even 3/4-inch thickness using a meat mallet
- This ensures uniform cooking and prevents thick spots from remaining undercooked
- Trim any excess fat or connective tissue for cleaner presentation
Creating the Perfect Brine:
- Dissolve kosher salt and brown sugar in warm water, stirring until completely clear
- Add garlic powder and onion powder, whisking to eliminate any lumps
- Allow brine to cool completely before adding chicken—hot brine will start cooking the meat
The Brining Process:
- Submerge chicken completely in the cooled brine solution
- Cover container and refrigerate for minimum 4 hours, maximum 24 hours
- Longer brining times result in more flavorful, tender chicken
Phase 2: Setting Up the Coating Station
Organization is everything when it comes to successful breading. I learned this the hard way after creating numerous kitchen disasters with flour everywhere and uneven coatings.
Station Setup:
- Bowl 1: Seasoned flour mixture (flour, cornstarch, paprika, cayenne, black pepper, garlic powder)
- Bowl 2: Buttermilk and beaten eggs combined thoroughly
- Bowl 3: Second flour mixture (identical to Bowl 1)
- Have a large plate ready for coated chicken pieces
Mixing the Dry Ingredients:
- Whisk all dry ingredients together until evenly distributed
- I like to sift the mixture once to eliminate any clumps
- Divide this mixture between two separate bowls for the double-coating process
Phase 3: The Double-Coating Technique
This is where the magic happens. The double-coating method is what separates good crispy chicken from absolutely incredible crispy chicken.
First Coating Round:
- Remove chicken from brine and pat completely dry with paper towels
- Dredge each piece thoroughly in the first flour mixture
- Press the coating firmly into the chicken surface
- Shake off excess flour gently
The Wet Stage:
- Dip flour-coated chicken into the buttermilk-egg mixture
- Ensure every surface is completely covered
- Allow excess liquid to drip off briefly
Second Coating Round:
- Roll the wet chicken in the second flour mixture
- Press coating firmly again, creating a thick, adherent layer
- Place coated chicken on the prepared plate
Critical Resting Period:
- Let coated chicken rest for 15-20 minutes before frying
- This allows the coating to set and adhere properly
- Skipping this step often results in coating that falls off during cooking
Mastering the Frying Process
Oil Selection and Temperature Control
| Oil Type | Smoke Point | Flavor Profile | Cost Factor |
|---|---|---|---|
| Peanut Oil | 450°F | Neutral, clean | Higher cost |
| Vegetable Oil | 400°F | Very neutral | Budget-friendly |
| Canola Oil | 400°F | Light, neutral | Mid-range |
| Avocado Oil | 520°F | Slightly nutty | Premium cost |
I personally prefer peanut oil for its high smoke point and neutral flavor, but vegetable oil works excellently for budget-conscious cooking.
Temperature Guidelines:
- Heat oil to 325°F for initial frying phase
- Increase to 350°F for the final crisping stage
- Use a reliable thermometer—guessing leads to greasy or burnt chicken
Frying Technique:
- Fry chicken pieces in small batches to maintain oil temperature
- Cook for 6-7 minutes on the first side without moving
- Flip carefully and continue cooking for 5-6 minutes
- Internal temperature should reach 165°F for food safety
Achieving Perfect Crispiness
The final step in my process involves a brief high-temperature blast that creates an incredibly crispy exterior while keeping the inside juicy.
The Finishing Touch:
- Increase oil temperature to 375°F
- Return chicken to oil for 1-2 minutes for final crisping
- Remove immediately and drain on wire rack, not paper towels
- Wire racks prevent steam buildup that softens the coating
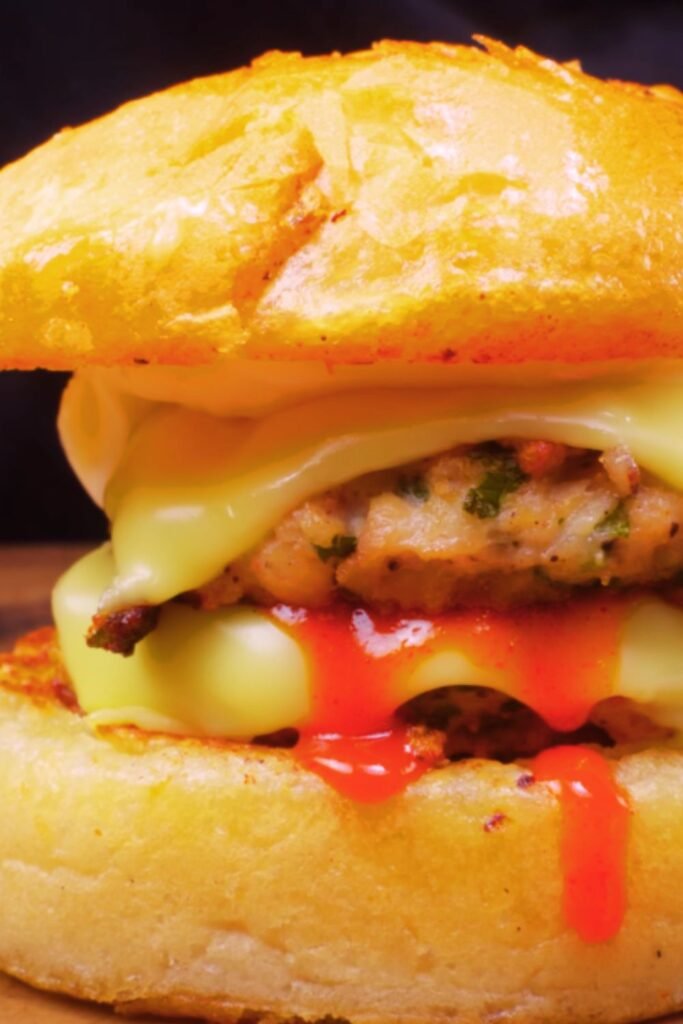
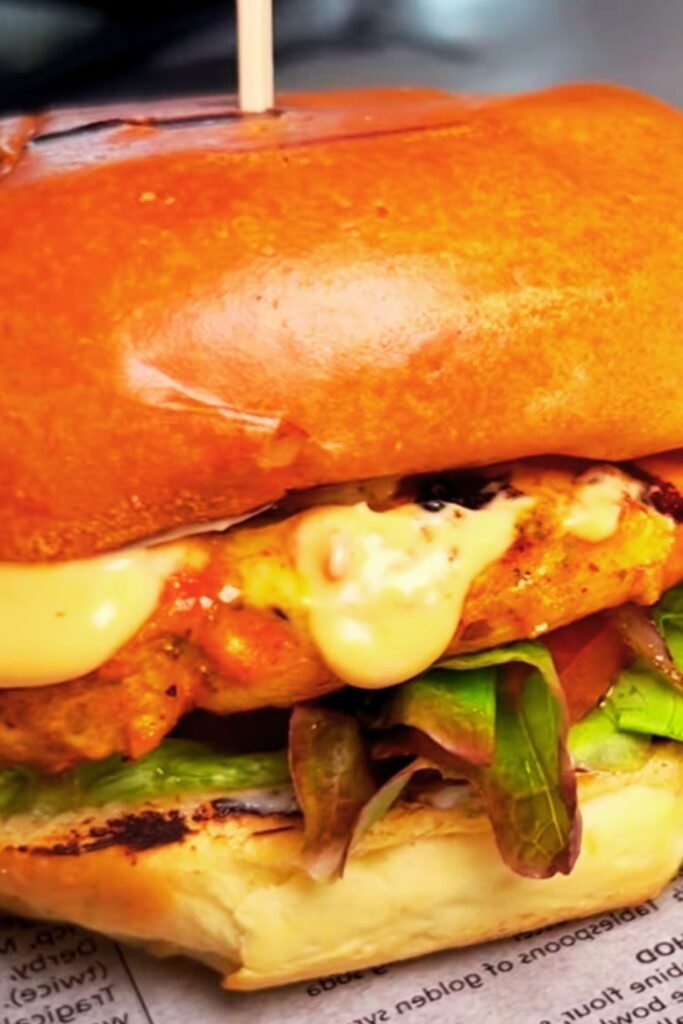
Burger Assembly: Building the Perfect Stack
Bun Selection and Preparation
| Bun Type | Texture | Flavor | Best Use |
|---|---|---|---|
| Brioche | Soft, buttery | Rich, slightly sweet | Premium burgers |
| Kaiser Roll | Firm, crusty | Neutral, hearty | Classic style |
| Potato Bun | Soft, pillowy | Mildly sweet | Modern favorite |
| Sesame Seed Bun | Medium firm | Nutty notes | Traditional choice |
I always toast my buns lightly—this prevents them from becoming soggy and adds another layer of texture contrast.
Bun Preparation Steps:
- Slice buns in half if not pre-sliced
- Brush cut surfaces lightly with melted butter
- Toast on a dry skillet or under broiler until golden
- Watch carefully to prevent burning
Sauce Combinations That Work
Classic Mayo-Based Sauce:
- 1/2 cup mayonnaise
- 1 tablespoon Dijon mustard
- 1 teaspoon garlic powder
- 1/2 teaspoon smoked paprika
- Salt and pepper to taste
Spicy Kick Variation:
- Add 1-2 teaspoons hot sauce to the classic base
- Include 1/4 teaspoon cayenne pepper
- Finish with a squeeze of fresh lime juice
Nutritional Information and Considerations
Complete Nutritional Breakdown
| Component | Calories | Protein (g) | Fat (g) | Carbs (g) | Sodium (mg) |
|---|---|---|---|---|---|
| Crispy Chicken (1 piece) | 420 | 35 | 24 | 18 | 890 |
| Brioche Bun | 280 | 8 | 6 | 48 | 420 |
| Sauce (2 tbsp) | 180 | 0 | 20 | 2 | 240 |
| Lettuce & Tomato | 15 | 1 | 0 | 3 | 5 |
| Total Per Burger | 895 | 44 | 50 | 71 | 1555 |
Making Healthier Modifications
Reduced-Fat Options:
- Use buttermilk powder mixed with water instead of full-fat buttermilk
- Substitute half the flour with almond flour for added protein
- Choose whole grain buns for increased fiber content
Air Fryer Alternative:
- Spray coated chicken with cooking oil
- Cook at 380°F for 12-15 minutes, flipping halfway
- Results in 40% less oil absorption while maintaining crispiness
Troubleshooting Common Issues
Problem-Solution Matrix
| Issue | Likely Cause | My Solution |
|---|---|---|
| Coating falls off | Insufficient resting time | Always rest 15-20 minutes after coating |
| Greasy texture | Oil temperature too low | Maintain 325-350°F throughout cooking |
| Dry chicken | Overcooking or no brine | Use thermometer, don’t exceed 165°F internal |
| Bland flavor | Under-seasoning | Season each component adequately |
| Soggy coating | Steam buildup | Use wire rack for draining, not paper towels |
Storage and Reheating Tips
Proper Storage Methods
Short-term Storage (1-2 days):
- Cool completely before refrigerating
- Store in airtight container with paper towel to absorb moisture
- Keep separate from buns and toppings
Long-term Storage (up to 3 months):
- Freeze cooked chicken on baking sheet first
- Transfer to freezer bags once solid
- Label with date and reheating instructions
Reheating for Best Results:
- Oven method: 375°F for 10-12 minutes on wire rack
- Air fryer: 350°F for 5-6 minutes
- Avoid microwave—it makes coating soggy
Serving Suggestions and Pairings
Classic Accompaniments
Traditional Sides:
- Crispy french fries with sea salt and herbs
- Coleslaw with tangy vinaigrette dressing
- Onion rings with spicy dipping sauce
- Sweet potato fries with cinnamon seasoning
Lighter Options:
- Mixed green salad with balsamic vinaigrette
- Grilled corn on the cob with herb butter
- Roasted vegetable medley
- Fresh fruit salad with mint
Beverage Pairings:
- Classic iced tea with lemon
- Fresh lemonade or fruit-infused water
- Craft sodas or sparkling water with lime
- Coffee or cold brew for brunch serving
Frequently Asked Questions
Q: How long should I brine the chicken for optimal results?
I recommend brining for at least 4 hours, but overnight (8-12 hours) produces the best flavor and texture. Don’t exceed 24 hours, as the chicken can become too salty and the texture may become mushy.
Q: Can I prepare the coated chicken ahead of time?
Absolutely! You can coat the chicken up to 4 hours ahead and keep it refrigerated. This actually improves the coating adherence. Just bring it to room temperature for 15 minutes before frying.
Q: What’s the best way to know when the oil is ready?
Use a reliable thermometer for accuracy. If you don’t have one, drop a small piece of bread into the oil—it should sizzle immediately and turn golden in about 60 seconds when the temperature is right.
Q: My coating always seems to burn before the chicken is cooked through. What am I doing wrong?
This usually means your oil temperature is too high. Lower the heat and maintain 325-350°F. Also, ensure your chicken pieces are evenly pounded to 3/4-inch thickness for uniform cooking.
Q: Can I use this recipe for chicken thighs instead of breasts?
Yes! Chicken thighs work wonderfully and are often more forgiving. They may need an extra 2-3 minutes of cooking time due to their higher fat content, but they’ll be incredibly juicy.
Q: How do I prevent the oil from splattering everywhere?
Keep the chicken at room temperature before frying to reduce temperature shock. Pat the chicken completely dry after brining, and lower pieces into the oil gently using tongs. A splatter screen also helps significantly.
Q: What’s the secret to getting restaurant-level crispiness?
The double-coating technique combined with proper oil temperature control is key. Also, never skip the resting period after coating—it makes a huge difference in how well the coating adheres and crisps up.
Q: Can I make this recipe gluten-free?
Certainly! Substitute the all-purpose flour with a 1:1 gluten-free flour blend. Add an extra tablespoon of cornstarch to maintain crispiness. Rice flour also works excellently for creating a crispy coating.
This crispy chicken burger recipe has become my go-to for family gatherings, weekend treats, and whenever I want to impress guests with homemade comfort food. The combination of proper brining, double-coating, and careful temperature control creates results that rival any restaurant. Remember, practice makes perfect—don’t be discouraged if your first attempt isn’t flawless. Each time you make these burgers, you’ll discover little improvements that make them even better.