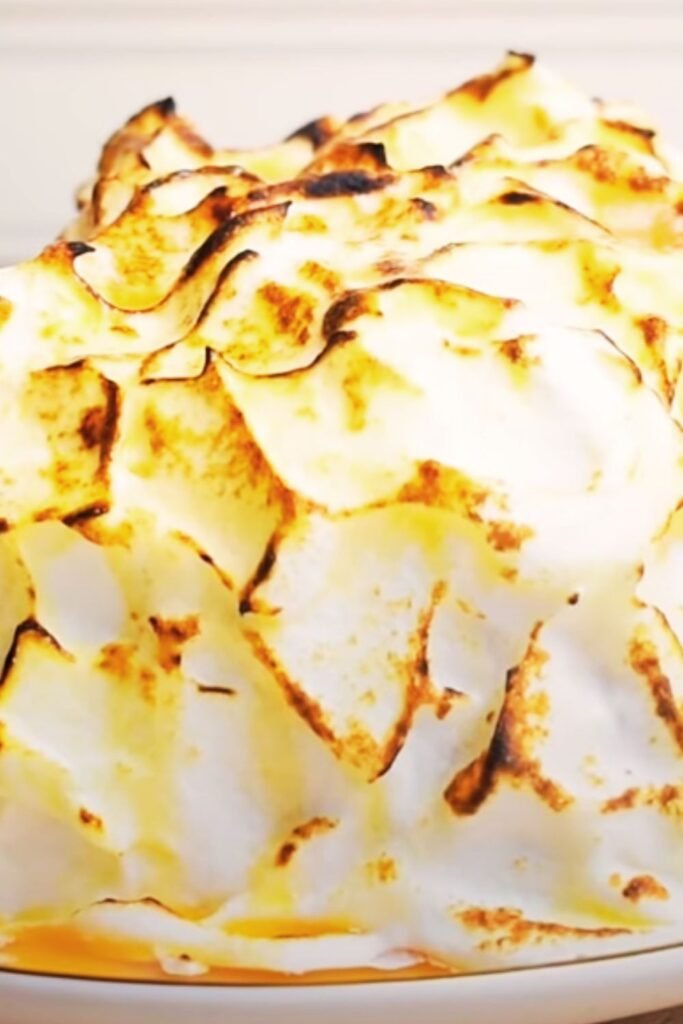
There’s something absolutely magical about watching faces light up when I bring a Baked Alaska to the table. The dramatic contrast of cold ice cream nestled beneath a cloud of golden, torched meringue never fails to captivate. Today, I’m sharing my foolproof recipe for Vanilla-Raspberry Baked Alaska – a dessert that looks like it belongs in a five-star restaurant but is surprisingly achievable in your home kitchen.
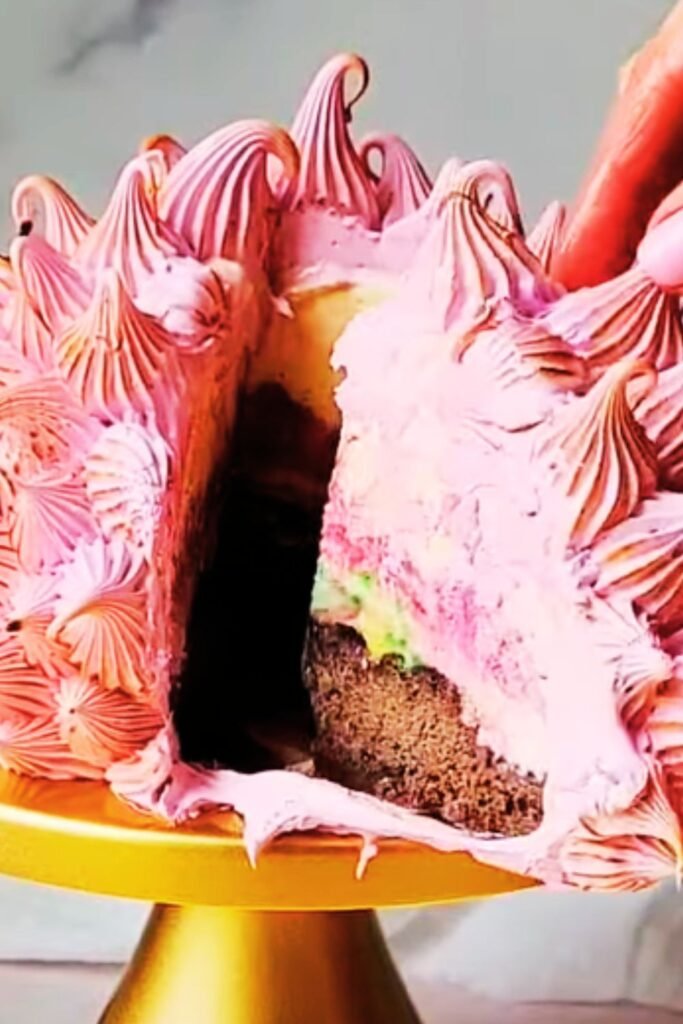
This iconic dessert combines the comfort of vanilla ice cream with the tartness of fresh raspberries, all sitting atop a tender sponge cake base and crowned with billowy meringue. What makes this version special is the way the raspberry flavors weave through each layer, creating a symphony of taste and texture that’s both nostalgic and sophisticated.
Understanding Baked Alaska: A Brief Journey Through Dessert History
Baked Alaska : A layered dessert consisting of ice cream and cake topped with meringue, which is then browned quickly in a very hot oven or with a culinary torch.
Meringue : A mixture of whipped egg whites and sugar that creates a light, airy topping capable of insulating ice cream from heat.
Sponge Cake Base : A light, airy cake that serves as the foundation, often soaked with flavored syrup to complement the ice cream layers.
The beauty of Baked Alaska lies in its seemingly impossible physics – how does ice cream survive in a hot oven? The secret is in the meringue’s insulating properties and the brief exposure to high heat. When executed properly, you get that gorgeous golden exterior while the ice cream remains perfectly frozen inside.
Essential Equipment and Ingredients
Before diving into the recipe, let me walk you through what you’ll need. Having everything prepared and measured beforehand makes this process so much smoother.
Equipment Checklist
- Stand mixer or hand mixer with whisk attachment
- 9-inch springform pan
- Large mixing bowls (at least 3)
- Rubber spatula
- Offset spatula
- Kitchen torch or broiler access
- Ice cream scoop
- Fine-mesh sieve
- Digital thermometer (helpful but not essential)
Core Ingredients Breakdown
| Component | Main Ingredients | Key Tips |
|---|---|---|
| Sponge Cake | Eggs, sugar, flour, vanilla | Room temperature eggs whip better |
| Ice Cream Layer | Vanilla ice cream, fresh raspberries | Premium ice cream makes a difference |
| Raspberry Sauce | Raspberries, sugar, lemon juice | Strain for smooth texture |
| Meringue | Egg whites, sugar, cream of tartar | Clean bowl is crucial |
The Foundation: Perfect Sponge Cake
My sponge cake recipe creates the ideal base – sturdy enough to support the ice cream layers yet tender enough to cut through easily. The key is achieving the right balance of structure and lightness.
Sponge Cake Ingredients
- 4 large eggs, room temperature
- 1/2 cup granulated sugar
- 1/2 cup all-purpose flour
- 2 tablespoons cornstarch
- 1 teaspoon vanilla extract
- Pinch of salt
Method
- Preheat your oven to 350°F and line a 9-inch round pan with parchment paper
- Separate eggs carefully – even a drop of yolk will prevent proper whipping
- Beat egg yolks with half the sugar until pale and thick
- In a separate clean bowl, whip egg whites to soft peaks
- Gradually add remaining sugar, beating to stiff peaks
- Fold yolk mixture into whites gently
- Sift flour and cornstarch together, then fold into egg mixture
- Bake for 18-20 minutes until golden and springy
The cake should spring back when lightly touched. Let it cool completely before assembling your Baked Alaska.
Crafting the Perfect Raspberry Sauce
This sauce serves dual purposes – it flavors the ice cream layer and creates beautiful marbled streaks throughout. I prefer making my own because I can control the sweetness and texture perfectly.
Raspberry Sauce Recipe
- 2 cups fresh raspberries (or 1 1/2 cups if using frozen)
- 1/3 cup granulated sugar
- 2 tablespoons fresh lemon juice
- 1 tablespoon water
Combine all ingredients in a medium saucepan over medium heat. Stir gently until sugar dissolves, then simmer for 8-10 minutes until the mixture thickens slightly. Strain through a fine-mesh sieve to remove seeds, pressing the pulp with the back of a spoon. This creates a smooth, vibrant sauce that won’t interfere with the meringue later.
Ice Cream Layer Assembly Strategy
The ice cream layer requires some planning since timing is everything. I’ve found that slightly softened ice cream spreads more evenly and creates cleaner layers.
Preparation Steps
- Remove 1 quart of premium vanilla ice cream from freezer 10 minutes before assembly
- Line your springform pan with plastic wrap, leaving overhang
- Place the cooled sponge cake in the bottom
- Brush cake lightly with raspberry sauce (reserve most for swirling)
- Spread half the softened ice cream over cake
- Drizzle with raspberry sauce and swirl gently with a knife
- Add remaining ice cream and create final swirls
- Cover tightly and freeze for at least 4 hours
The plastic wrap makes removal much easier later. Don’t skip this step – I learned the hard way after spending twenty minutes trying to extract a stuck Baked Alaska from its pan!
Mastering Swiss Meringue
Swiss meringue provides the most stable topping for Baked Alaska. Unlike French meringue, it’s less likely to weep or collapse, giving you more time to work with it.
Swiss Meringue Ingredients
- 4 large egg whites
- 3/4 cup granulated sugar
- 1/4 teaspoon cream of tartar
- 1 teaspoon vanilla extract
Technique Breakdown
- Combine egg whites and sugar in mixer bowl
- Set bowl over simmering water, whisking constantly
- Heat mixture to 160°F (it should feel hot to touch)
- Remove from heat and add cream of tartar
- Whip on high speed until stiff, glossy peaks form (8-10 minutes)
- Beat in vanilla extract
The finished meringue should hold its shape completely when you lift the whisk. It might seem like a lot of whipping, but patience pays off with that gorgeous, stable texture.
Assembly and Final Torching
This is where the magic happens. The assembly needs to move quickly once you start, so have everything ready.
Final Assembly Steps
- Remove ice cream from freezer
- Invert onto serving plate and remove plastic wrap
- Working quickly, spread meringue all over the surface
- Use an offset spatula to create decorative peaks and swirls
- Torch immediately or place under broiler for 1-2 minutes
Watch the meringue carefully during browning – it goes from perfect to burnt very quickly. I prefer using a kitchen torch because it gives me more control over the browning pattern.
Nutritional Information and Serving Guidelines
Understanding the nutritional aspects helps with portion planning and dietary considerations.
| Nutrient | Per Serving (1/8 of recipe) | Daily Value % |
|---|---|---|
| Calories | 285 | 14% |
| Total Fat | 8g | 12% |
| Saturated Fat | 5g | 25% |
| Cholesterol | 95mg | 32% |
| Sodium | 75mg | 3% |
| Total Carbs | 48g | 16% |
| Sugars | 44g | – |
| Protein | 6g | 12% |
Serving Suggestions
This dessert serves 8 generously, though I often find people asking for smaller portions due to its richness. Here are my favorite accompaniments:
- Fresh raspberry garnish for color contrast
- Light dusting of powdered sugar
- Mint sprigs for aromatic appeal
- Additional raspberry sauce on the side
- Fresh berry medley
Make-Ahead Tips and Storage
One of the best aspects of Baked Alaska is how well it accommodates advance preparation.
Timeline Strategy
- 3 days ahead: Make sponge cake, wrap tightly
- 2 days ahead: Prepare raspberry sauce, refrigerate
- Day before: Assemble ice cream layers, freeze overnight
- Day of serving: Make meringue and torch just before serving
The assembled ice cream portion can be frozen for up to one week before adding meringue. Just ensure it’s wrapped airtight to prevent freezer burn.
Troubleshooting Common Issues
Through years of making this dessert, I’ve encountered (and solved) several common problems.
Problem-Solution Guide
| Issue | Cause | Solution |
|---|---|---|
| Meringue weeps | High humidity or sugar not dissolved | Use Swiss method, serve immediately |
| Ice cream melts during torching | Meringue too thin or over-torching | Thicker meringue layer, quick browning |
| Cake soggy | Too much sauce or warm assembly | Light brushing only, cold components |
| Difficult slicing | Dull knife or frozen solid | Hot knife, brief softening |
Seasonal Variations and Flavor Adaptations
While vanilla-raspberry is classic, this base recipe adapts beautifully to seasonal ingredients.
Summer Variations
- Strawberry-basil with strawberry ice cream
- Peach-vanilla with cinnamon cake
- Mixed berry with lemon cake base
Winter Adaptations
- Chocolate-peppermint for holidays
- Apple-cinnamon with caramel sauce
- Orange-cranberry with spiced cake
Each variation follows the same basic technique while celebrating different flavor profiles throughout the year.
Professional Presentation Tips
The visual impact of Baked Alaska is half its charm. These presentation tricks ensure yours looks restaurant-worthy.
Plating Excellence
- Use a heated knife for clean slices
- Wipe knife between cuts
- Serve on chilled plates
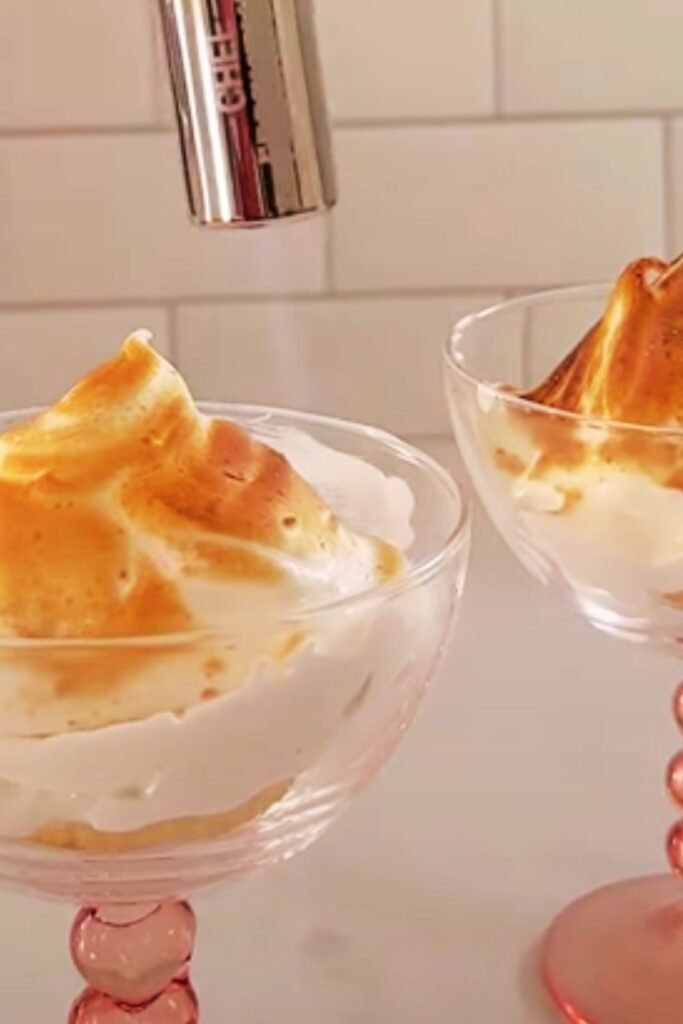
- Garnish individual portions rather than the whole dessert
- Consider height when creating meringue peaks
The contrast between the golden meringue and the colorful ice cream layers creates natural visual appeal. Don’t over-garnish – let the dessert speak for itself.
Frequently Asked Questions
Q. Can I make Baked Alaska without a kitchen torch? Yes, absolutely! Place the assembled dessert under a preheated broiler for 1-2 minutes, watching constantly. The broiler method works well but requires more attention to prevent burning.
Q. How far in advance can I prepare the components? The cake can be made up to 3 days ahead and stored covered at room temperature. The ice cream layer can be assembled and frozen up to one week before serving. Only make the meringue on the day you plan to serve.
Q. What if my meringue deflates after torching? This usually indicates the meringue wasn’t whipped to proper stiffness or the eggs weren’t fresh. Swiss meringue is more stable than French meringue, so I recommend that method for beginners.
Q. Can I use store-bought ice cream? Definitely! Choose a premium brand for the best flavor and texture. Avoid low-fat or sugar-free varieties as they don’t freeze as solidly and may melt more quickly during assembly.
Q. Why does my cake layer taste bland? The sponge cake should be lightly brushed with raspberry sauce or simple syrup. This adds moisture and flavor that complements the ice cream. Don’t oversoak, as this can make the cake soggy.
Q. How do I prevent the ice cream from melting during assembly? Work quickly and keep components as cold as possible. Have your meringue ready before removing the ice cream from the freezer. Some chefs place the assembled base back in the freezer for 15 minutes after adding meringue but before torching.
Q. What’s the best way to slice and serve? Use a large, sharp knife dipped in warm water and wiped clean between cuts. This prevents the meringue from sticking and creates clean layers. Serve immediately after slicing.
Creating Vanilla-Raspberry Baked Alaska transforms any dinner into a special occasion. The combination of textures and temperatures, along with that dramatic presentation, makes it one of my favorite desserts to share. While it requires some planning and technique, the joy on people’s faces when you bring this to the table makes every step worthwhile. The key is patience with each component and confidence in the final assembly. Once you master this version, you’ll find yourself experimenting with different flavors and making it your signature dessert.